Docs / Search & Product Filter
Search & Product Filter
Faceted filtering and instant search for BigCommerce. Customers narrow thousands of products down to the handful they want, using your own catalogue data — categories, custom fields, variants, metafields, or filters you build yourself.
Features, pricing and a free trial: Search & Product Filter for BigCommerce.
Overview
The app replaces two parts of your storefront: the filter panel on category pages, and the search box in your header. Both are driven by a copy of your catalogue that the app syncs from BigCommerce, which is what makes filtering and search fast even on stores with hundreds of thousands of products.
How the pieces fit together
- Product Sync pulls your catalogue, categories, custom fields, options and metafields into the app.
- Filters turn that data into facets. Some work out of the box, others you create from custom fields, categories or your own data.
- Search indexes the same data so quick search, the search page and suggestions all return the same results.
- Data tools clean the data up: merging inconsistent values, converting options, and controlling what appears where.
Dashboard
Storefront Nothing. The dashboard reports on your store; it changes nothing.
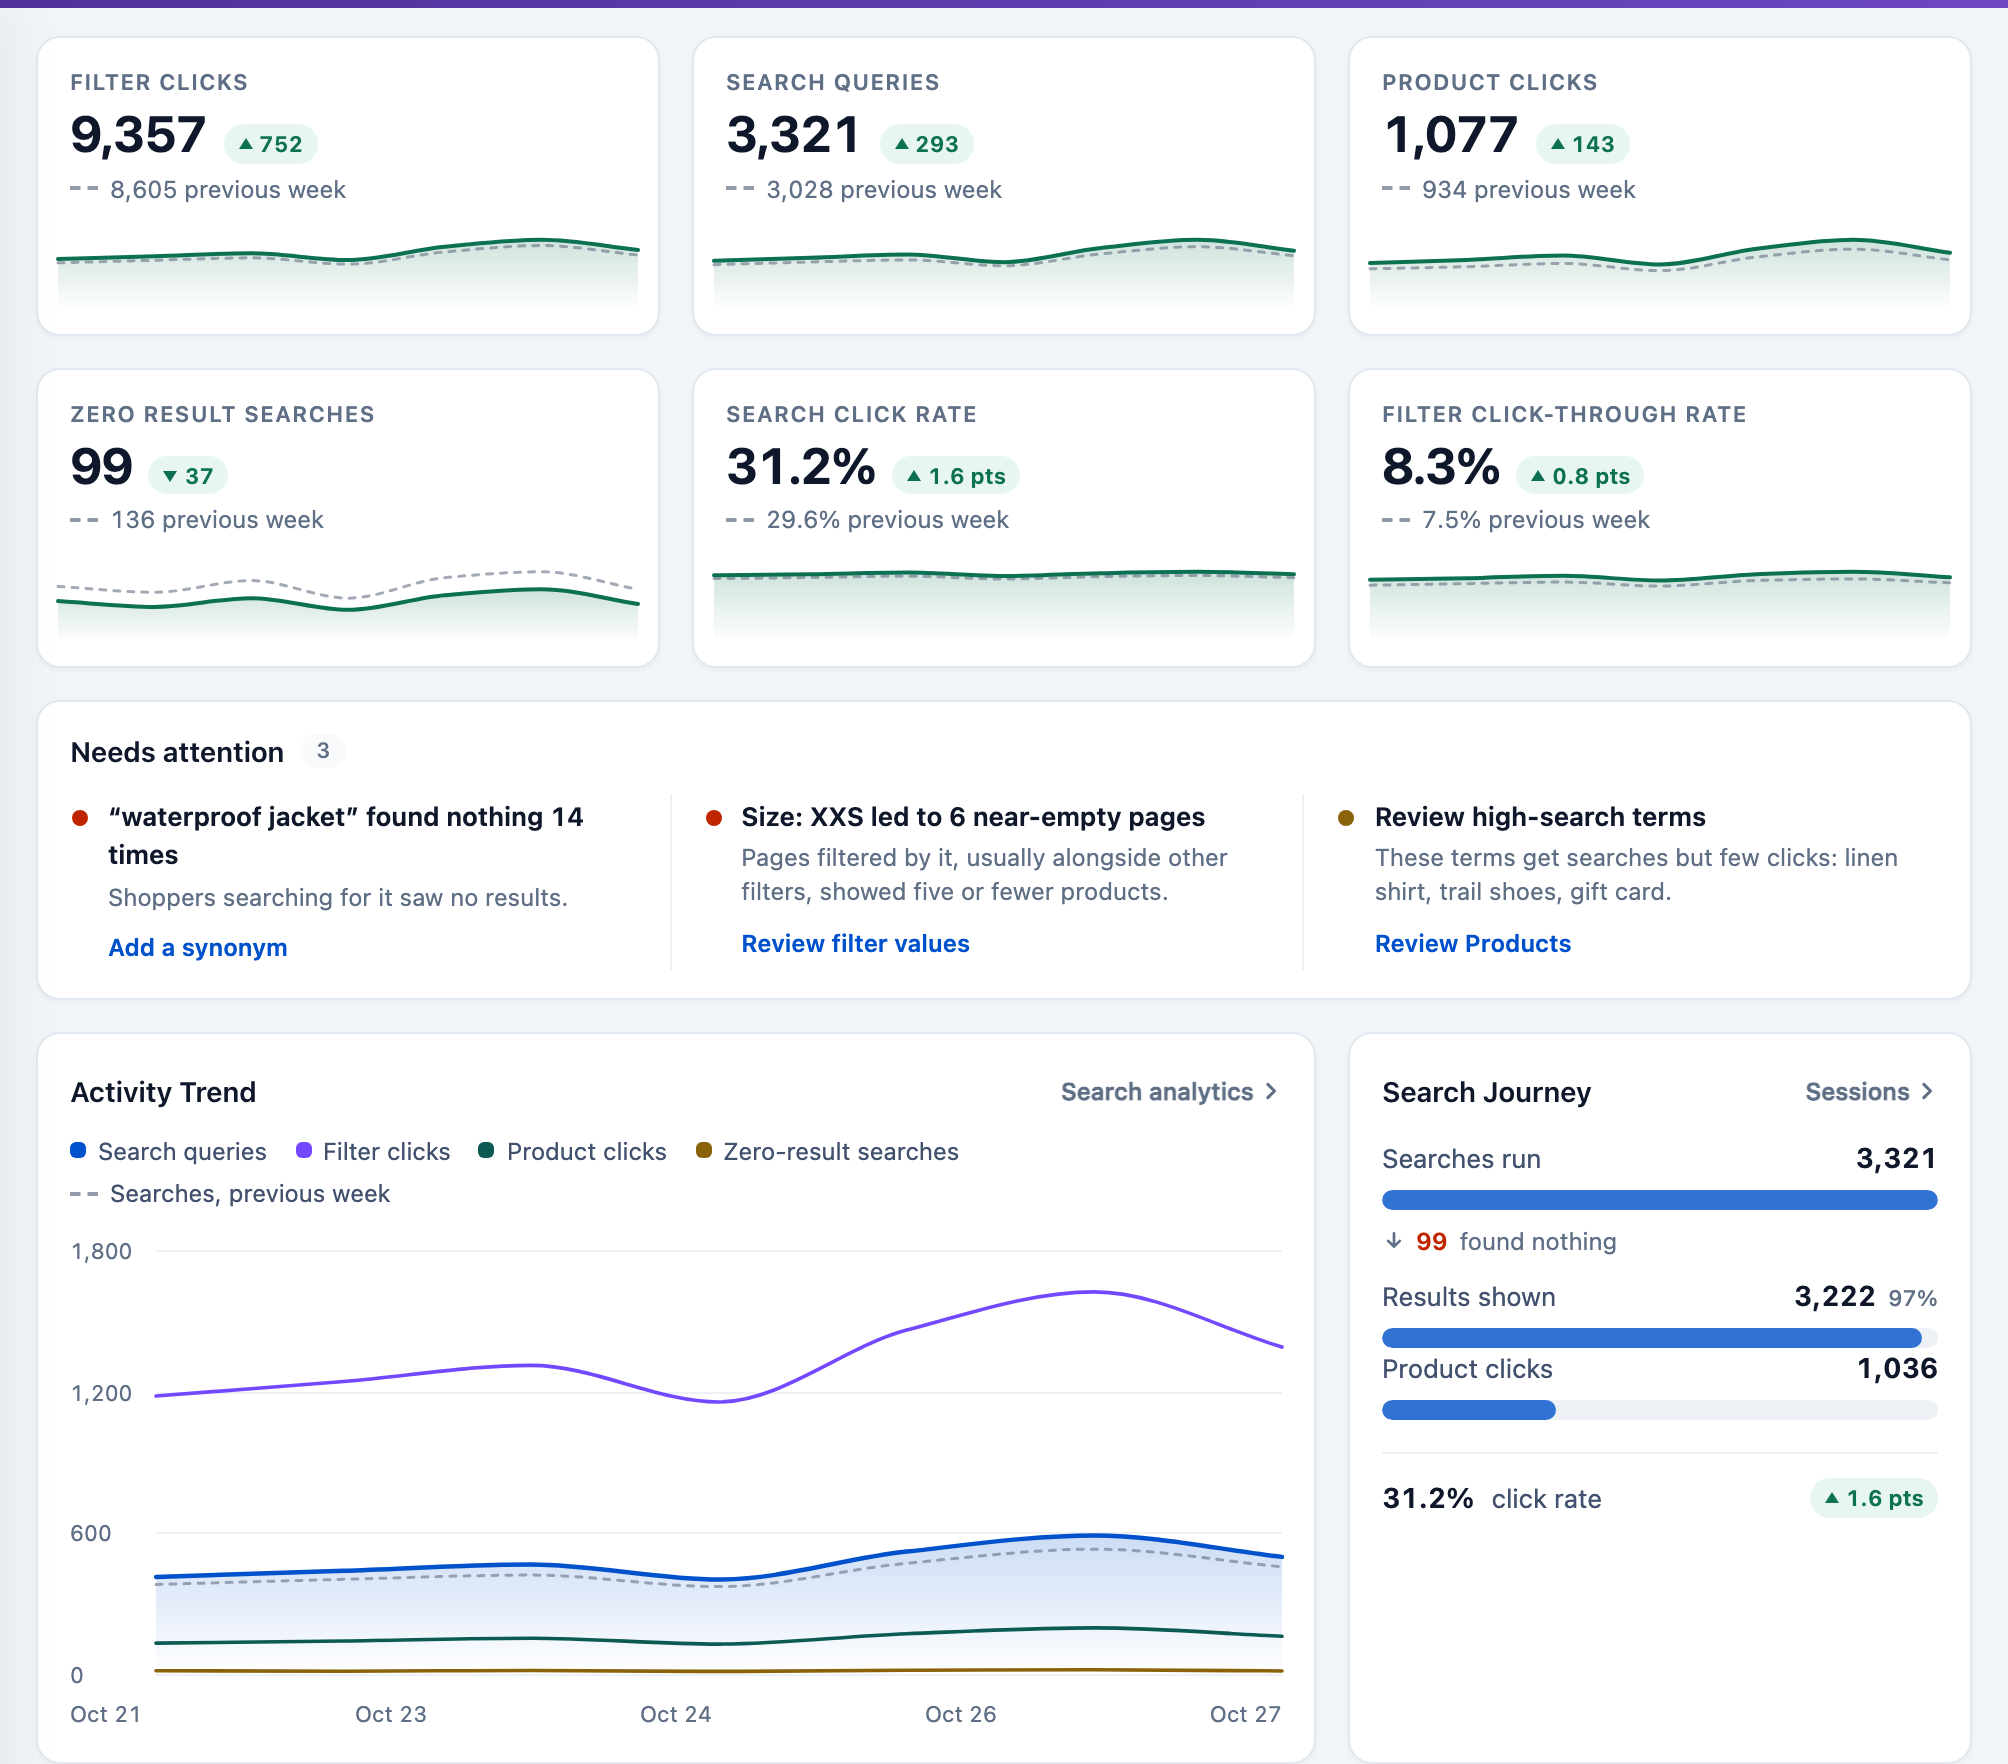
The dashboard is the app's front page and the fastest way to confirm your storefront is in the state you think it is. Choose the date range beside the title: Today, Yesterday, Last 7 Days, Last 28 Days, This Month, Last Month or a custom start and end date. Each graph is compared with the previous week.
| Panel | What it tells you |
|---|---|
| Needs attention | Jobs the app is waiting on, such as confirming your email address. Each has a link to deal with it, or an Ignore link. |
| Activity Trend | Search and filter use over the period. |
| Search Journey | How many searches were run, and the click rate. |
| Top Search Terms | What shoppers search for most, with the click-through rate of each term. |
| Zero Result Terms | Searches that returned nothing, the shortest route to a worthwhile fix. |
| Top Filter Values | The filter values shoppers select most. |
| Friction Queue | Searches that ended in a dead end or got few clicks. |
| Filter Health | Filter values that left shoppers on a near-empty page. |
| Top Products Clicked | The products shoppers clicked from search. |
| App Status | Your App Pin, the mode, whether Quick Search and the Search Page are in use, the number of Active Filters, the filter's location and styling, and when the catalogue was Last Synced. Check Last Synced first when the storefront looks stale. |
| Channel Overview | Each storefront channel: whether its script is current, its last filter and search activity, and the catalogue records synced. A link switches to that channel. |
| Support | Your open tickets for this store, with a Create Ticket link. |
| What's new | The latest changelog entries. |
The dashboard also reports the suggestions shoppers picked, the searches they left without clicking, quick views, and clicks on out-of-stock products.
Installation
Install the app
Storefront Injects the filter and search script into the channel you install on. Nothing renders until a theme is selected.
The app can only be installed through the BigCommerce marketplace. Installing signs you in to your store, connects the app, and starts your first product sync.
Select your theme
Storefront The filter panel and search box replace your theme's own, on the selected theme. Nothing shows until a theme is saved.
The app detects your theme from its template name. If your theme has been renamed or customised, detection can fail and the filter will not appear until you select the theme yourself.
Open Template Select under Settings in the app sidebar. Earlier versions of the app called this page Installation.
- Open Template Select under Settings.
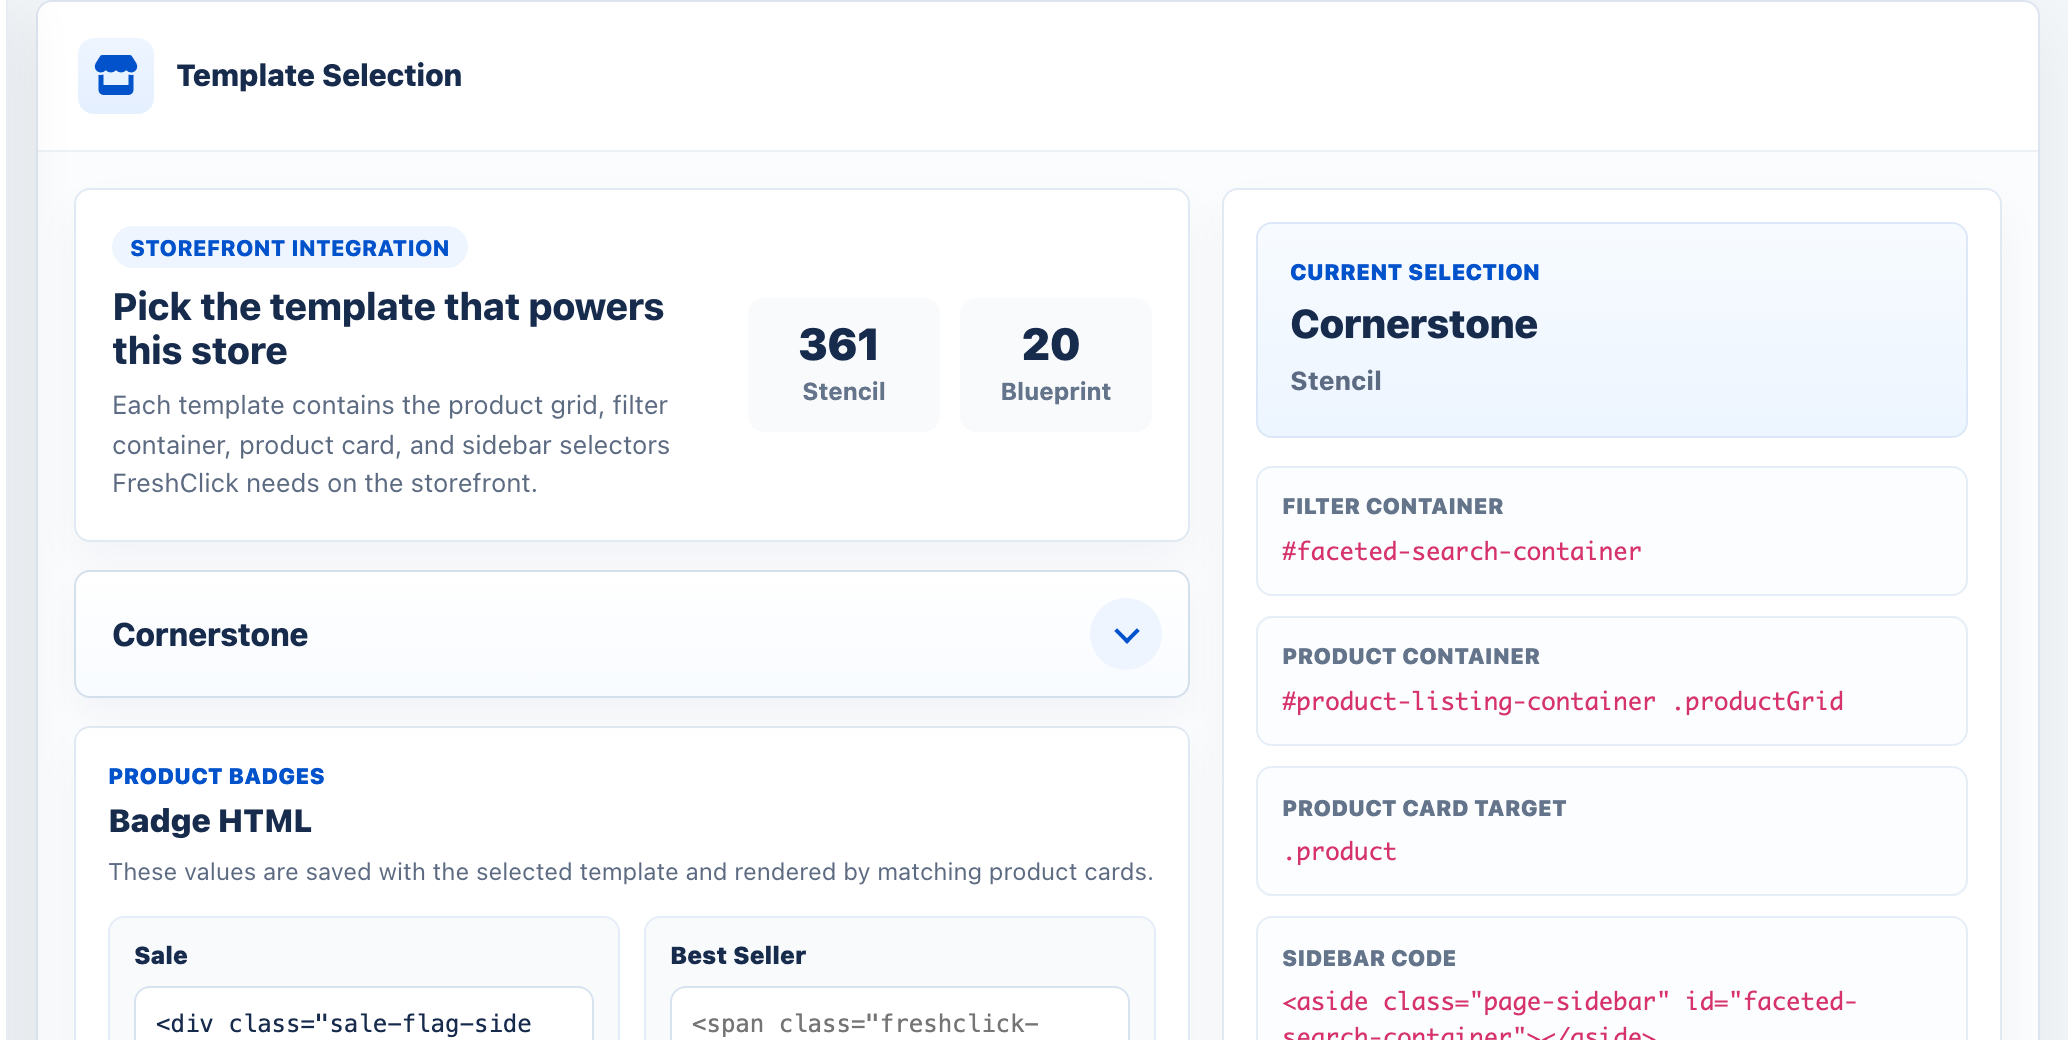
- Choose your store theme in Storefront template and click Save Template. The filter appears on your storefront.
- Blueprint stores only: after saving, paste the script shown on the page into
category.html, above the closing body tag.
| Theme type | What happens |
|---|---|
| Stencil | The newer framework, used by almost every store. The script is injected automatically and the theme is usually detected for you. |
| Blueprint | The older framework. Paste the script shown on Template Select into your theme's category.html. |
If your theme is not listed, use Request help on the Template Select page and our team will add support for it.
Use your theme's own product cards
Storefront Filter and search results draw their product cards from your theme, so they match your category pages.
Template Select opens in one of two modes, and a bar at the top says which is live. Automatic reads your storefront and applies the card design it finds. Shoppers then see the same layout, badges, ratings, prices and buttons on filtered and searched results as on your category pages. The other mode is the template picker above. Use the button on the bar, Switch to Automatic or Switch to Template Select, to change.
The app reads your cards again after each sync, so a theme change carries through without you picking a template by hand. Under Your card design, Re-read my theme and Re-read my product cards run the reads on demand. If a storefront is too large to read in one go, the page says so and products it has not reached yet keep the single card design.
Headless storefront setup
Storefront Nothing on a standard theme. On a headless storefront it is how the filter and search are added to your own pages.
Catalyst, Next.js and custom frontends do not run BigCommerce Script Manager, so the scripts the app installs never load there. On Template Select, choose Headless storefront setup to open the steps. They are filled in for your store, with a Copy button on the code.
- Keep a template selected. The template tells the app which elements hold the filter and the product grid. On Catalyst, choose the Headless template.
- Add the FreshClick tag to every category, brand and search page. Place it once per page, after the elements from step 3. It already carries your store and channel. Fill
data-catwith the category ID on category pages,data-brandwith the brand name on brand pages, anddata-customer-groupwith the signed-in shopper's customer group ID, or leave it empty. Search pages leavedata-catanddata-brandempty. - Give each page the elements the template expects. The page lists the selectors: the filter container, the product grid, a second product grid if the template has one, the product card and the sidebar wrapper.
- Serve a search results page. Results show when the page path matches the one shown and the URL carries
?search_query=. Give the page a<div id="searchContainer"></div>, and give every page a search box whose input hasid="search_query"andname="search_query".
Use Request help with a headless setup on the same panel and we will check your pages with you.
Multi-storefront channels
Storefront Adds the filter and search to the channels you add the script to. Each channel keeps its own filters and settings.
The script is injected into the channel you installed on. To cover other channels, open Manage Scripts, find the channel, and click Install script.
Use the channel selector at the top of every page to switch which storefront you are configuring. Filters, settings and language are all stored per channel.
Copy Configuration
Storefront Changes the storefront you copy to, once you apply. The storefront you copy from is not touched.
Settings are stored per channel, which keeps storefronts independent and makes setting up the second one tedious. Copy Configuration, under Settings and shown on stores with more than one storefront, moves a configuration from one storefront to another so you can set up once and reuse it.
- Search settings
- The whole of Search settings for the channel: precision, scope, quick search and the rest. These replace the destination's.
- Filter settings
- The channel's filter display settings, including Include Out-of-Stock Products. These replace the destination's.
- Synonyms
- Your synonym list.
- Redirects
- Your search redirects.
- Ignore words
- Your ignore words list.
- Choose the storefront to copy from, then the one to copy to. They have to be different.
- Tick what to copy. At least one thing.
- Show me what would change. Nothing is written yet — you get a per-item list of what would be created, updated or merged, and what has nothing to copy.
- Apply once the preview looks right.
Manage Scripts
Storefront Installing or removing the script turns the whole app on or off for that storefront.
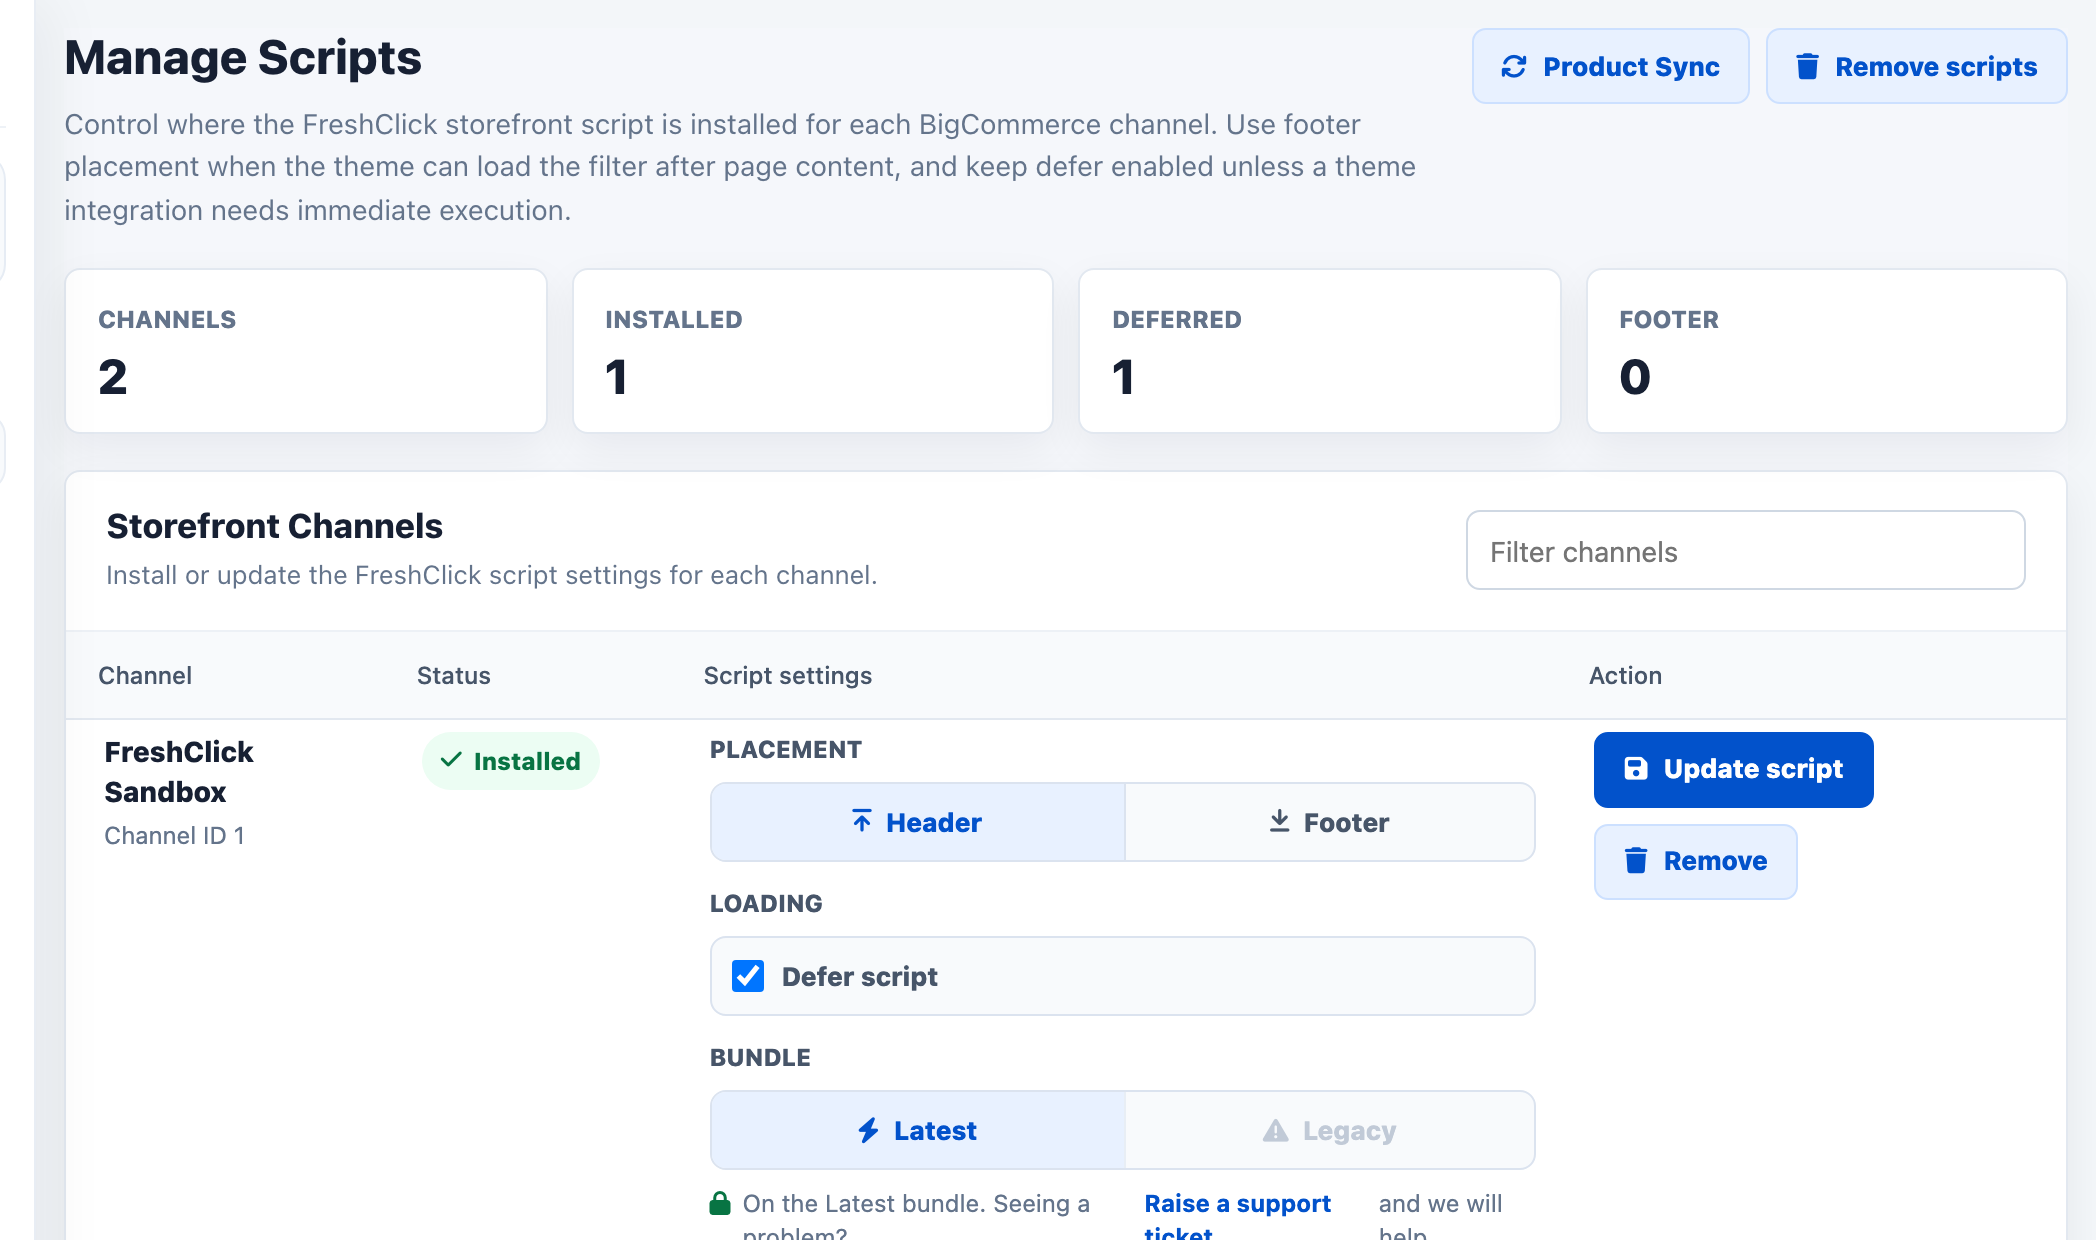
Manage Scripts, under Settings, shows one line per channel and lets you control the storefront script on each. This is the first place to check if the filter has stopped appearing on one storefront but works on another.
- Install script
- Adds the app's script to that channel's storefront.
- Remove script
- Takes the script off that channel, leaving a clean slate to install onto. Remove all scripts does this for every channel.
- Placement
- Where the script sits on the page: Header or Footer.
- Defer script
- Loads the page faster. Turn it off only if a theme integration needs the script to run immediately.
- Bundle
- Latest or Legacy. Legacy is being retired, so use Latest when you can.
- Migrate to Latest
- Moves a Legacy storefront to the Latest script in one step and removes any leftover Legacy copies. Your filters, settings, placement and loading stay as they are, and your saved custom JavaScript is carried across and adjusted where the Latest script needs it.
Filters
Adding filters
Storefront Each filter you add appears as a facet in the panel on category and search pages.
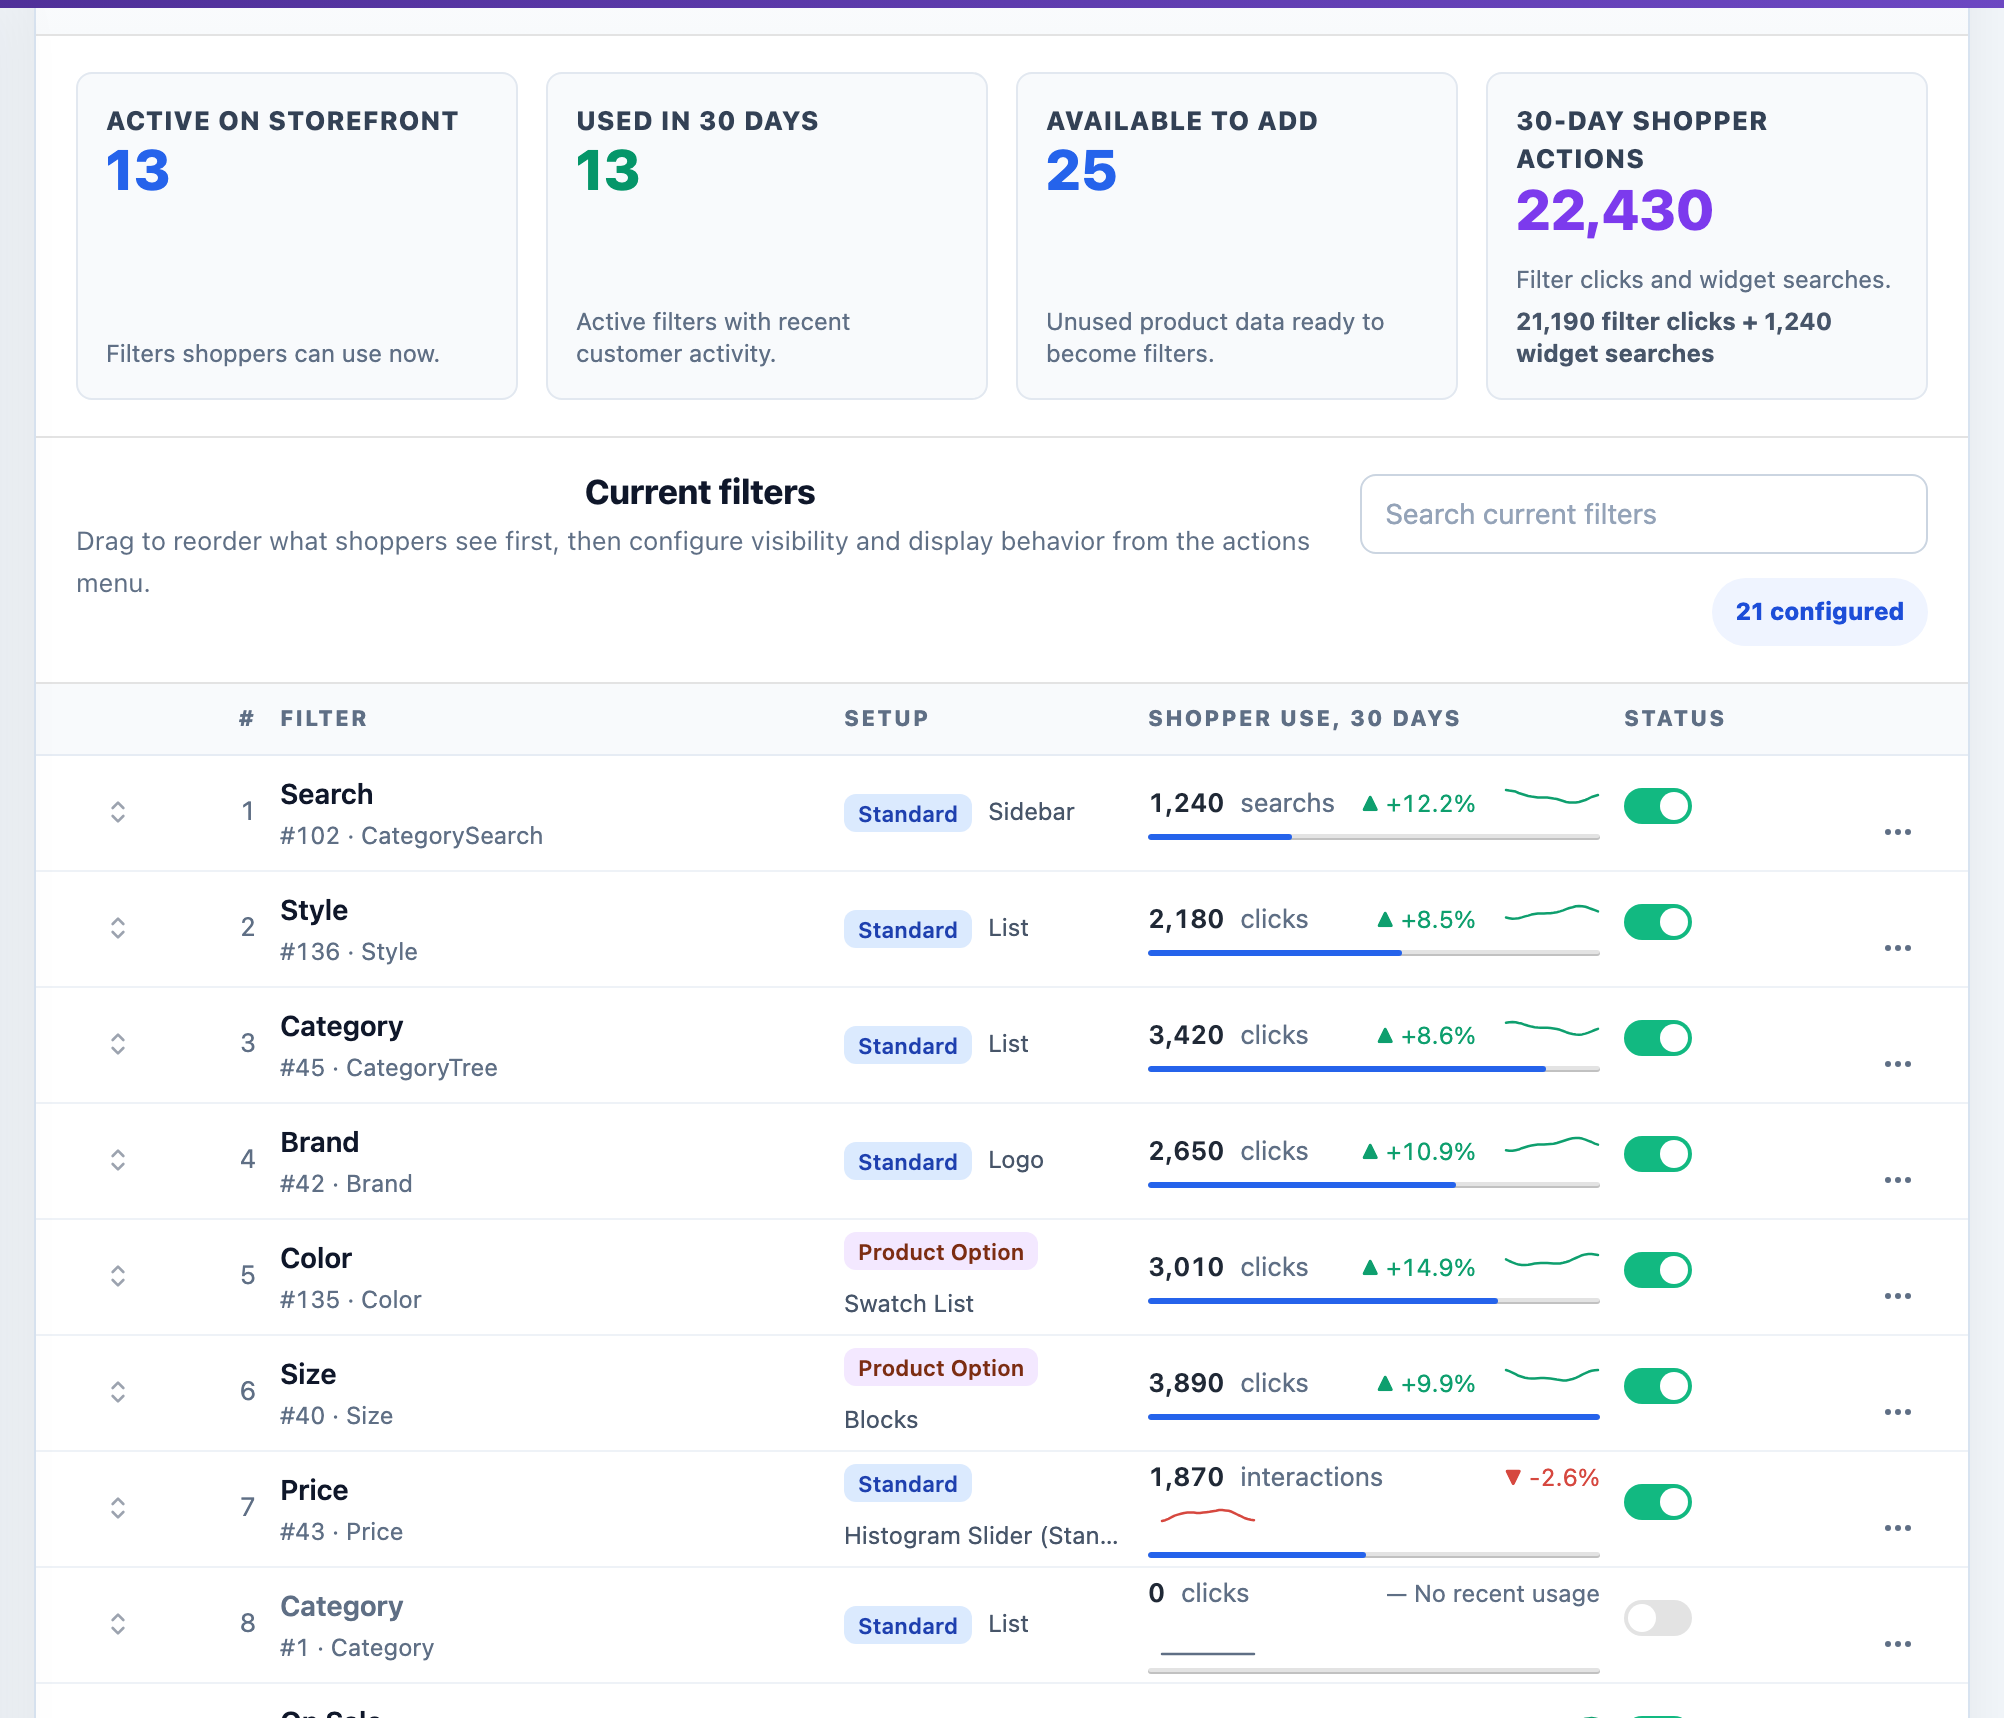
The Filters page opens with four counts: filters active on the storefront, filters shoppers used in the last 30 days, product data available to add, and shopper actions over 30 days. Current filters lists your filters with how often shoppers used each one. Add a filter lists the product data you can still turn into a filter, grouped by where it comes from: Standard, Custom Field, Product Option, Meta Tag and Filter Builder. Click one to add it. View Analytics opens Filter Analytics.
The Status column takes a filter off the storefront without deleting it. The actions menu (…) beside each filter offers Configure and Delete.
Drag current filters to reorder them. That order is your default; you can override it per category with Filter Display Order.
Filter properties
Storefront Changes a single facet's title, how its values render, whether it opens expanded, and where it appears.
To change a filter, open its actions menu (…) and choose Configure. The title bar shows the filter's ID and source; quote the ID when raising a support ticket about a specific facet. Which options appear depends on the type of filter you are editing.
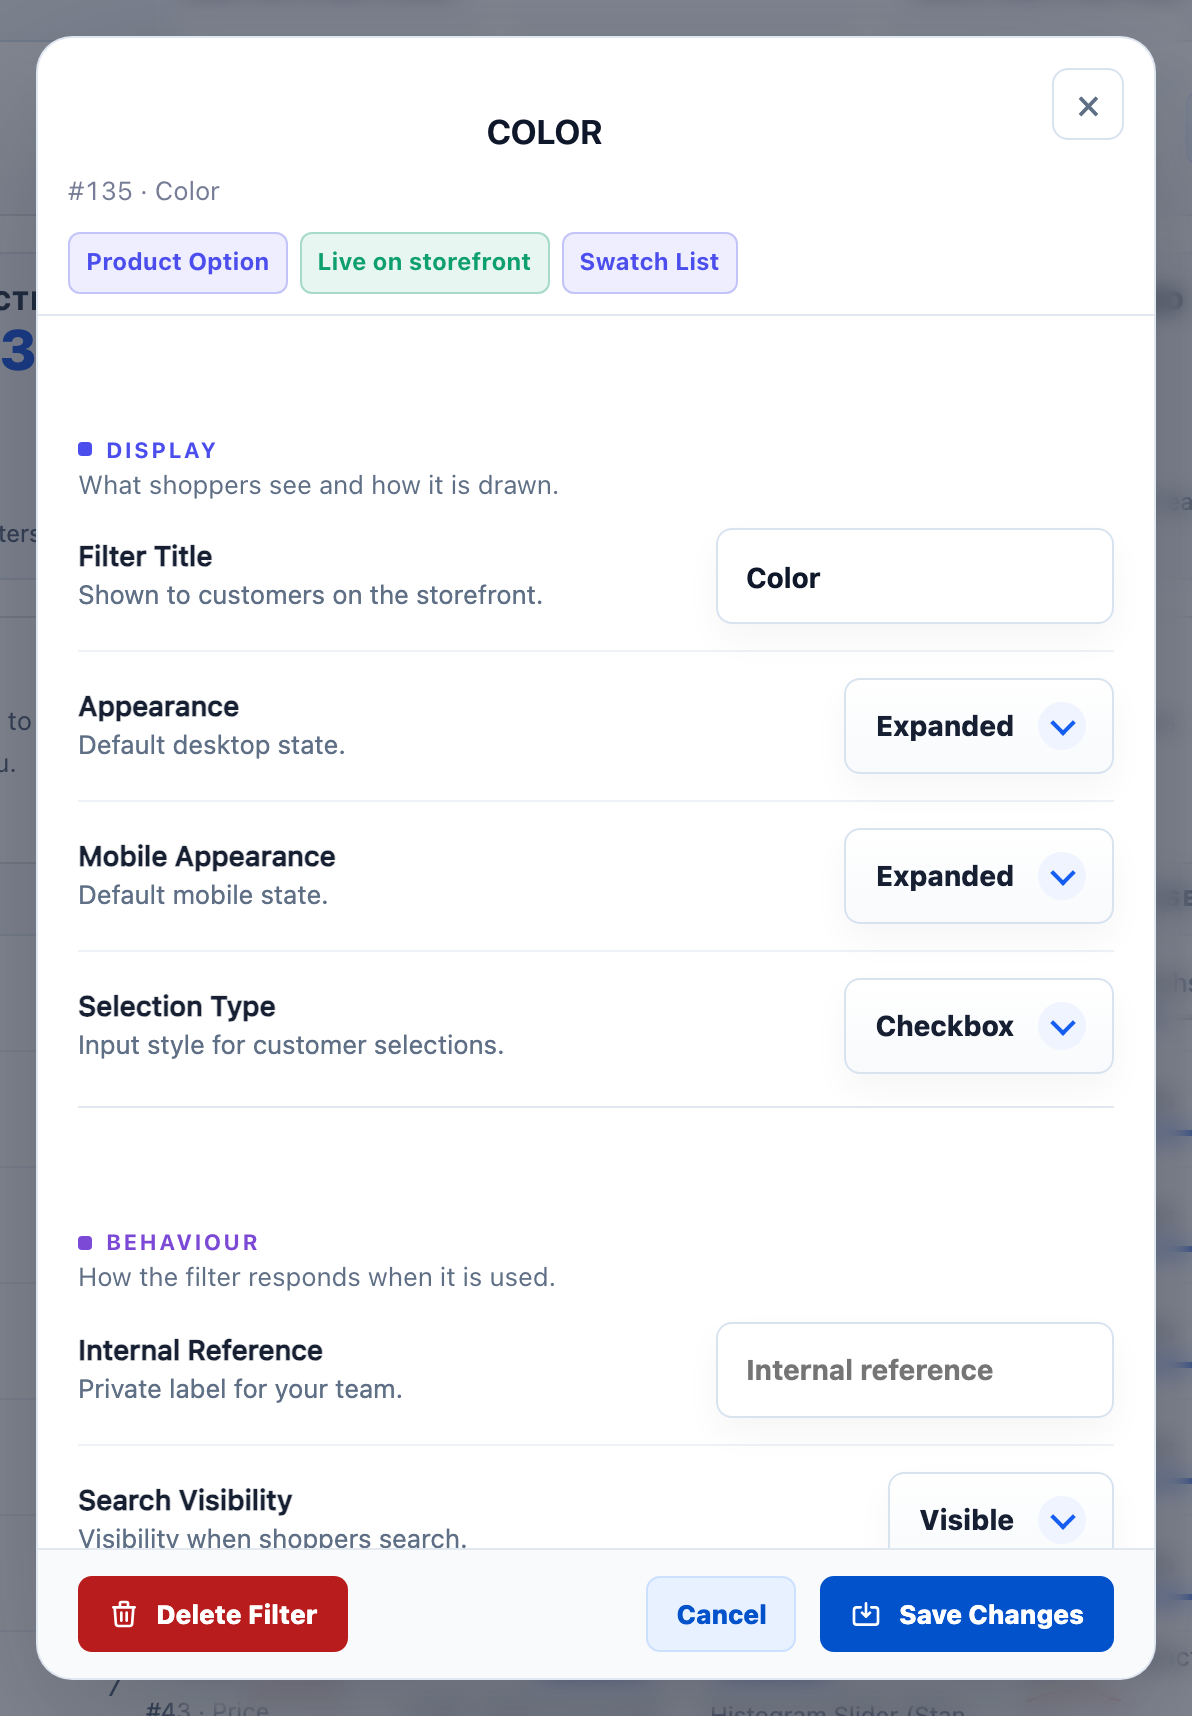
- Filter Title
- The heading customers see, for example Colour. On a Search filter this is Placeholder Text, shown inside the search box.
- Appearance
- Whether the filter loads Expanded or Collapsed on desktop.
- Mobile Appearance
- The same, set separately for mobile. Collapsing most filters on mobile keeps the panel usable on a small screen.
- Display As
- How the values render. The choices depend on the data: List Blocks Swatch Swatch List Detailed Slider Histogram Slider Date Range Min - Max Price Range Logo (brands). Sliders suit numeric data; swatches suit colour.
- Search Visibility
- Hidden removes the filter from search results pages and quick search while leaving it on category pages.
- Internal Reference
- A private note on the filter. Never shown to customers.
- Multiple Click Condition
- What happens when a customer selects more than one value in the same filter: OR widens the results, AND narrows them.
- Additive multi-select counts
- Counts include values already selected. On a brand filter, ticking a second brand adds its products to the results rather than narrowing them, and the number beside each brand matches what shoppers get.
- Selection Type
- Checkbox or Radio.
- Range Increment
- The step size for a price range.
- Display Category Images
- On category tree filters, shows category thumbnails where they exist.
- Automatically Expand
- On category trees, how deep the tree opens at first: None, First Level, Second Level or Third Level.
- Parent Clickable
- On a category tree, Not Clickable stops a category with subcategories from being ticked itself, so clicking it only expands the subcategories.
- Show Hidden Categories
- Includes categories marked hidden in BigCommerce.
- Only show categories in the current branch
- Limits the category filter to the part of the tree the shopper is already in.
- Sort Order
- On category trees, list categories in Alphabetical order or in the order set in BigCommerce (BigCommerce Sort Order).
- Select Categories
- The categories where this filter stays hidden. A filter for sizes has no place on an accessories category. Switch on Tick subcategories with their parent to tick or clear a category and everything beneath it together; it is off until you choose it.
- Select Brands
- The same, by brand page.
- Limit for logged in
- Limits the filter to chosen customer groups. Shown when your store has customer groups.
- Tooltip Image
- Uploads a help image for the filter. See Tooltip images.
- Manage Swatch
- Edits swatch labels and colours.
- Manage Sort Order
- Controls the order the filter's values appear in.
- Group Values
- Gathers related values under one parent. See Group values.
- Included Categories
- On a custom category tree, the categories it contains.
- Exclude Categories
- On category and subcategory trees, categories to leave out.
To remove a filter, choose Delete from its actions menu. It returns to the list under Add a filter, so nothing is lost.
Histogram slider
Storefront Draws the filter as a slider with the spread of your catalogue behind the handles, so shoppers see where products cluster before they drag.
Price filters, numeric custom field filters, and the Width, Height, Depth and Weight filters can use a histogram slider. In Configure, set Display As to one of three styles: Histogram Slider (Density), Histogram Slider (Standard) or Histogram Slider (Compact).
Filter Sections
Storefront Gathers the chosen filters under one collapsible heading in the panel. Filters you do not place in a section show as they do today.
A long sidebar is easier to scan when related filters share a heading. Open Filters, then Filter Sections.
- Add a filter section. Enter a Section name, for example Colors.
- Choose the filters in Filters in this section.
- Save Section. It appears under Existing sections, where you can Edit or Delete it.
Shoppers open and close each section. Until you add one, filters render as a flat list.
Group values
Storefront Shows one parent value with its children tucked beneath. Ticking the parent ticks every value in it at once.
Group Values turns a long list into a few clear choices, for example showing 4.1m and 4.2m under one parent, 4m. It is available on product option filters displayed as a list with checkboxes.
- Open Group Values from the filter's Configure window.
- Set a group for each value. Enter the parent in the box beside the value. Suggest from numbers fills in groups for numeric values to get you started. It fills empty rows only.
- Tick Show grouped values on the storefront and save. Nothing is saved until you press Save changes.
Tooltip images
Storefront Adds a small help button beside the filter title. It opens your image and text.
Use a tooltip image to show what a choice means, such as a size guide or a fabric close-up. In Configure, open Tooltip Image and upload the picture. The help button works with a tap on phones and with the keyboard as well as a mouse.
Pre-configured filters
Storefront Adding one puts that facet on your storefront immediately — no sync or catalogue change needed.
These work straight from your BigCommerce data with no setup beyond adding them.
| Filter | What customers can do |
|---|---|
| Availability | Narrow to products currently available to buy. |
| Brand | Filter by brand or manufacturer. |
| Category | Browse products inside specific categories. |
| Category Tree | Drill down through the category hierarchy. |
| Sub Category | Filter within subcategories of the current category. |
| Top Level Sub Category | Filter by the highest-level subcategories only. |
| Condition | New, used or refurbished. |
| Price | Search within a price range, as a slider or min-max boxes. |
| On Sale | Show only discounted products. |
| Sale Percentage | Find the biggest discounts. |
| Featured Products | Products flagged as featured in BigCommerce. |
| Rating | Filter by review score. |
| Stock | Filter by stock availability. |
| Shipping | Free shipping, local pickup and other shipping types. |
| Search | Keyword search within the current category. |
| Weight | Filter by product weight. |
| Width / Height / Depth | Filter by physical dimensions. |
Category-based filters
Storefront Adds a facet built from your category structure, shown as a tree when subcategories are selected.
Category-based filters build a facet out of your category structure. Category Tree and Sub Category are ready-made under Standard. To build one from the categories you choose, add a custom category tree.
- Open the Filters page and click the custom category tree card under Add a filter.
- Enter a Filter Title, for example Clothing.
- Choose the categories to include and save. The new filter appears in your current filters.
Change the categories later with Included Categories in Configure, and leave some out with Exclude Categories. Category trees can list categories in your BigCommerce order: set Sort Order to BigCommerce Sort Order.
Custom field filters
Storefront Nothing until you sync. After a custom field sync, the values become selectable facet options.
Custom fields are the most flexible way to add filterable data to products — a book's ISBN, a DVD release date, a fabric, a certification. Once synced, any custom field can become a filter.
If one field holds several values in a single value, such as Red, Blue, Green, tick Split comma-separated values against Custom Fields on Product Sync. Each part is then stored as its own value. It is off by default, and ranges such as 2011 - 2019 are not expanded.
Adding a custom field to a product
- Open the product in BigCommerce under Products.
- Open the Custom Fields tab.
- Enter the name and value, for example
Material/Cotton. Both are limited to 250 characters. Use+and–to add or remove rows. - Save, then sync custom fields in the app.
Importing custom fields in bulk
For many products at once, use BigCommerce's Import and Export. In the product's Custom Fields column, use the format below, separating multiple fields with a semicolon:
[Field Name]=[Value];[Field Name 2]=[Value 2]

Color=Blue;Material=Cotton
See the BigCommerce custom fields documentation for the full import format.
Product options and variants
Storefront Nothing until you sync. After a full sync, option values become facet options.
Variant options — size, colour, finish — become filters once synced. To set them up in BigCommerce:
- Open the Variations section of the product and choose + Add Variant Option, or Configure Options to edit an existing one.
- Name the option, choose how it displays, and add its values with + Add Another Value.
- Reorder options and values with the drag handle, and remove a value with the delete button.
- Save Variants. A variants table appears where you can set prices, images, SKUs and weights per combination.
If the same option means the same thing under different names across products, use Merge Product Options or the Value Replacer to bring them together.
Filter Builder
Storefront Nothing until you add the built filter on the Filters page. Then it behaves like any other facet.
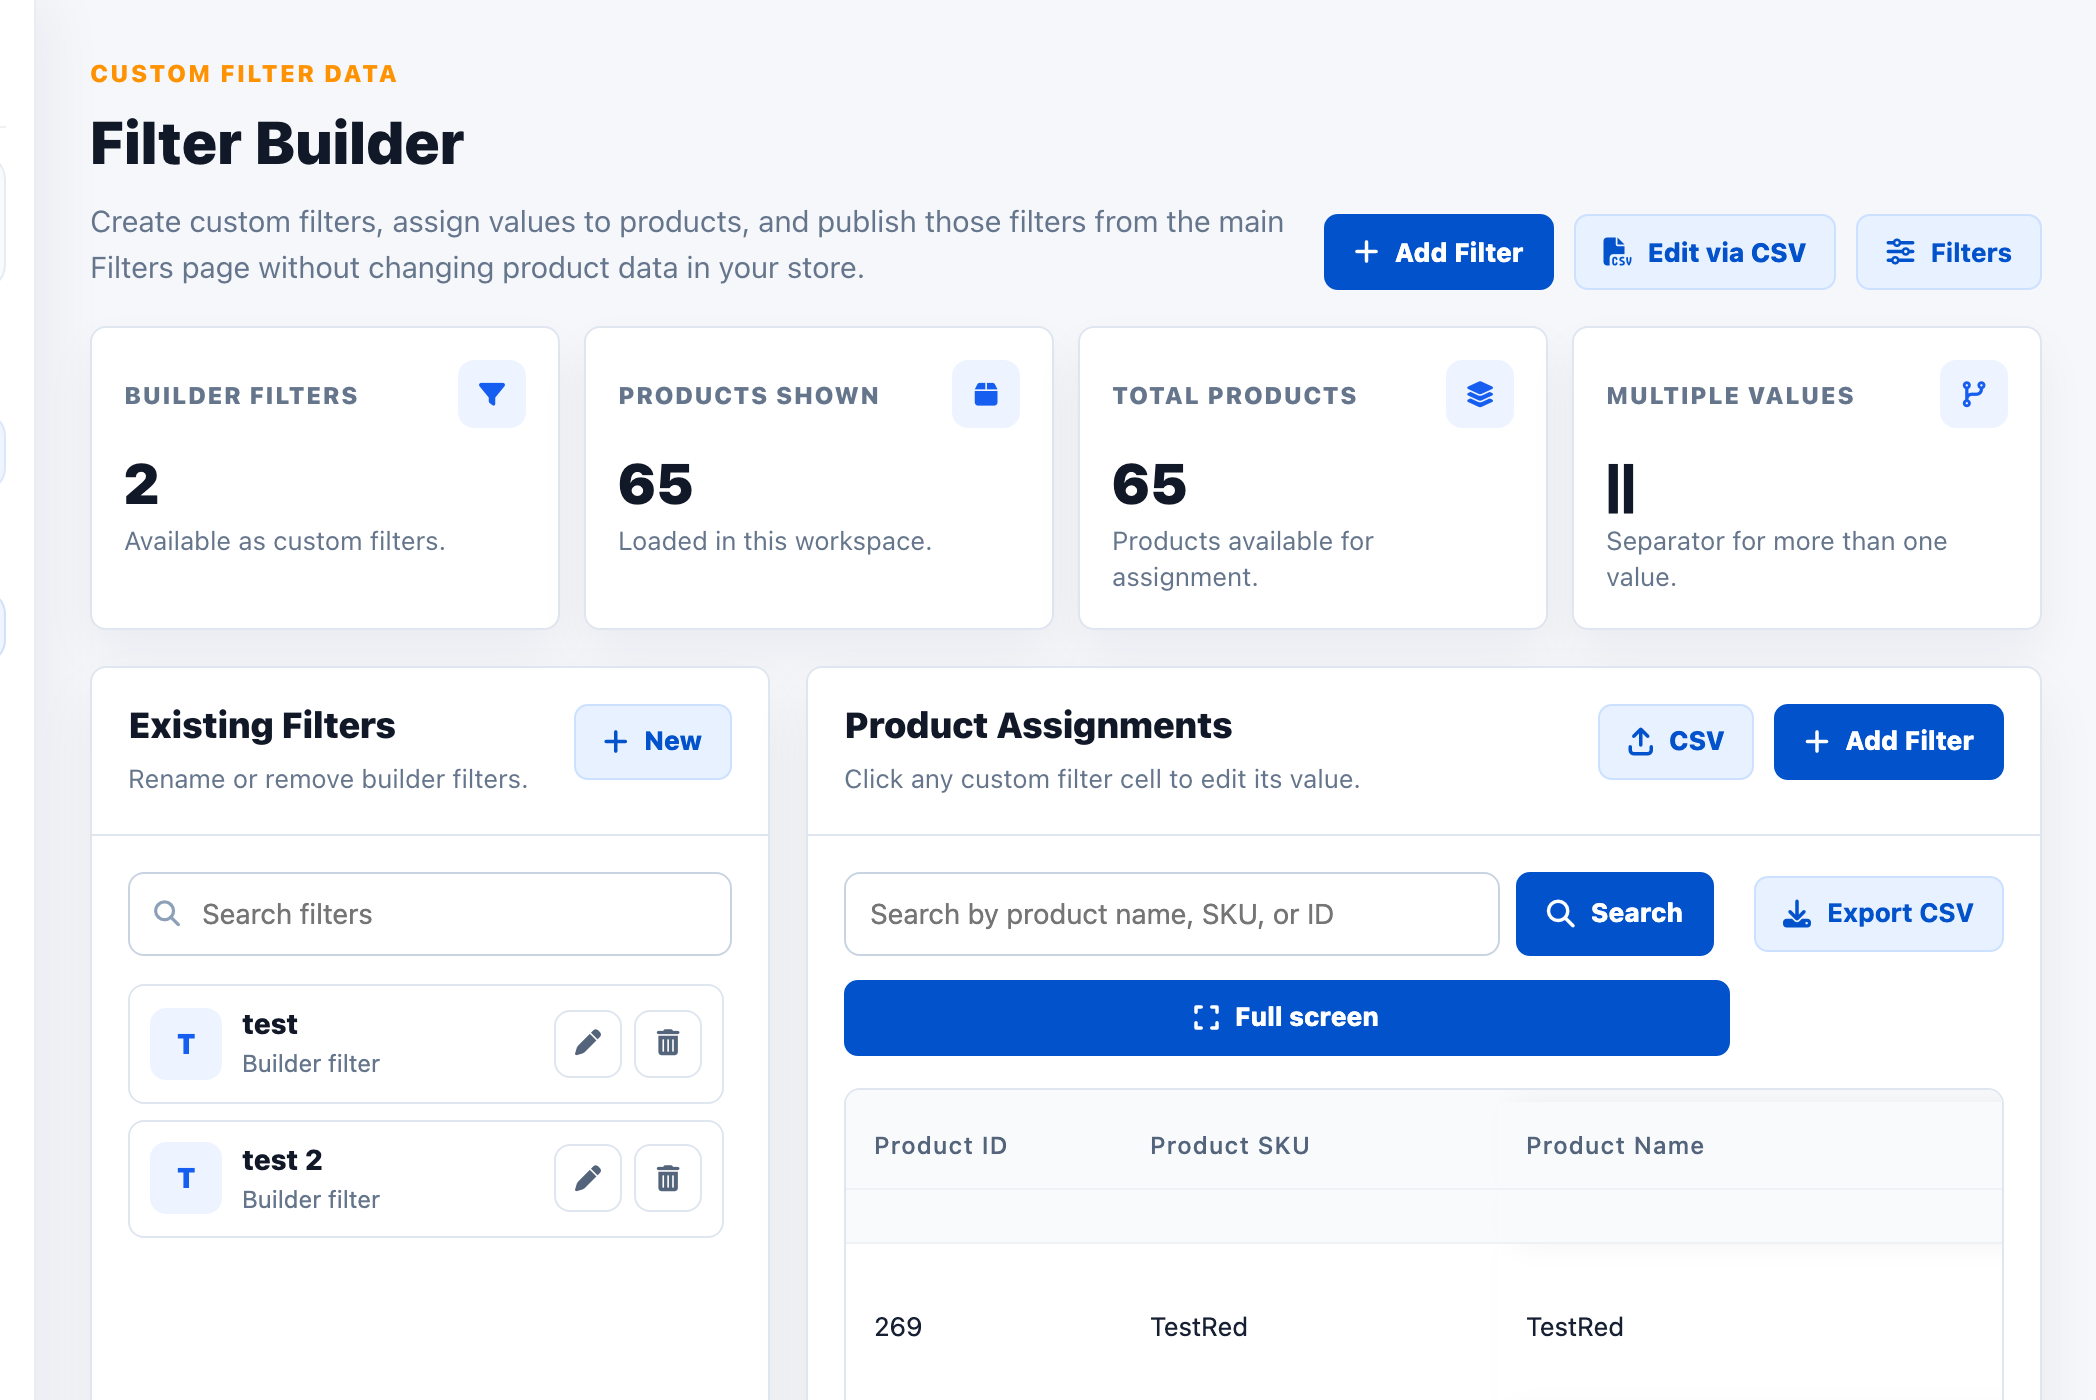
Filter Builder is for data that does not exist in BigCommerce at all. You define the filter and assign values to products inside the app, either by spreadsheet or in the table. Separate several values in one cell with ||.
Edit via CSV
- Export the CSV from the Filter Builder page.
- Add your data. Keep columns A to D unchanged and add one column per filter. Put values in your new columns, separating multiple values in one cell with
||. - Add the filters. Put
yesin theadd_filtercolumn on any one row, and every filter column in the file is added to the Filters page for you. - Import the CSV. Tick Delete existing filter builder data before import first if you are replacing rather than adding.
Edit via table
- Click Add Filter and type a Filter title.
- Fill in the new column in Product Assignments. Click any cell to edit it; cells save as you edit.
- Add it from Add a filter on the Filters page, under Filter Builder.
Existing filters can be renamed or removed under Existing Filters.
Metafield filters
Storefront Metafield values become facet options once synced and added.
BigCommerce metafields store structured extra data against products — specifications, attributes, anything your catalogue needs. The app can read those metafields and turn them into facets, which is the cleanest route if your data already lives there.
To turn one comma-separated metafield into separate filter options, tick Split comma-separated values against Metafields on Product Sync.
Exclude products from the filter
Storefront The excluded products stop appearing in filter results. They stay on your store and remain reachable by link, category and search.
Exclude Products under Filters removes specific products from filter results. Open a category, tick the products to leave out, and click Save. Useful for discontinued lines you still need a live page for, or items that only make sense as an add-on rather than something a customer filters their way to.
Ticks are one list, not one per category. A product in several categories is excluded from all of them. Nothing is saved until you click Save.
Filter settings
Layout and appearance
Storefront Where the filter panel sits, how it is styled, and how its values behave for every customer.
Filter, search, mobile and custom CSS settings are stacked on one page, App Settings, as tabs. Each card below is named as it is on that page.
- Status
- Filter Off hides the filters on the storefront while you make changes or pause filtering. Filter On shows them on category and search pages.
- Filter Location
- Vertical (Sidebar), Horizontal (Above Products) or Button & Slide-out, where a button at the top opens a sidebar filter.
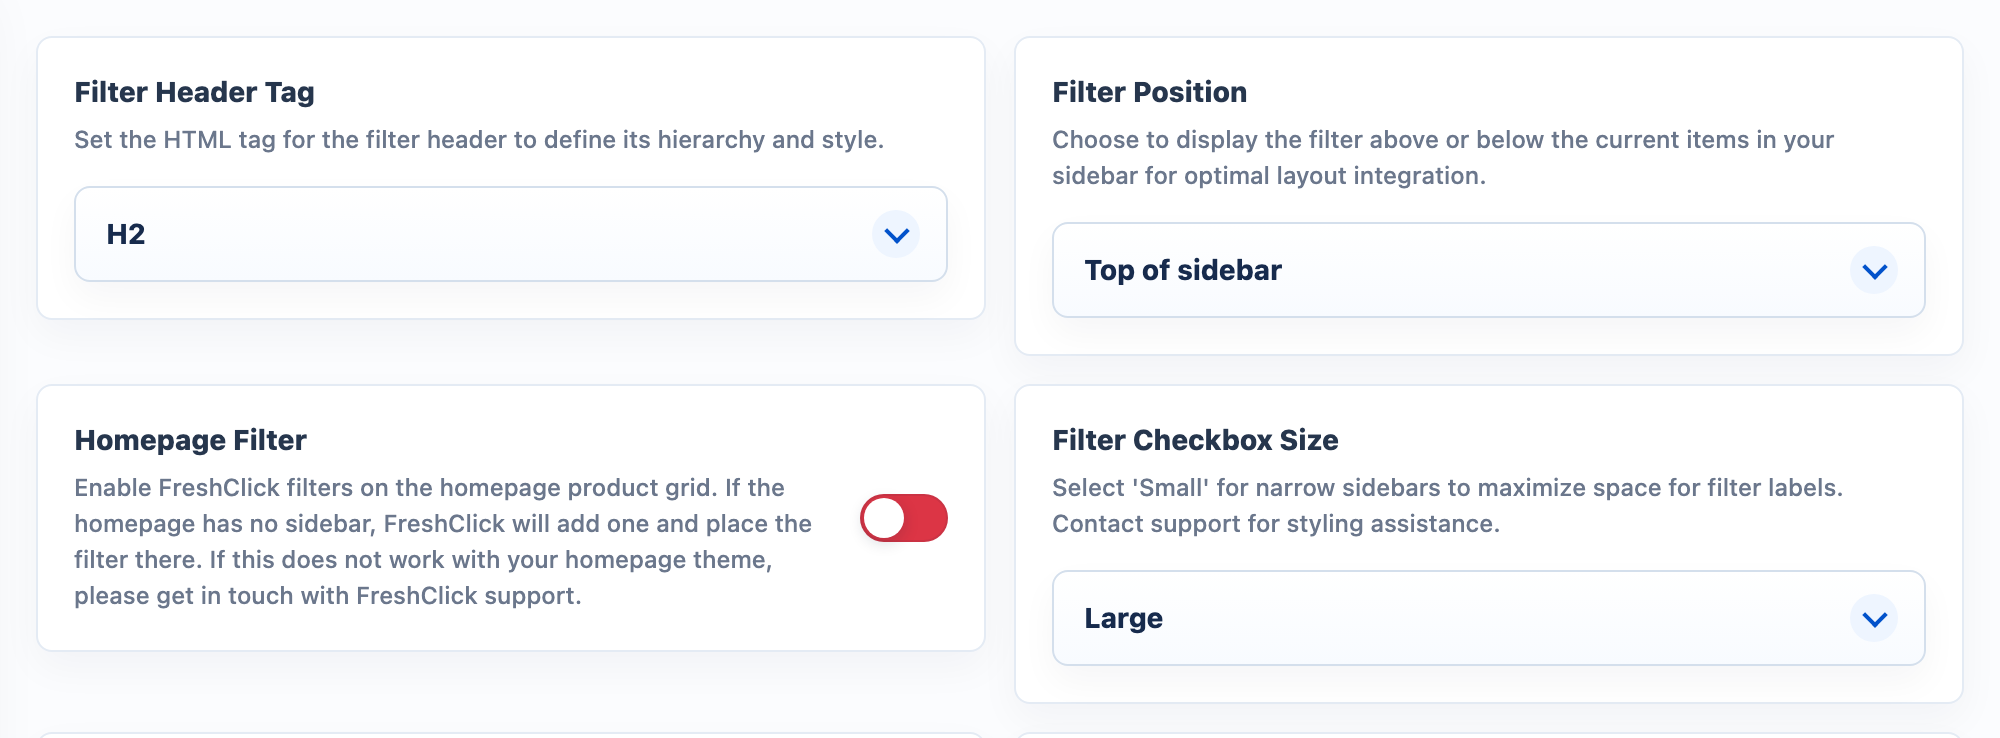
- Filter Header Tag
- The heading level used for filter titles,
h1toh6. Set it so filter headings sit correctly in your page's heading structure.
- Filter Position
- Place the filter above or below the items already in your sidebar.
- Homepage Filter
- Displays the filter on your homepage product grid as well as category pages. If the homepage has no sidebar, the app adds one.
- Filter Checkbox Size
- Choose small in a narrow sidebar to leave more room for the labels.
- Count Style
- Uses the latest style for displaying counts.
- Filter Styling
- Version 1 - Basic, Version 2 or Version 3 - Modern, the cleaner, current design that new stores start on. If none quite matches your theme, raise a ticket and we will adjust it.
- Facet Scroll
- How overflowing values are handled in a long facet: let customers scroll inside it, or show Show more / Show less links.
Counts and visibility
Storefront What customers see in the panel: counts, empty values, wording, and whether the filter shows on a category at all.
- Hide 0 Counts
- Hides values that would return no products, so customers never click into an empty result.
- Hide Filter Counters
- Removes the number beside each value. Also improves performance noticeably on stores over 50,000 products; on smaller stores it makes no measurable difference.
- Capitalise Filter Values
- For catalogues stored in capitals. Shows RED SUEDE as Red Suede in list filters, swatch names, category trees and group labels. Display only, so filtering and shared links are unaffected, and your product data stays as it is. Acronyms are lowercased too, so XL reads as Xl.
- Show Results Count
- Shows a line such as 24 results above the products while a filter is applied. It disappears when filters are cleared and keeps its space so the products do not jump. Left out on themes that already show their own count. Change the wording on the Language page.
- Hide BigCommerce Filter
- Hides your theme's built-in filter so customers do not see two filter panels.
- Hide Category Header
- Hides the category description and subcategory grid once a filter is clicked, bringing results into view.
- Filter Refine Box
- Adds a search box inside each filter. Essential on facets with dozens of values.
- Refinements text
- The text on the refinements heading.
- Filter Clear All Button
- Adds a single control that clears every selected value at once.
- Active Color
- The colour used for active elements: checkboxes, product counts, sliders and search autofill buttons.
- Category Filter Visibility
- Turns the filter off on categories you choose. Tick the categories where it should not display.
- Non active products
- Turn on to stop loading products that are not active.
Shoppers' ticked filters, sort and page stay in place when they reload or use Back and Forward, and clearing every filter returns them to the plain page.
Products and pricing
Storefront How the product listing behaves under the filter: order, paging, images and price display.
- Product Order
- The order products appear in once a filter is applied.
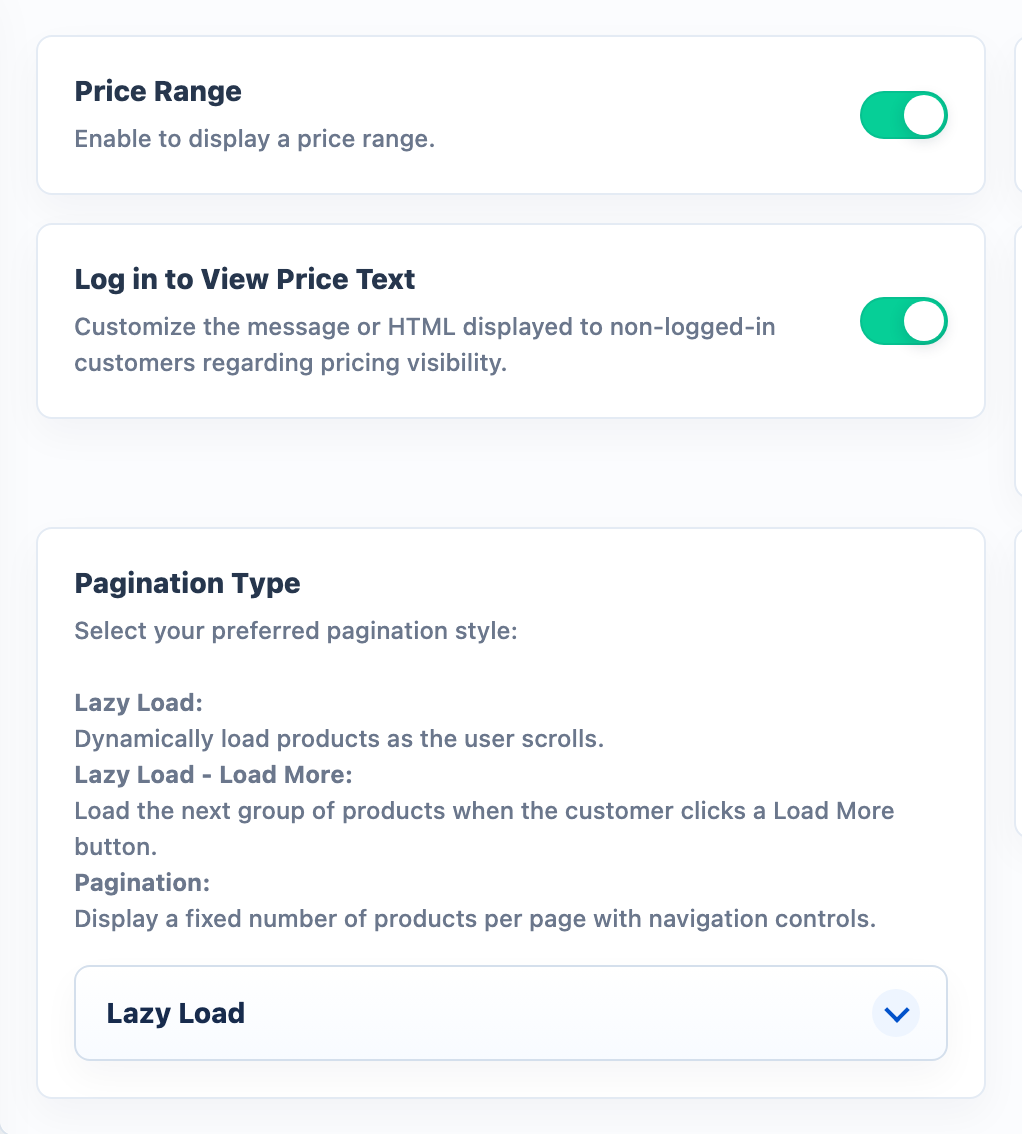
- Pagination Type
- Lazy Load loads more products as the customer scrolls; Lazy Load - Load More loads the next group when the customer clicks a Load More button; Pagination shows a fixed number with page links below.
- Products per Page
- How many products load per page or per lazy-load batch.
- Include Out-of-Stock Products
- Keeps out-of-stock products in filter results instead of removing them. Products you sell on backorder are shown as available to order, not out of stock.
- Out-of-stock product button text
- Replaces Add to Cart on out-of-stock products, for example Notify me.
- Show Hover Image
- Swaps to another product image when a customer hovers over a product card.
- Hover to
- Which image the hover swaps to.
- Click and Scroll
- Scrolls to the top of the product list when a filter is clicked, so customers see the start of the new results.
- Price Range
- Enable if your product listings show a price range rather than a single price.
- Display Price Hidden Label
- Enable if your store shows a hidden-price label on some products.
- Log in to View Price Text
- Switch on to show prices only to signed-in customers. Common on trade stores.
- Log in to view price text
- The HTML message shown in place of the price to signed-out visitors.
- Hide Compare Price
- Shows only the price the shopper pays on search, filter and brand pages. The crossed-out original, MSRP or was price, the You save text and the sale badge are left off, and your theme's own compare price on those lists is hidden too. On the homepage only the crossed-out original price is hidden. Off by default, and applies to the Latest storefront script only.
Sale badges, the On Sale filter and card prices reflect sales set on individual variants. Product cards and price filters use the price list assigned to the storefront the shopper is on, converted into the currency they have chosen.
Merging and tidying values
Storefront Values that were separate options collapse into a single facet entry.
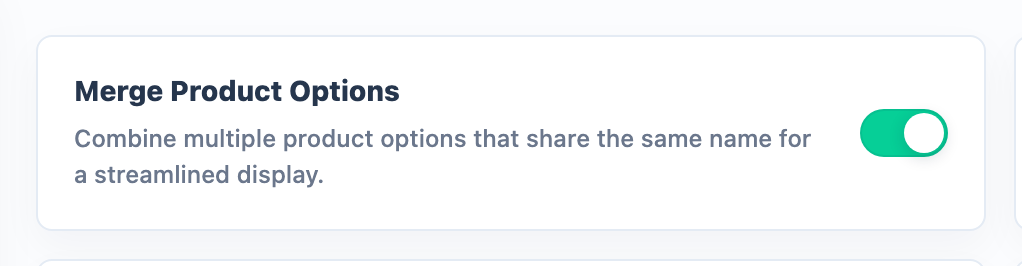
- Merge Product Options
- Merges product options that share a display name, so Colour defined separately on many products becomes one facet.
- Merge for Swatch
- Enable when you want a swatch colour filter and merged product options. Without it, swatches and merging conflict.
URLs and SEO
Storefront Changes the URL produced whenever a customer selects a filter. Previously shared filtered links use the old format.
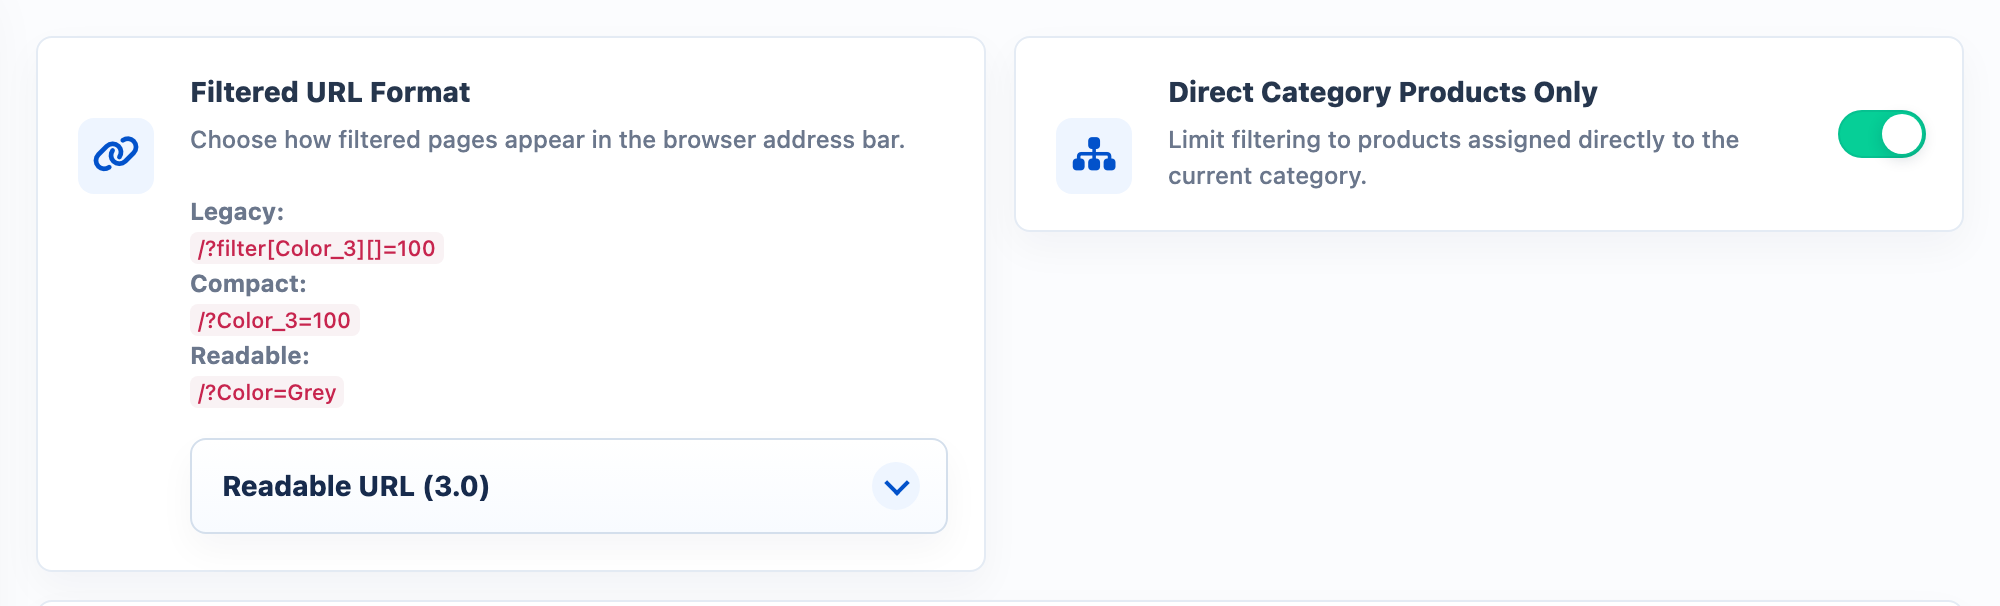
- Filtered URL Format
- How filtered pages appear in the browser address bar. Readable URL (3.0) is recommended — shareable, understandable, and better for SEO.
- Legacy
/?filter[Color_3][]=100 - Compact
/?Color_3=100 - Readable URL (3.0)
/?Color=Grey
- Legacy
- Direct Category Products Only
- Limits filtering to products assigned directly to the current category, rather than pulling in everything from its subcategories.
Reviews and payment badges
Storefront Adds review scores and instalment messaging to product cards in filter and search results.
Product cards in filter and search results can carry your review scores and payment messaging, shown the same way as on your product pages. Connect the provider you already use and the app renders it on the card. Each card also carries the product's own image alt text.
- Ratings
- Which review source the store uses: BigCommerce, Bazaarvoice, Judge.me, Fera, REVIEWS.io, Stamped, Trustpilot, WiserReview or Yotpo. Ratings then appear on product cards, including results that load as shoppers scroll or search.
- Public / Private API Key
- Credentials for BigCommerce's own product reviews.
- Yotpo App Key / Secret Key
- Yotpo credentials.
- Trustpilot business unit id / data template id
- Trustpilot widget identifiers.
- Judge.me Shop Domain / Private Token
- Judge.me credentials.
- Fera Secret Key
- Fera credentials.
- REVIEWS.io Store ID
- REVIEWS.io store identifier.
- Product Affirm
- Shows Affirm monthly-payment messaging on the product cards the app draws and on Optimised Dropdown cards.
- Product Afterpay
- Shows Afterpay or Clearpay instalment messaging. The placement copies the settings your theme already uses, so nothing appears if your store does not show Afterpay.
- Product PayPal Pay Later
- Shows PayPal Pay Later messaging, placed the same way.
Mobile settings
Storefront How the filter panel opens and applies on phones. Desktop is unaffected.
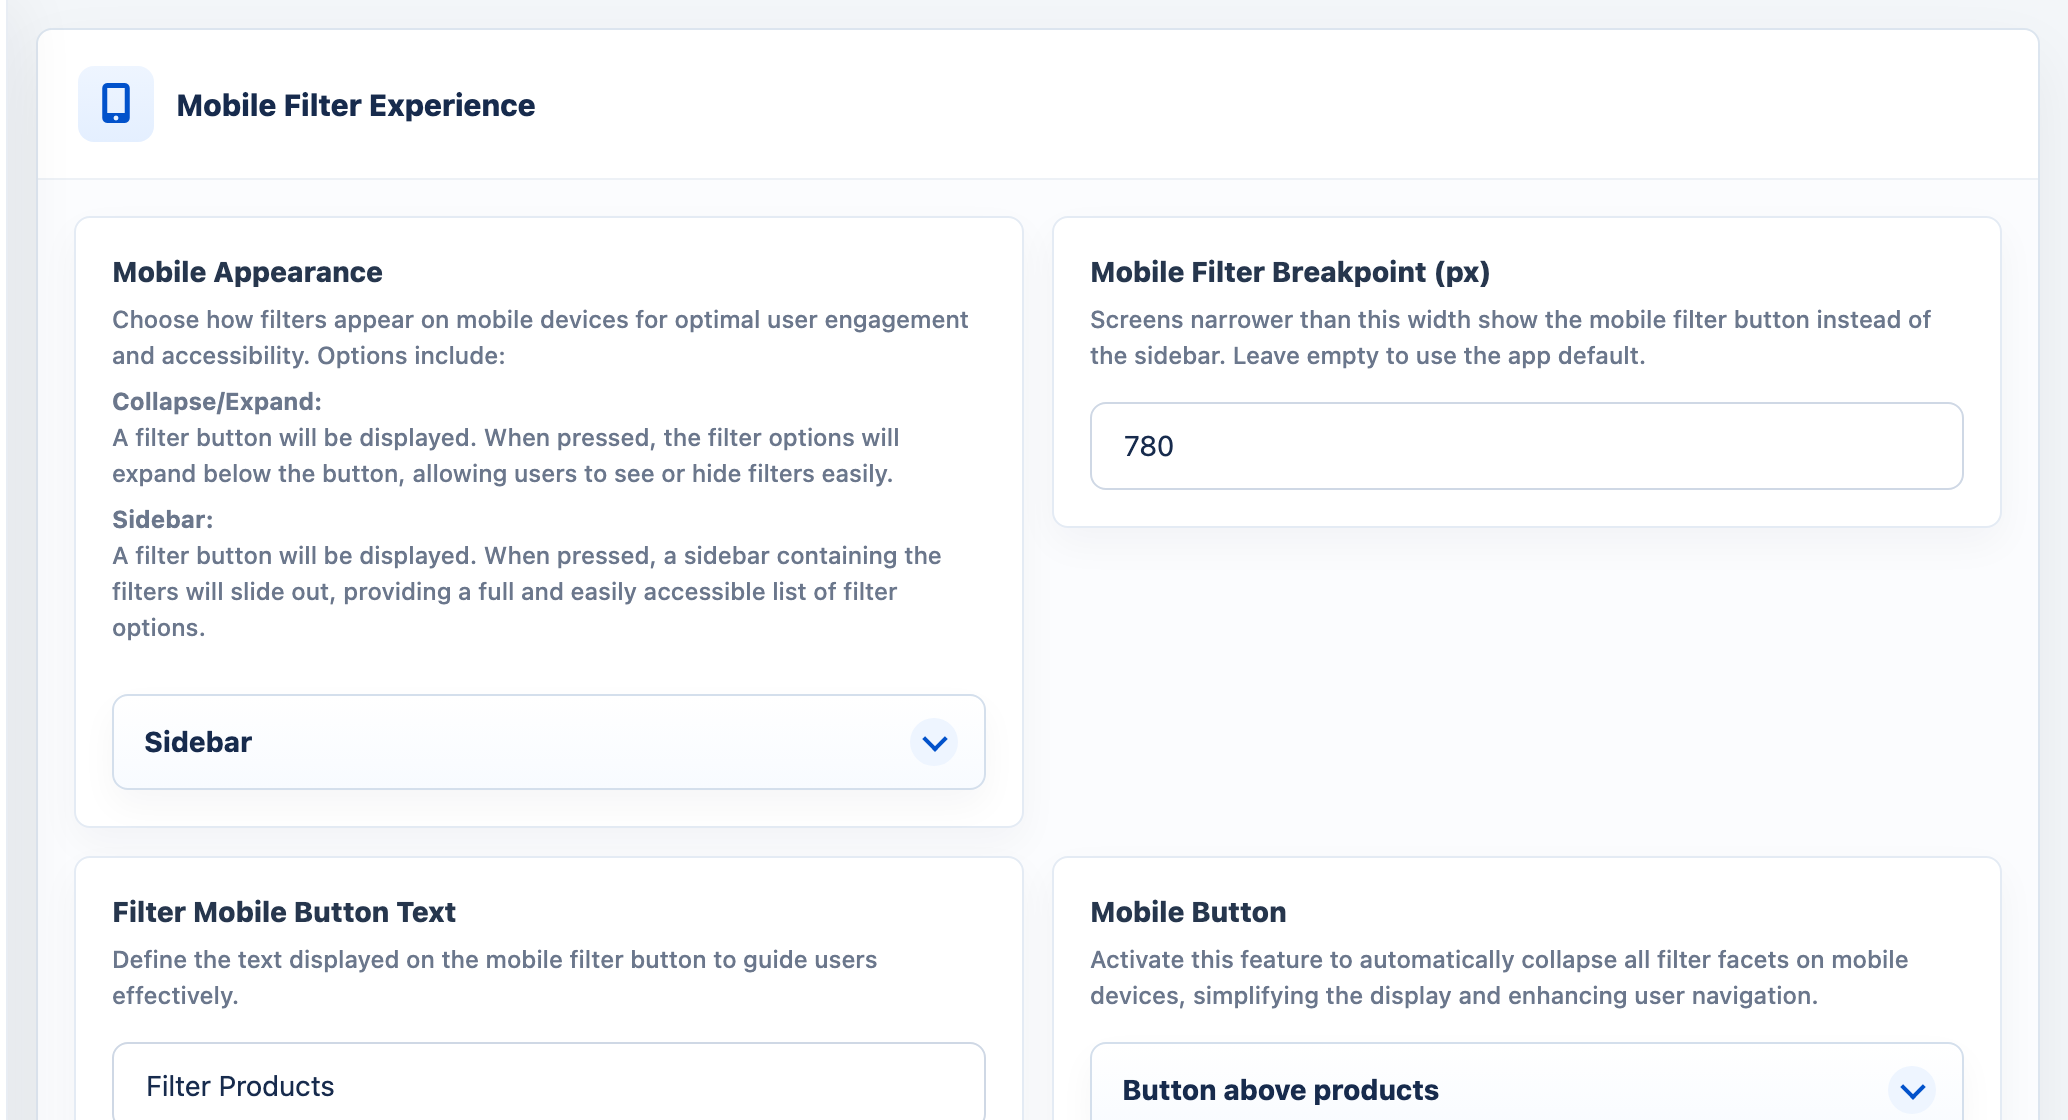
- Mobile Appearance
- Collapse/Expand shows a filter button that expands the filters below it. Sidebar shows a button that slides a sidebar of filters out.
- Mobile Filter Breakpoint (px)
- Screens narrower than this width show the mobile filter button instead of the sidebar. Leave empty to use the app default.
- Filter Mobile Button Text
- The text on the mobile filter button.
- Force Mobile Collapse
- Collapses all filter facets on mobile for a cleaner layout.
Filters can also be set to load collapsed on mobile one by one, using each filter's Mobile Appearance option.
Search
Search is documented on its own page: Search & quick search. It covers quick search and the Optimised Dropdown, matching and relevance controls, synonyms, redirects, merchandising rules, AI Search and the AI shopping assistant.
Data tools
Product Sync
Storefront Filter and search results refresh to match your current catalogue. Until it runs, customers see the old copy.
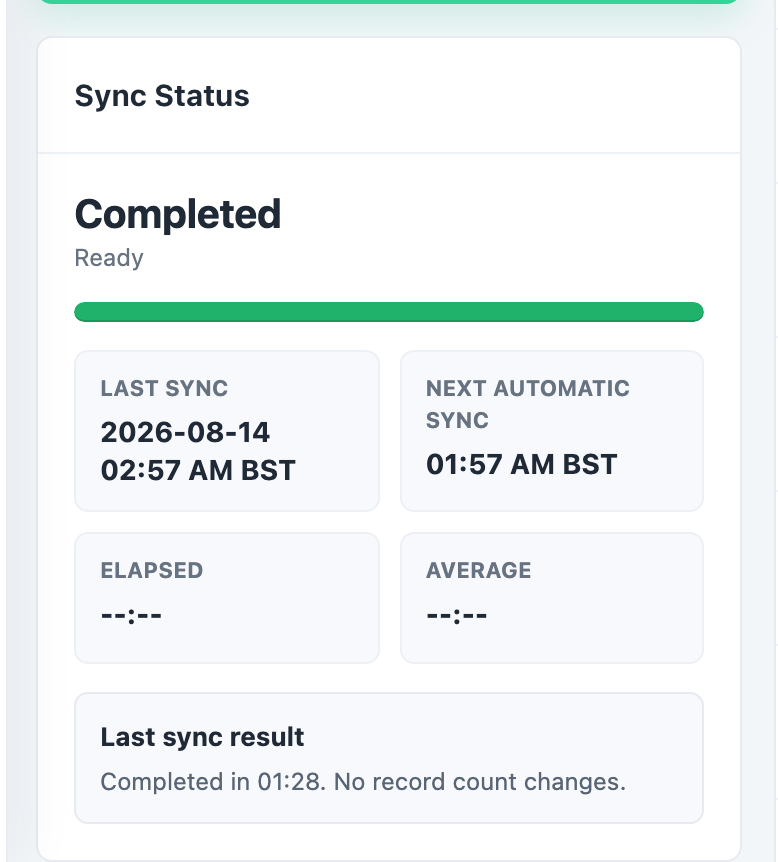
Product Sync, under Data, pulls your catalogue from BigCommerce into the app. Depending on store size a full sync takes anywhere from a minute to about an hour.
The first sync runs during installation, then nightly. Run a manual sync after changing data in BigCommerce:
- Sync all data: a full refresh of products, categories, options and variants.
- Sync custom fields: much faster, and all you need when only custom fields have changed.
The page lists each data set with a sync control of its own: Products, Categories, Pages, Brands, Product Options, Custom Fields, SKUs, Rules, Metafields, Blog Posts, Price List and Location Inventories. Choose what the nightly sync brings in; turning one off leaves the data you already have in place. Pages sync includes the page body, so page content can be searched.
- BigCommerce API
- Which sync engine to use. v3 is recommended for every store.
- Split comma-separated values
- Beside Custom Fields and Metafields. Stores each comma-separated part of a value as its own value, so 2011,2012,2013 becomes three values and a filter on 2012 matches. Off by default.
- Search by MPN, UPC, GTIN and Bin Picking Number
- Beside Products. Applies on the next full sync.
With the real-time updates add-on, BigCommerce sends product, inventory and store changes the moment you make them, so there is little to sync by hand. Enable real-time updates and View webhook feed are on the same page.
Value Replacer
Storefront Variant spellings collapse into a single facet value in the filter panel.
Manufacturers rarely agree on names. One supplier's Navy is another's Dark Blue, and unmerged they produce a colour filter with twelve near-identical values. Value Replacer, under Data, standardises them inside the app so they group into one. It covers product option values, custom field values, category values and brand values.
- Search values to replace and find the value you want to change. Each group lists matches with a replacement field.
- Enter the replacement against it and save.
- Repeat for each variation, or use Edit CSV: export the current values, add replacements in the To column, then Import CSV to do the whole group in one pass.
If you already know the value, choose Add a replacement directly and type the value and its replacement without searching first. Saved rules are listed under Saved replacements.

Convert Options
Storefront Option data merges into the custom field filter after the next sync, so one facet covers both sources.
Converts product options into custom fields so option data and custom field data can be merged into a single filter. Under Add Conversion, choose the Option or variant name and the Custom field destination, then click Add conversion. Your conversions are listed under Active Conversions.
A product sync is required after changes. The tool does not convert SKU or rules options.
Custom Field Import
Storefront Imported fields become available as facet values, the same as a custom field sync.
Imports custom fields straight from a BigCommerce product export, which is faster than re-syncing when you have just bulk-edited fields in a spreadsheet. Use the original BigCommerce product export CSV.
- Upload the file. Choose or drop a CSV under Upload CSV File and click Import File. Large files upload in chunks, and a chunk that fails is retried automatically. Alternatively paste a direct HTTPS link under Import CSV From URL and click Import URL.
- Choose whether to overwrite. Overwrite existing imported custom fields replaces fields you imported before.
The Custom field import mode switch pauses automatic custom field sync for this store. Importing a CSV switches it on, because imported fields do not survive a sync without it. Custom field imports keep quotes inside your values, and the app warns you when an import will not survive the next sync.
Filter Cache
Storefront Purging forces the next customer to get freshly built results instead of a cached page.
The app caches filter results to keep large stores fast. Open Filter Cache from the Filters menu to see what is held, listed under Categories and Brands, and how many database queries the cache saves. Working out which filters a category page shows means counting products against every option, custom field and price band on it, and a cached page skips all of that.
The cache clears itself when you save settings, run an import, reorder filters or sync your catalogue, and when the product, category and brand webhooks arrive from BigCommerce.
Use Purge all, or Purge against one channel, category or brand, only if the storefront still shows old results after all of that. It is usually a change made outside the app, or a webhook that never arrived. Purging costs nothing but the rebuild, which the next visitor to that page pays once.
Filter Display Order
Storefront Changes the order filters appear in on the categories you set. Categories you never open keep the order from the Filters page.
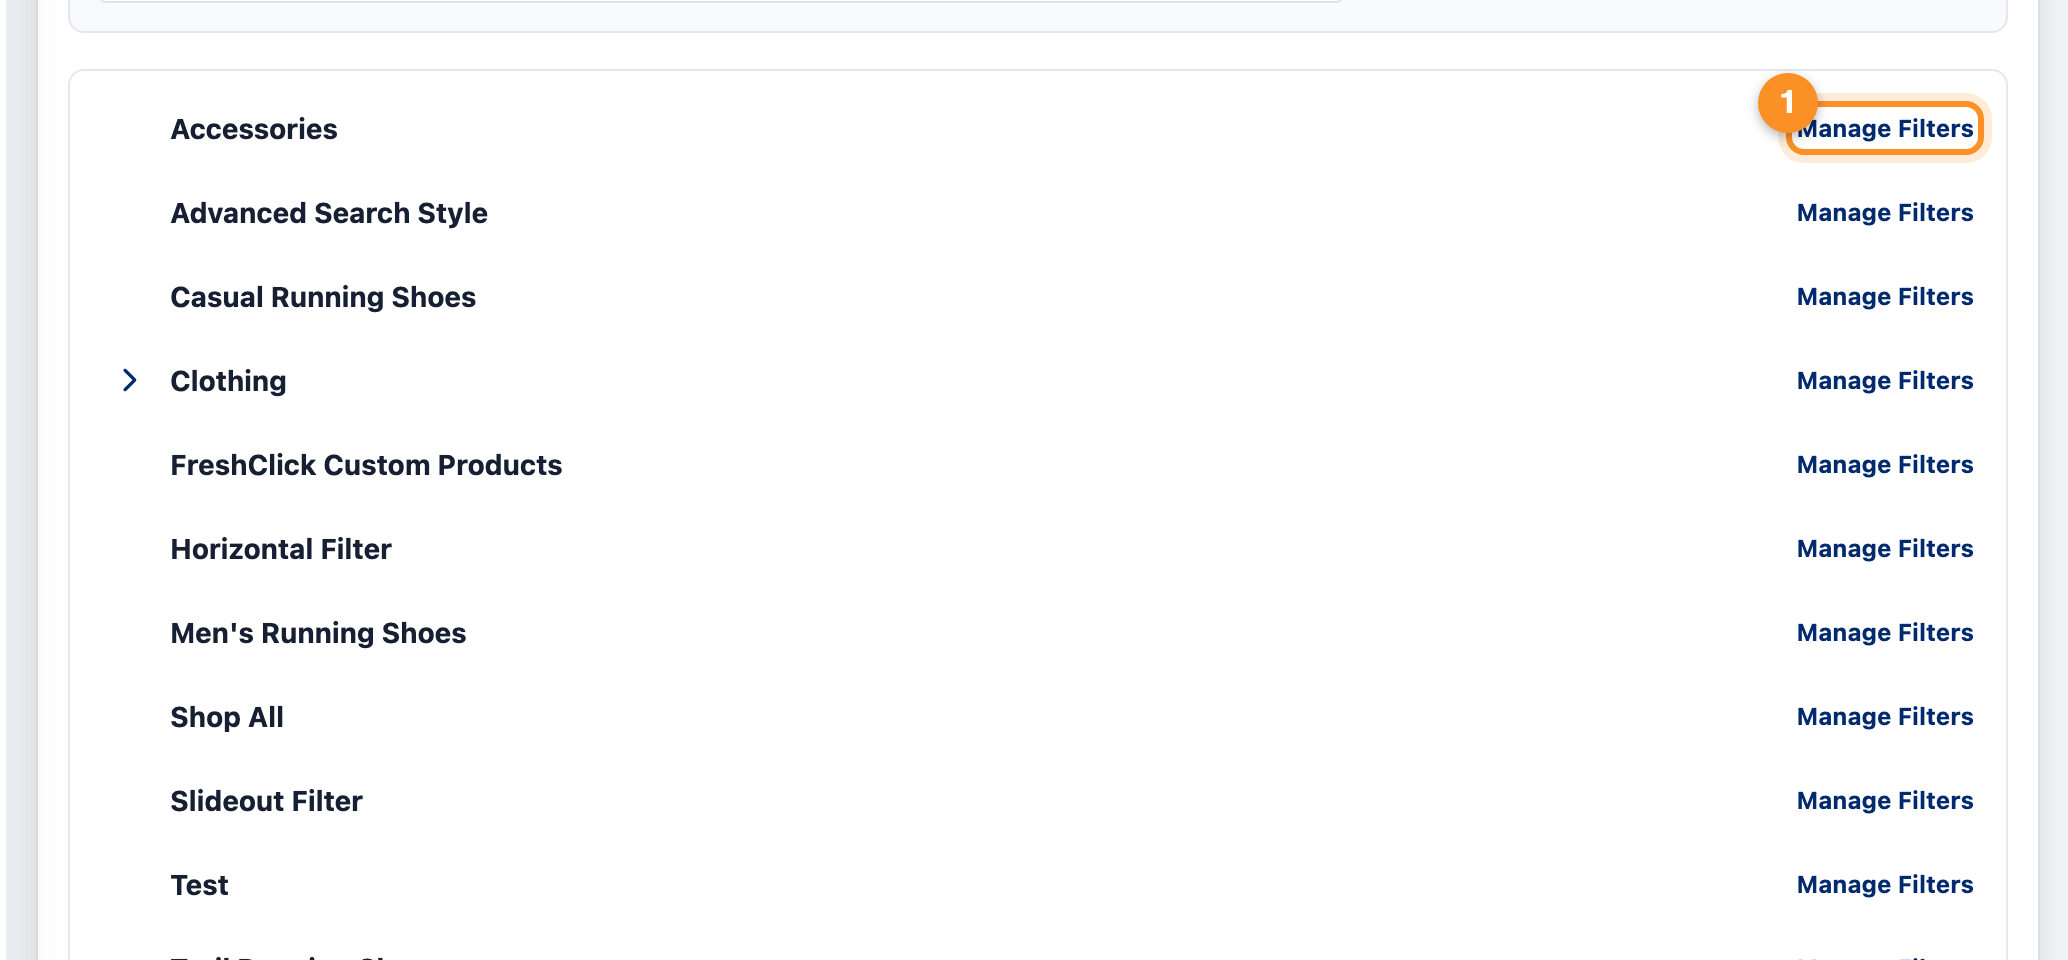
Sets the order filters appear in, per category, so a clothing category can lead with Size while a furniture category leads with Material.
- Expand the category tree and click Manage Filters beside the category you want to change.
- Drag the filters into the order you want.
- Click Save sort order.
With Replicate to child categories on, saving a category also writes the same order to every category beneath it, so a whole branch can be set from its top category. It is a sitewide option. Categories that already carry an order of their own are marked as modified.
Sort Order
Storefront Changes the order a filter's values appear in. Fields you never open keep their alphabetical order.
Under Filters, Sort Order sets the order of the values inside a filter: product options, custom fields and metafields. Sizes, for instance, rarely read well from A to Z. Click Manage on a field, then drag its values into order.
- Choose a field and, optionally, pick Sort by A to Z or Z to A as a starting point.
- Drag values to move them. For a long list, choose Download CSV, move the rows into the order you want (row 1 sorts first), then Upload CSV. Values the file leaves out move to the end.
- Click Save sort order. Each field is saved separately.
The sort options shoppers can pick on category and search pages are set separately. See Custom Sort Order.
Blog filtering
Blog filters
Storefront Adds faceted filtering to your blog listing.
The same faceted filtering, applied to your BigCommerce blog. Customers narrow posts by the tags and data you expose, instead of scrolling a single long list. Filters are added on the Blog Filter page, under Blog, in the same way as product filters.
Blog settings
Storefront Where the blog filter appears and how posts are listed.
- Blog Page Filter
- Turns the blog filter on or off.
- Blog Filter Location
- Vertical (Sidebar) or Horizontal (Above Products).
- Blog Filter Type
- Show the filter as Tags or Checkboxes.
- Blog Filter Container
- The element on your blog page that holds the filter.
- Blog Post Container
- The element that holds the list of posts.
- Blog Post Class
- The class your theme gives each post.
- Blog Post Template
- The markup used to draw each post in filtered results.
Blog content can also be included in site search from the search settings.
Customisation
Language
Storefront Every piece of interface text in the filter and search changes to your wording.
Every piece of interface text in the filter and search can be changed, to another language or just to your own wording. Open Language under Settings, click the text you want to change, type the replacement, and save. It includes the Optimised Dropdown labels, such as Top Searches, Top Searched Products and View all results, the Results count wording, and the question contact message.
Custom CSS
Storefront Your CSS is applied to the filter and search components for all customers.
Adds your own CSS to the filter and search components, for the cases the settings do not reach. If you would rather not, raise a ticket with a link to the page and we will style it for you.
Add-ons
Storefront Depends on the add-on. Storefront add-ons change what customers see; each add-on's page says which.
The Add-ons page, under Plan, lists optional extras that can be enabled on top of the core app. Each is a subscription of its own, with a trial where one is offered. Once an add-on is active on a channel, its page appears in the sidebar under Add-ons. Storefront add-ons extend the customer-facing experience beyond filtering and search. The add-ons with their own pages are Filter Tags, Custom Sort Order, AI Search, AI Shopping Assistant, AI Recommendations, Merchandising Rules, Fitment Finder, User Filter Profiles and Webhook Feed.
Filter Tags
Storefront Adds a row of one-tap shortcuts above your products, or in the sidebar. Shoppers reach a popular value without opening the filters.
A tag can point at a brand, category, product option or custom field value. Each tag drives the real filter, so its count matches the sidebar and clicking one recounts the others just as a facet would. Tags work on phones as well as desktop.
- Open Filter Tags and click Add a tag.
- Choose what it filters by, then pick the value.
- Set the button text shoppers read (optional) and click Add this tag.
- Save changes. Drag tags into the order you want. A tag's switch hides it without deleting it, and Shows on gives each category its own set.
Under Show to shoppers, choose Top bar or Sidebar. The Storefront preview shows your saved tag bar as shoppers see it.
Custom Sort Order
Storefront Adds sort options to the dropdown your theme already shows, and can open category pages and search results already sorted. Changes save as you make them.
Custom Sort Order, in the add-on list, adds sort options by product detail and sets the default order your pages open on.
- Product SKU
- Adds SKU: A to Z and SKU: Z to A. Products with no SKU are placed last.
- Brand
- Adds Brand: A to Z and Brand: Z to A. Products with no brand are placed last.
- Biggest saving first
- One option, ranked by percentage off rather than amount off. Products that are not reduced are placed last.
- Store-wide default sort
- What your category pages and search results open on: a product detail or one of your custom fields. Products without it are placed last. Applies to every category except those given a rule of their own.
- Category rules
- A different default for individual categories.
Turning a sort option on only adds it to the dropdown; shoppers pick it themselves. Only the default sort changes the order a page opens in. A link that carries a sort is honoured on arrival. Custom field values sort as numbers where they are numbers, so 9 comes before 10.
Analytics
Storefront Nothing. Reporting only.
Filter Analytics, Search Analytics, Search Queries and Zero Search Results sit under Analytics in the sidebar. The toolbar switches between Overview, Search and Filters, and sets the channel and the period: Last 7 days, Last 30 days, Last 90 days or a From and To date, then Apply range. Every report exports with Export CSV.
Filter Analytics
The Filter Analytics page replaces the old Filter Stats page. It opens with headline figures: filter-assisted revenue, sessions that filtered, refinements per session and filters in use.
- Every filter, and how it performs
- Interactions, sessions, click-through, average results after, dead-end rate and a verdict for each filter. A filter clicked often that also empties the grid often is the most expensive row on the page.
- Most-clicked filter values
- Which individual values customers click, the level at which you decide a value earns its place. Export filter values downloads each value with its usage for the period, ready for a spreadsheet.
- Filters used together
- Pairs applied in the same session. Move a frequently combined pair next to each other on the Filters page.
- How many filters shoppers use at once
- How many shoppers apply a second filter after the first.
- Applied against taken back off
- Filters applied and removed, and the removal rate. Rising means filters are not doing what shoppers expect.
- How shoppers sort
- Which sort options get chosen, to help you decide your default.
- Sidebar order against actual use
- Whether the order of your filters matches how shoppers use them. See Filter Display Order.
- Filters nobody uses
- Facets nobody touches. Each one lengthens the panel for no return, so this is the list to cut from.
- Values that empty the grid
- Filter values that leave shoppers with no products. These are worth fixing rather than removing.
- Where filtering happens
- Filter use by page type, and by time of day under When shoppers filter.
Search Analytics covers the search side.
Weekly summary email
Every Friday the store owner and every staff login get an email summing up how shoppers used search and filters over the past week. It shows your searches, click rate and searches that found nothing, your top and rising search terms, filter clicks and your most-used filter values, each set against the week before. Every email has a link to turn the summaries off.
Your account
Profile
Storefront Nothing.
Your own name, contact details and password, from Profile in the account menu at the foot of the sidebar. Passwords can also be reset from the login page if you are locked out. Store users, in the same menu, invites colleagues by email; they choose their own username and password.
Payments
Storefront Indirectly. If a payment fails the app stops displaying until the invoice is settled.
Billing, under Plan and in the account menu, shows your subscription, add-ons, invoices and card details, per channel. This is where you settle a failed invoice to bring the app back online.
Enterprise Plan
Storefront Nothing by itself.
For catalogues and traffic beyond the standard packages. The Enterprise page explains what is included and how to start the conversation with us; terms are arranged directly rather than self-served.
Pricing and subscription
Packages
Pricing is based on the number of products in your store, and the right plan is assigned automatically. Each storefront is billed separately, on its own product count.
| Plan | Products | Per month | Per year |
|---|---|---|---|
| Starter | Up to 1,000 | £24 / $29 | £240 / $290 |
| Growth | 1,001 – 5,000 | £64 / $79 | £640 / $790 |
| Pro | 5,001 – 25,000 | £119 / $149 | £1,190 / $1,490 |
| Premier | 25,001 – 50,000 | £159 / $199 | £1,590 / $1,990 |
| Scale | 50,001+ | £239 / $299 | £2,390 / $2,990 |
You are billed in pounds or dollars depending on the account. Paying yearly costs the same as ten months, so two months are free.
Larger catalogues and higher-volume stores can move to the Enterprise Plan, arranged directly with us.
How billing works
Payment is taken when you subscribe and on the same date each period after that. If your product count moves you between plans the change is automatic, and you are only charged for the time spent on each plan, calculated at the end of the month.
If a payment fails the app stops displaying on your store and you will receive an email asking you to settle the invoice. Paying it restores the app.
Cancelling
Uninstall the app to cancel. You will receive an email asking you to confirm; confirming closes the subscription. If it does not arrive, contact support.
Getting help
Support PIN
Your App Pin is shown in the App Status panel on the dashboard. Include it on every ticket so we can open your exact configuration. The Support link in the sidebar fills in your store for you.
Change log
The Changelog, under Help, lists what has shipped. Check it before reporting a problem — the fix may already be live.
Contact us
Raise a ticket from the Support link under Help in the app, or email support@freshclick.co.uk. Include your store hash, your support PIN, and a URL showing the problem.