After making changes in BigCommerce
If you make changes to Custom Fields, Product Options, Metafields, Category Structure, or Variants, you will need to sync your filter again from the Product Sync page.
Everything you need to install, configure, customise, and manage Search & Product Filter for BigCommerce.
Our app can only be installed through the BigCommerce Marketplace. This link will let you log in to your store and install the app.
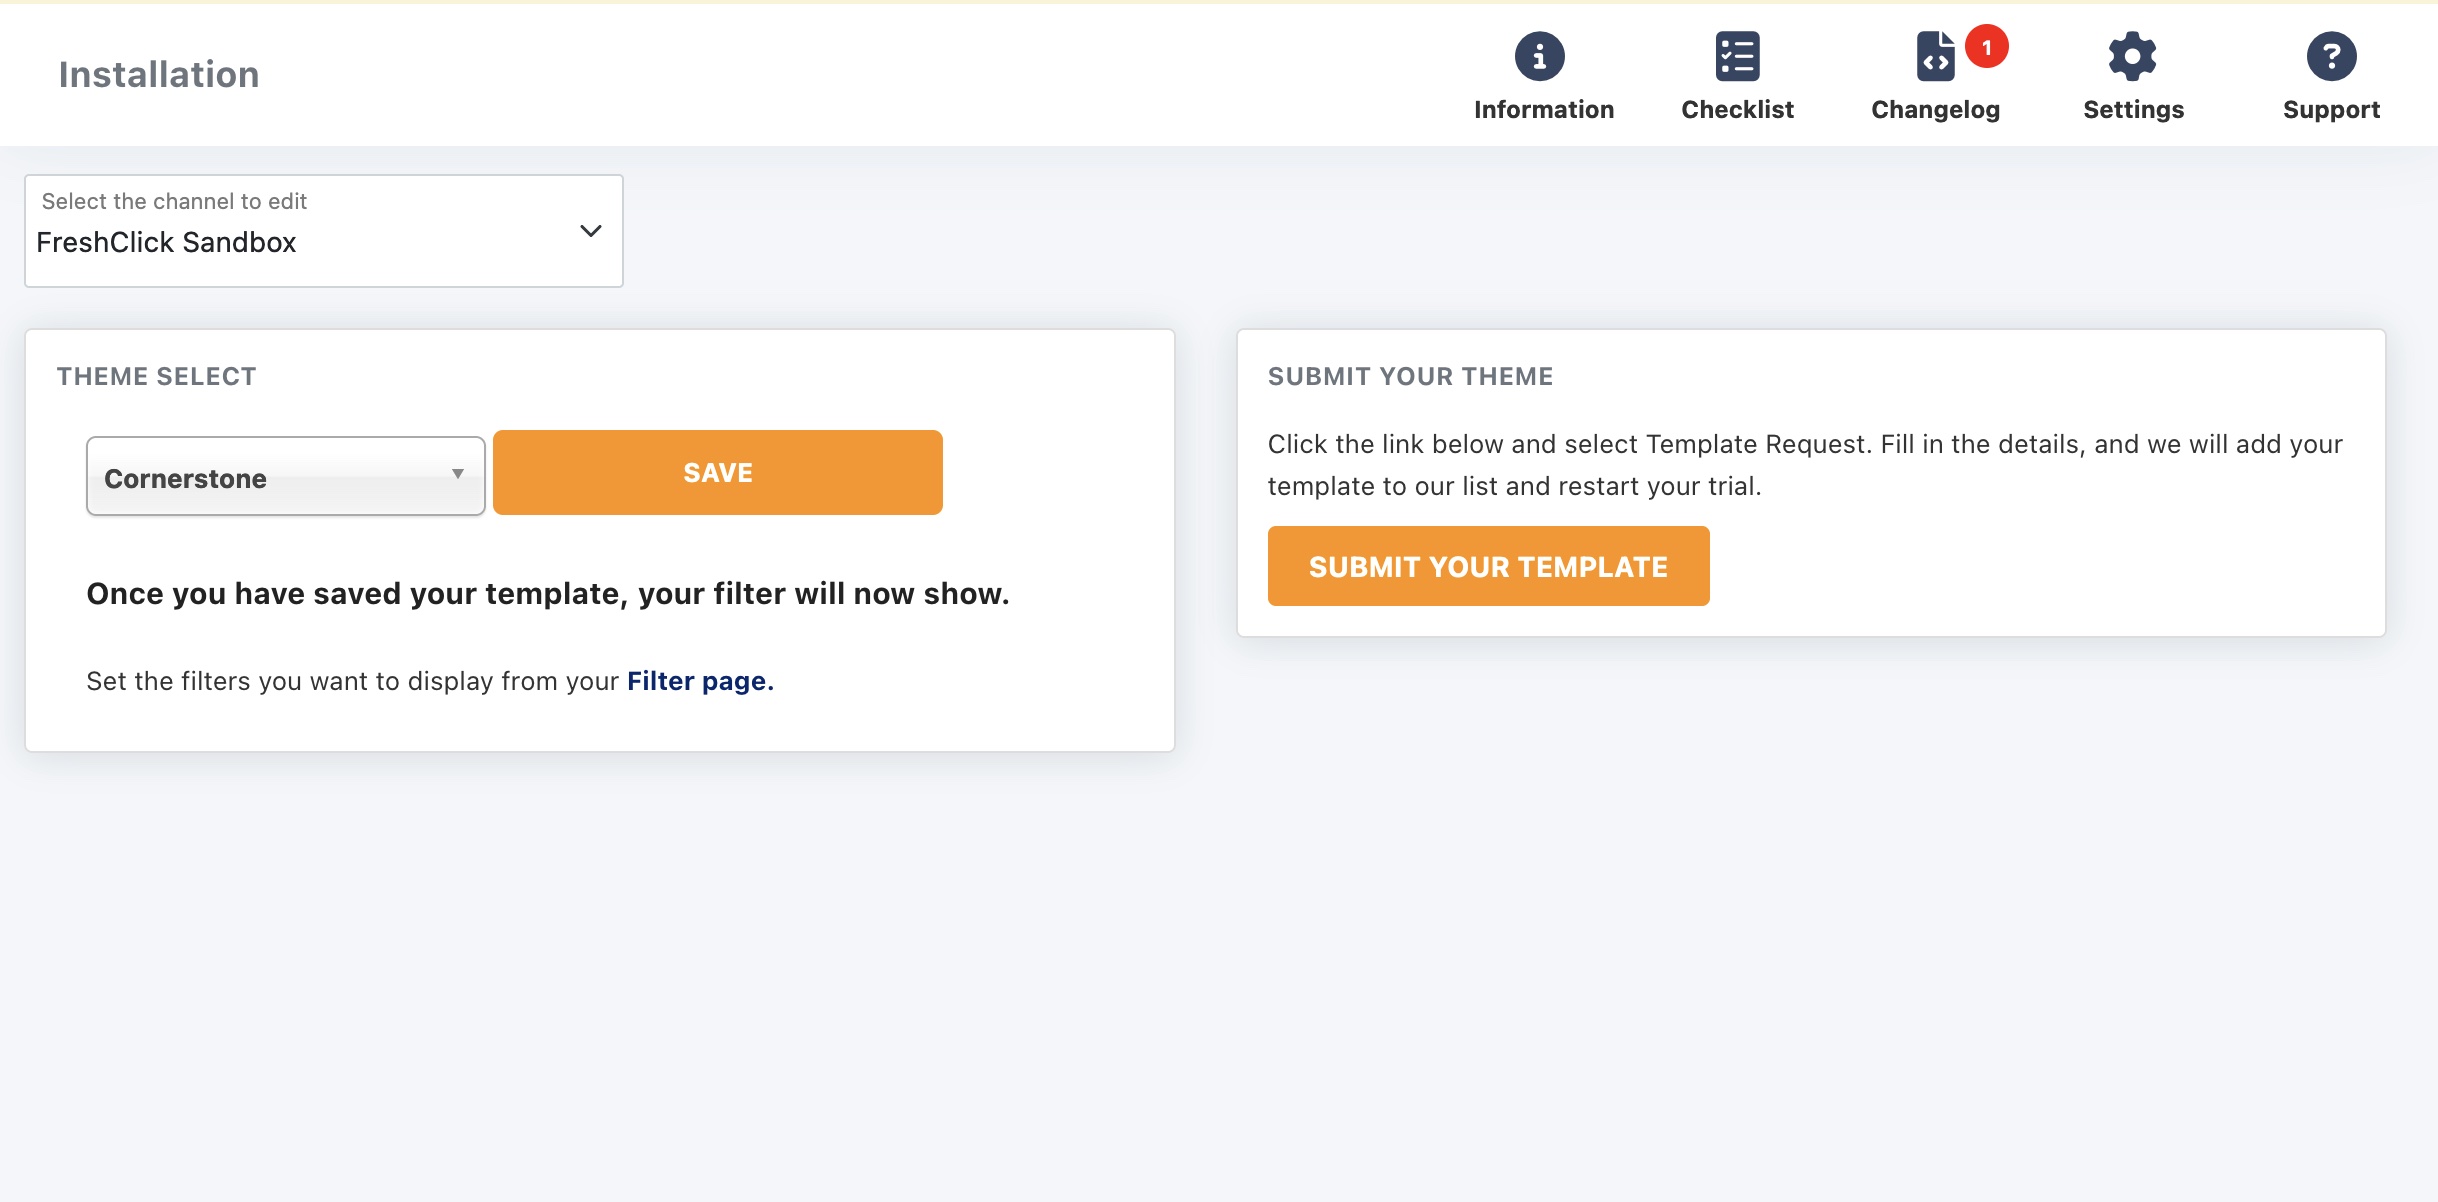
Our app automatically detects your theme using its template name. If your theme name has been customised, you may need to select the correct theme manually from our list.
Click Installation under the Configuration heading to choose your store theme. Once selected and saved, the filter will display on your storefront.
| Theme Type | Description |
|---|---|
| Stencil Theme (newer themes) | Most themes use Stencil. If you are unsure which framework your store uses, it is most likely Stencil. If you are using a Stencil theme, our script will be injected automatically. Our app will try to recognise your theme automatically, but if it cannot, you can select it from the Installation page. |
| Blueprint Theme (older themes) | Follow the instructions shown on the Installation page after selecting your Blueprint theme. |
If you have any issues, or you cannot find your store theme, you can submit a template request and one of our team will add it for you.
Our app is compatible with BigCommerce Multi-Storefront. Once installed, the script is injected into the channel you installed it on.
To add the script to other channels, go to Manage Scripts, find the channel you want, and click Add Script. The script will then be injected into that storefront.
To customise filters and settings, use the channel selector dropdown shown at the top of each page.
Each channel requires its own subscription. Every channel also includes a ten-day free trial.
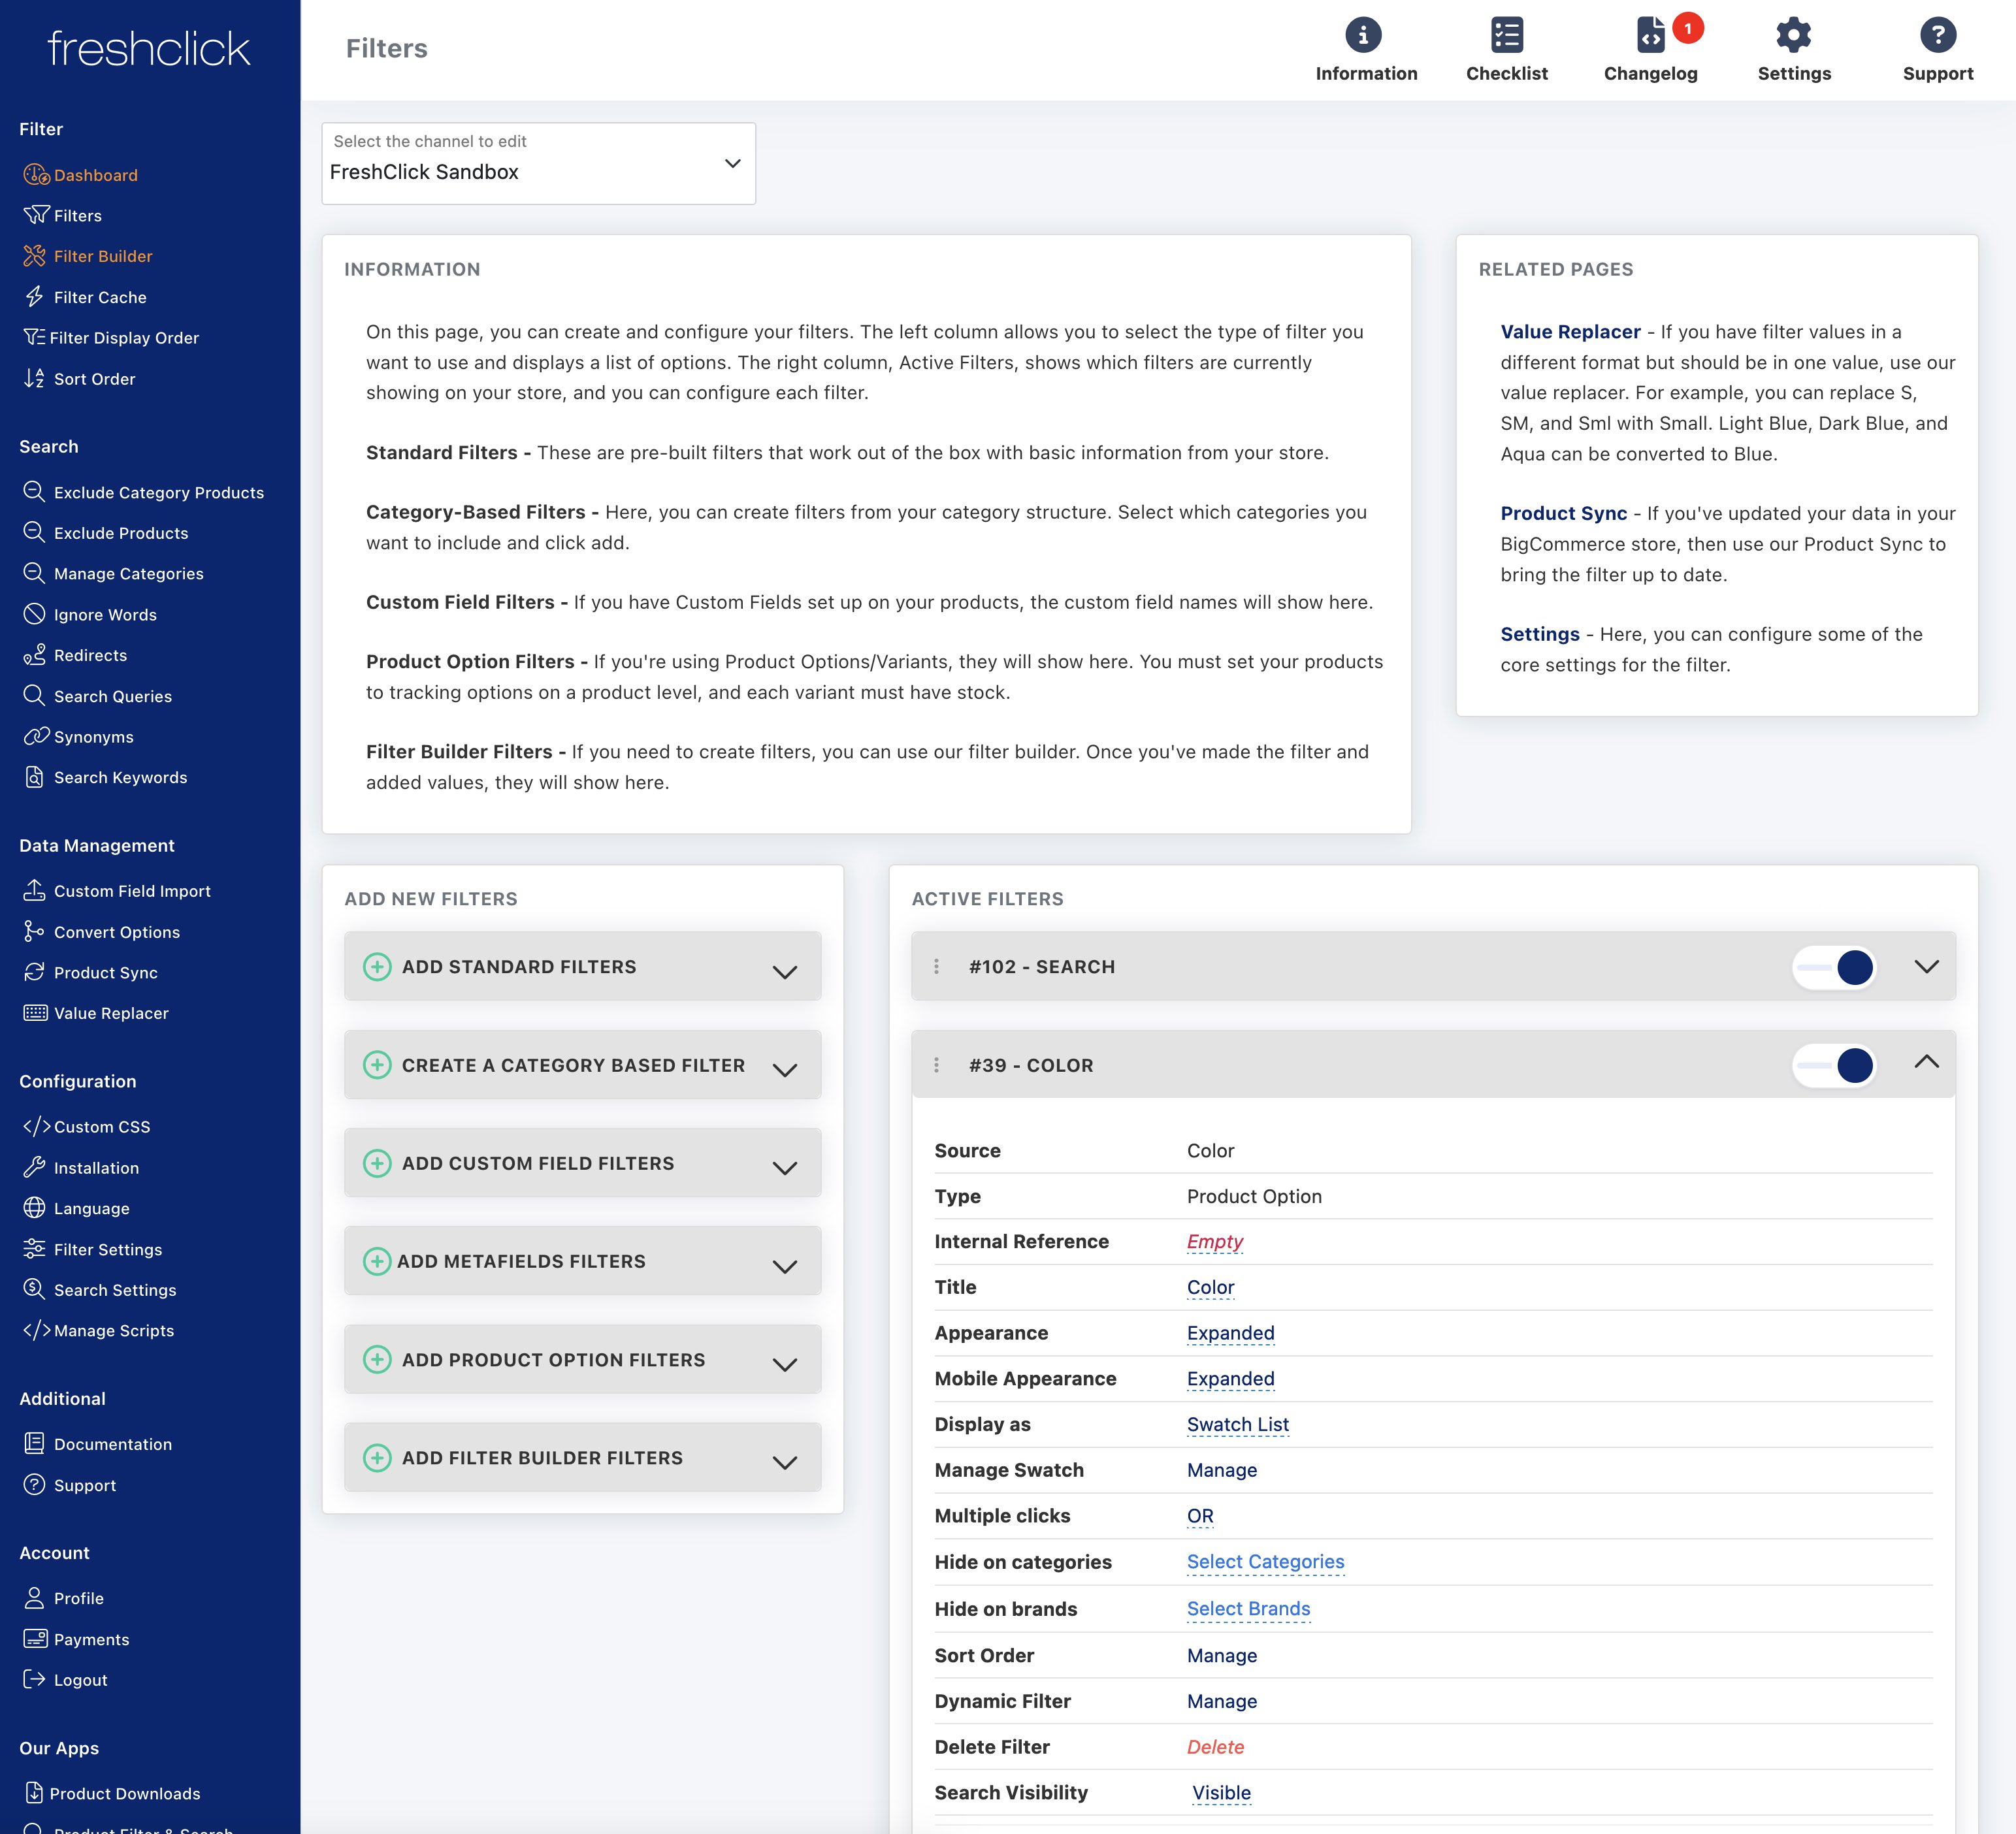
On the Filters page, the left-hand side shows the filters you can add, including Standard Filters, Custom Field filters, Product Option and Variant filters, Filter Builder filters, and Metafield filters. Click Add next to any filter you want to use, and it will appear on the right-hand side under your current filters.
Below is a list of the options available for each facet. The settings shown will depend on the type of filter you are editing.
| Property | Description |
|---|---|
| ID | The ID appears before the filter title when the filter is collapsed. This can be useful when referring to a specific filter in support requests. |
| Source | This shows the name of the data source pulled from BigCommerce. See also Type. |
| Type | This shows where the data is coming from, such as Custom Fields or Product Options. |
| Internal Reference | Lets you add an internal reference for each filter. |
| Title | The title displayed on your store, for example Colour. |
| Appearance | Choose whether the filter loads collapsed or expanded. |
| Mobile Appearance | Choose whether the filter loads collapsed or expanded on mobile devices. |
| Show Hidden Categories | Lets you show or hide categories that are hidden in BigCommerce. |
| Display As | Choose how the filter displays, such as slider, list, blocks, or min-max. |
| Parent Clickable | If the filter is a category tree, you can stop the parent from being clickable so it only expands subcategories. |
| Multiple Clicks | Choose how the filter behaves when a user clicks multiple options. |
| Hide on Categories | Select which categories should hide this filter. |
| Hide on Brands | Select which brands should hide this filter. |
| Delete Filter | Deletes the filter. It will then be available again under the relevant Add New Filters section. |
| Search Visibility | Hides the filter from search pages and quick search. |
Below is a list of the main filter settings available in the app.
| Feature | Description |
|---|---|
| App Master Switch | This is the main on/off switch for the app. If disabled, the filter and search will not display on your store. |
| Filter Location | Lets you display the filter vertically in a sidebar or horizontally across the top of your product listing. |
| Filter Header Tag | Lets you change the header tag between h1 and h6. |
| Filter Position | Lets you display the filter above or below the existing items in your sidebar. |
| Filter Checkbox Size | If you have a narrow sidebar, select small to give more room to filter labels. If you have styling issues, create a ticket and we will help. |
| Product Order | Controls the order of products after a filter is selected. |
| Merge Product Options | Merges product options that share the same display name. Ideal for multiple options with the same label. |
| Merge for Swatch | Enable this if you want to use a swatch colour filter and still merge matching product options. |
| Ratings | Select the rating type used in your store, such as Public API Key or Private API Key. |
| Disable the Filter on Specific Categories | Lets you turn the filter off on selected categories. Tick the categories where you do not want the filter to display. |
| Hide BigCommerce Filter | Hides the default BigCommerce filter on category pages. |
| Hide Category Header | If enabled, the category description and sub-category grid will be hidden once a filter is clicked, making the filtered results easier to view. |
| Filter Refine Box | Adds a refine bar inside each filter, which is useful when a filter has many values. |
| Hide 0 Counts | If enabled, customers will not see filter values with a count of 0. |
| Click and Scroll | If enabled, the page scrolls to the top of the product listing when a filter is selected so customers can see the beginning of the results. |
| Include Out-of-Stock Products | Includes out-of-stock products in the filter results. |
| Price Range | Enable this if you are displaying price ranges in your product listings. |
| Display Price Hidden Label | Enable this if you are displaying a hidden price label on your store. |
| Hide Filter Counters | Hides the counters beside each filter value. This can also improve performance on stores with 50,000+ products. |
| Pagination Type | Choose the pagination style you want to use. |
| Lazy Load | Loads products automatically as the customer scrolls. |
| Pagination | Displays a fixed number of products with pagination links below the list. |
| Products per Page | Sets how many products are loaded using lazy load or standard pagination. |
| Active Colour | Choose the colour used for active elements such as checkboxes, product counts, sliders, and search autofill buttons. |
| Second Image on Hover | Displays the second product image when a customer hovers over a product. |
| URL Structure | Choose the URL style used when filters are selected. Old URL: /?filter[Color_3][]=100 New URL: /?Color_3=100 Readable URL (recommended): /?Color=Grey |
| Filter Styling | Choose between the old style with no borders, or the new style with a more modern bordered design. We can also help modify the filter to better match your store. |
| Facet Scroll | Controls how overflowing filter values are displayed. You can either let users scroll inside the facet or use Show More and Show Less links. |
| Out-of-Stock Product Button Text | Replaces the default “Add to Cart” text for out-of-stock products. |
| Exclude Subcategories | Stops the filter from pulling in products from subcategories. |
| Log In to View Price | Only shows prices to customers who are logged in. |
| Log In to View Price Text | Add your HTML message for customers who are not logged in. |
If you make changes to Custom Fields, Product Options, Metafields, Category Structure, or Variants, you will need to sync your filter again from the Product Sync page.
Category-based filters let you create filters using your category structure. They can also display as a tree when subcategories are selected.
Steps to create a category-based filter:
The new Clothing filter will appear at the bottom of your Active Filters list.
Custom fields give you a flexible way to add extra information to product pages, such as attributes like a book’s ISBN or a DVD release date. Depending on your theme, the display position of these fields may vary.
Whenever custom fields are set on a product, they will usually appear in the product details section. If you do not want them displayed, you can remove them from the product itself.
You can also create and edit custom fields using a CSV import or through the API.
You can add or remove fields using the + and – buttons to the right of each row.
If you want to add custom fields across many products at once, you can use our Import and Export feature.
Enter your data in the product’s Custom Fields column. If you have multiple fields, separate each one with a semicolon.
The format is:
[Field Name]=[Value];[Field Name 2]=[Value 2]
Example: Color=Blue;Material=Cotton
Reference: BigCommerce Custom Fields documentation
These filters work out of the box using your BigCommerce data, including:
| Filter | Description |
|---|---|
| Availability Filter | Lets customers narrow results based on products currently available to buy. |
| Brand Filter | Lets customers filter products by brand or manufacturer. |
| Category Filter | Lets customers browse products inside specific categories. |
| Category Tree Filter | Displays categories in a hierarchy so users can drill down into more specific areas. |
| Condition Filter | Lets customers filter by product condition, such as new, used, or refurbished. |
| Depth Filter | Lets customers narrow products by front-to-back dimensions. |
| Featured Products Filter | Highlights products marked as featured on your store. |
| Height Filter | Lets customers filter by height. |
| On Sale Filter | Shows products currently on sale or discounted. |
| Price Filter | Lets customers search within chosen price ranges. |
| Rating Filter | Lets customers filter by product ratings and reviews. |
| Sale Percentage Filter | Helps customers find products with larger discounts. |
| Search Filter | Lets users search for keywords or phrases within the category. |
| Shipping Filter | Lets customers filter by shipping type, such as free shipping or local pickup. |
| Stock Filter | Lets customers filter by stock availability. |
| Sub Category Filter | Lets customers filter within subcategories of a broader category. |
| Top Level Sub Category Filter | Filters within the highest-level subcategories of a broader category. |
| Weight Filter | Lets customers filter products by weight. |
| Width Filter | Lets customers filter products by width. |
Follow these steps to add or edit variant options in the BigCommerce control panel:
After creating options, a Variants table will show all product combinations. This works like a spreadsheet, so you can add or update prices, images, SKUs, and more for each variant. Use the Edit columns dropdown to show extra fields like Sale Price or Weight.
You can also copy values down into multiple rows by selecting a cell and dragging from its bottom-right corner.
Reference: BigCommerce Product Options documentation
Edit via CSV
Let’s say you want to create a new filter called Fabrics.
1. Go to the Filter Builder page. Under Edit via CSV, click Export CSV.
2. Open the exported CSV and add each product’s fabrics to the Fabric column. Use || to separate multiple values in one cell. Do not change the other columns. You can also add new columns beside Fabric to create more filters. Save the file.
3. Return to the Filter Builder page. Under the Export CSV button, tick Delete existing data if needed, then upload your edited CSV and click Import CSV. Your new data will appear in the table below, where you can also edit values directly in the cells.
4. Because Fabrics is a new filter, you still need to add it to your active filter list. Go to the Filters page, open Add Filter Builder Filters, and click Add beside Fabric.
Your new filter will now show on your storefront.
Edit via table
1. Click the Add filter text box and enter the title of the filter you want to create.
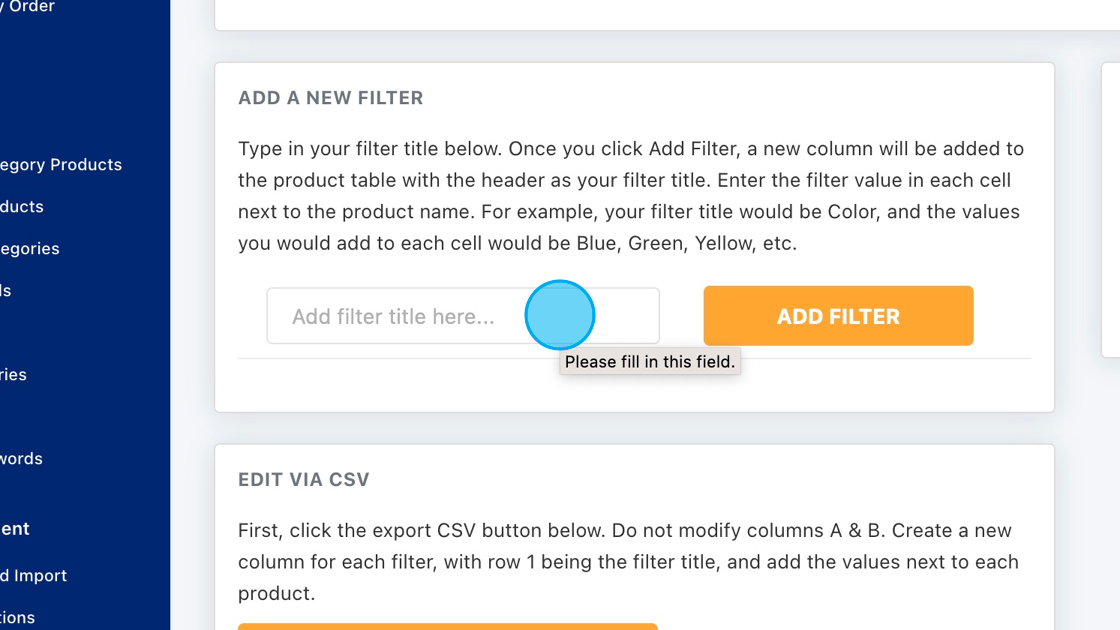
2. Click ADD FILTER.
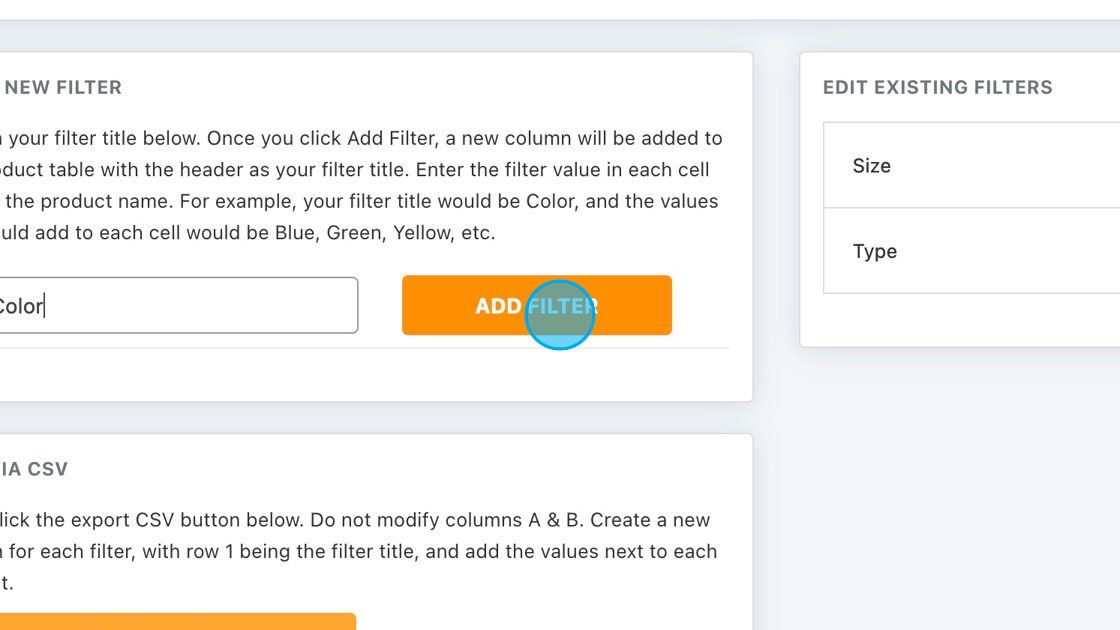
3. The page will refresh and a new column will appear in the table below. Click into the cell and add the values you want to assign to each product.
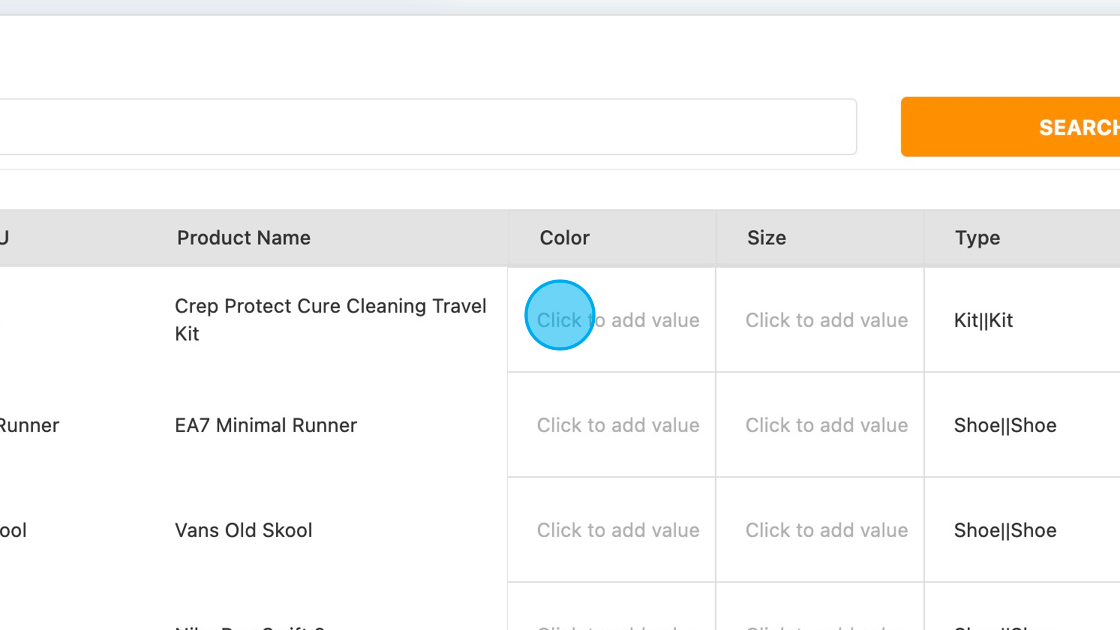
4. Use || to separate multiple values in the same cell.
5. Once your data is in place, go to the Filters page, open the Filter Builder section, and you will see your new filter ready to add.
Using BigCommerce metafields as facet filters gives you more flexibility and control over how products can be searched and filtered.
Metafields let you store extra product information such as specifications, attributes, or other custom data. You can then use that data to create additional filters in your storefront.
For example, if you use metafields to store colour, material, or style, you can turn those into filters so customers can refine products using those values.
Explore our range of tools designed to help you build a tailored filter and search experience. These tools give you control over how your data is managed, displayed, and refined.
We use several layers of cache to improve performance. Some of these are stored in your Filter Cache page and are generated as customers start interacting with filters.
You can clear all stored cache using the Purge All button. Cache is also purged automatically when changes are made inside the app or after the filter is synced.
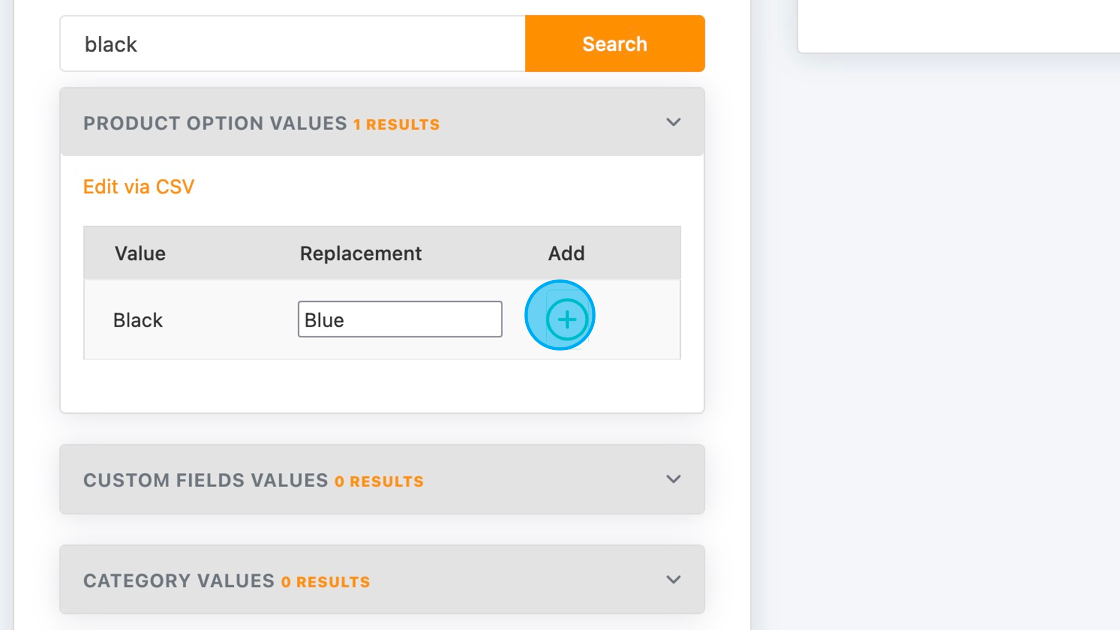
Different manufacturers often label the same colour or attribute in different ways, which can lead to messy filtering. The Value Replacer tool lets you standardise those values inside the app so they group together properly in the filter.
This only affects the filter data in our app, not the original product data on your store.
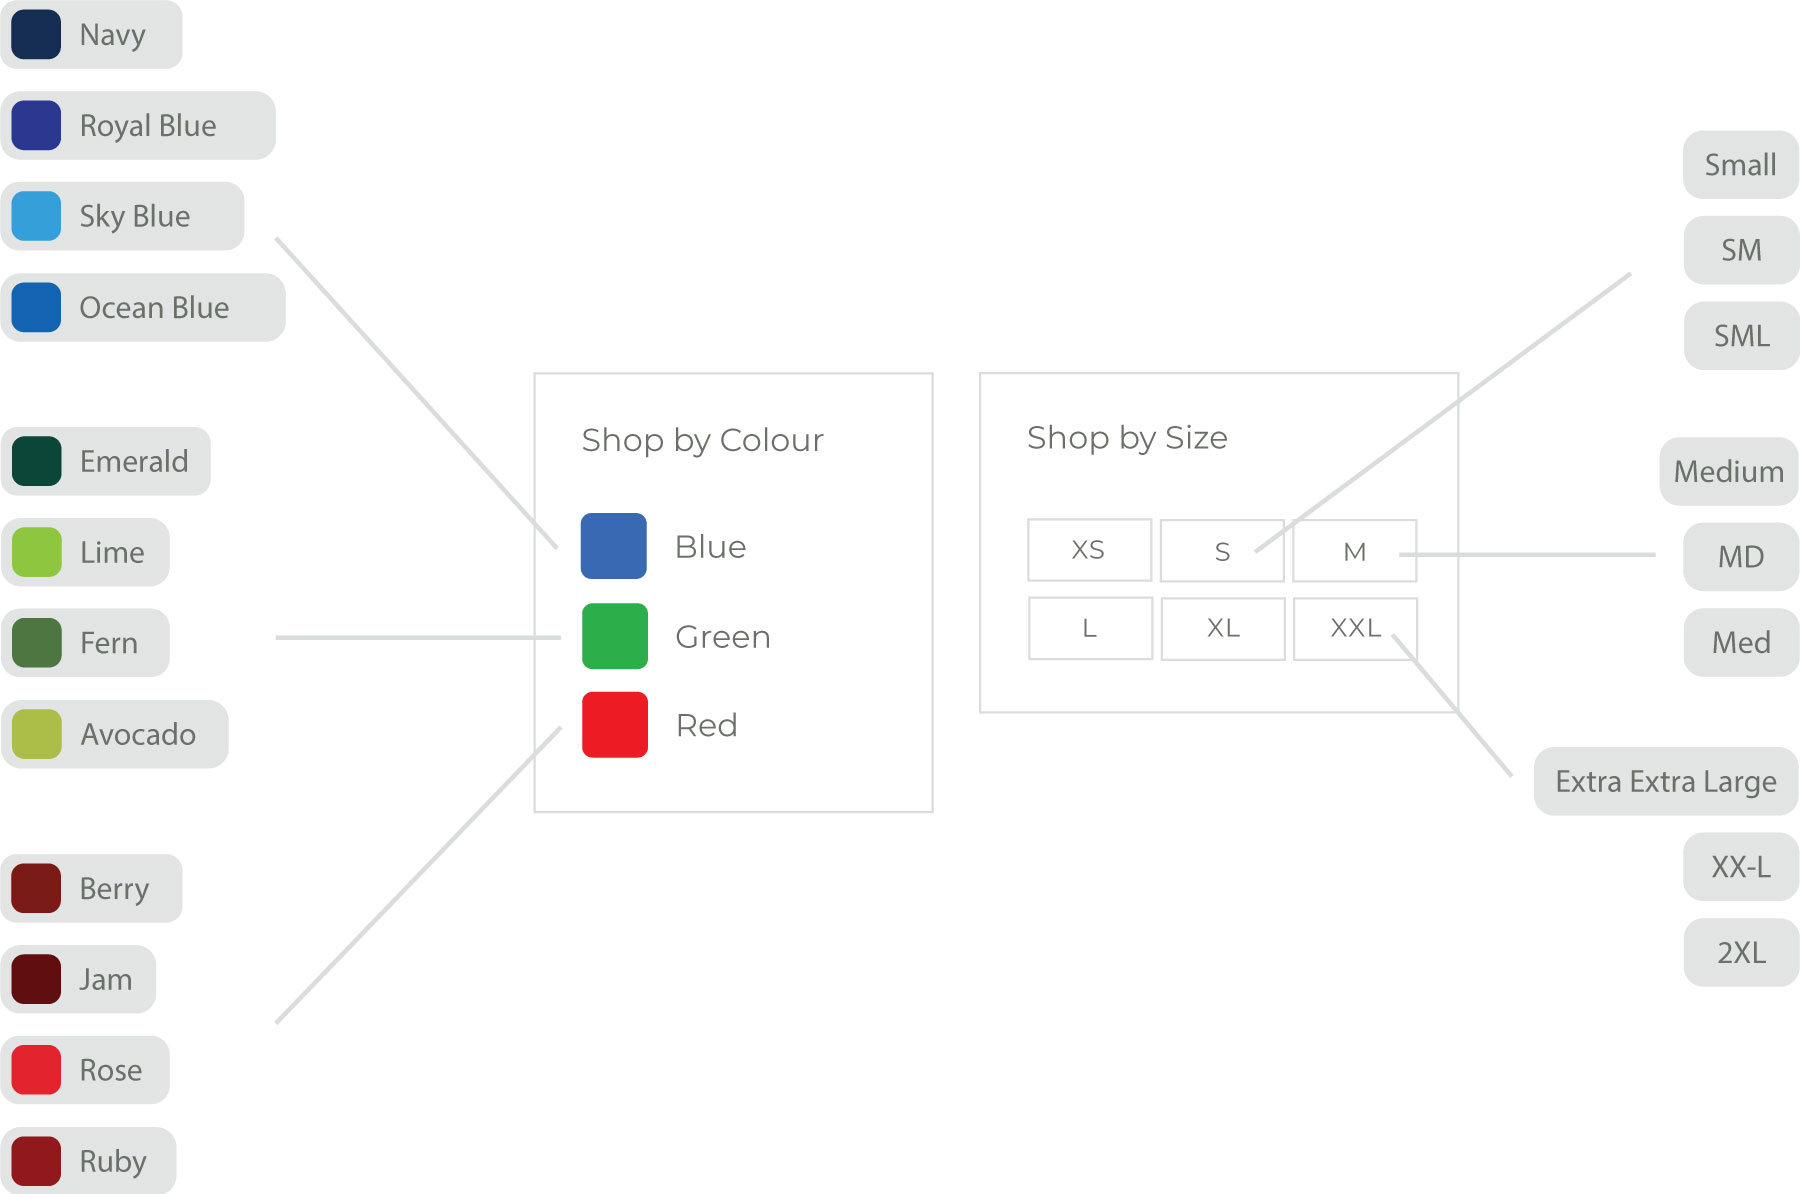
For example, you could replace all of the following with Blue:
1. Click the search text field.
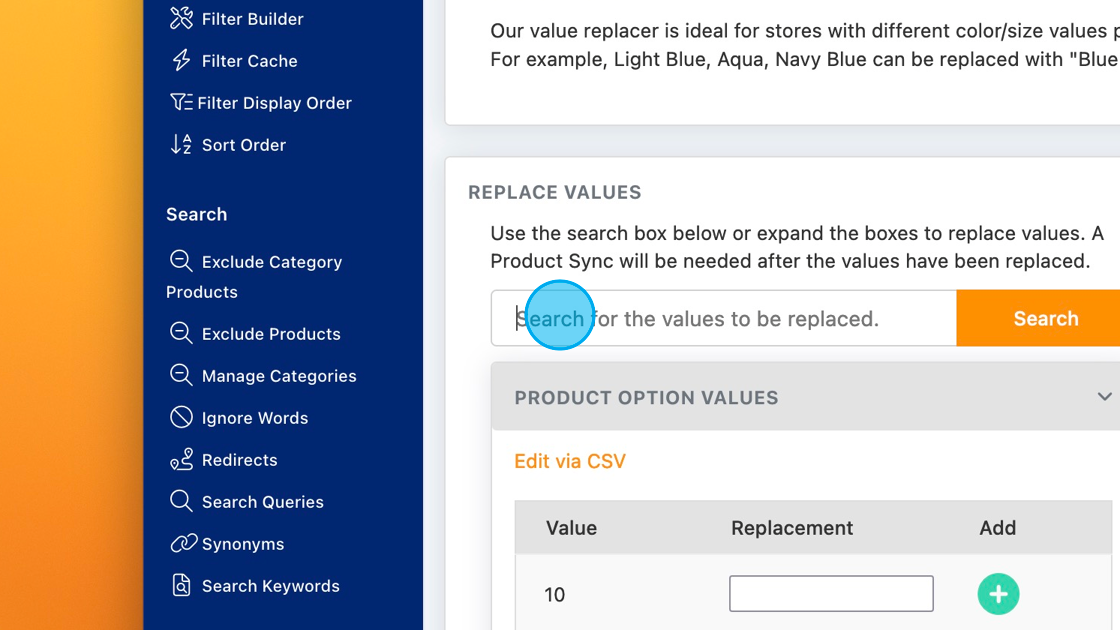
2. Enter the value you want to replace.
3. Click Search.
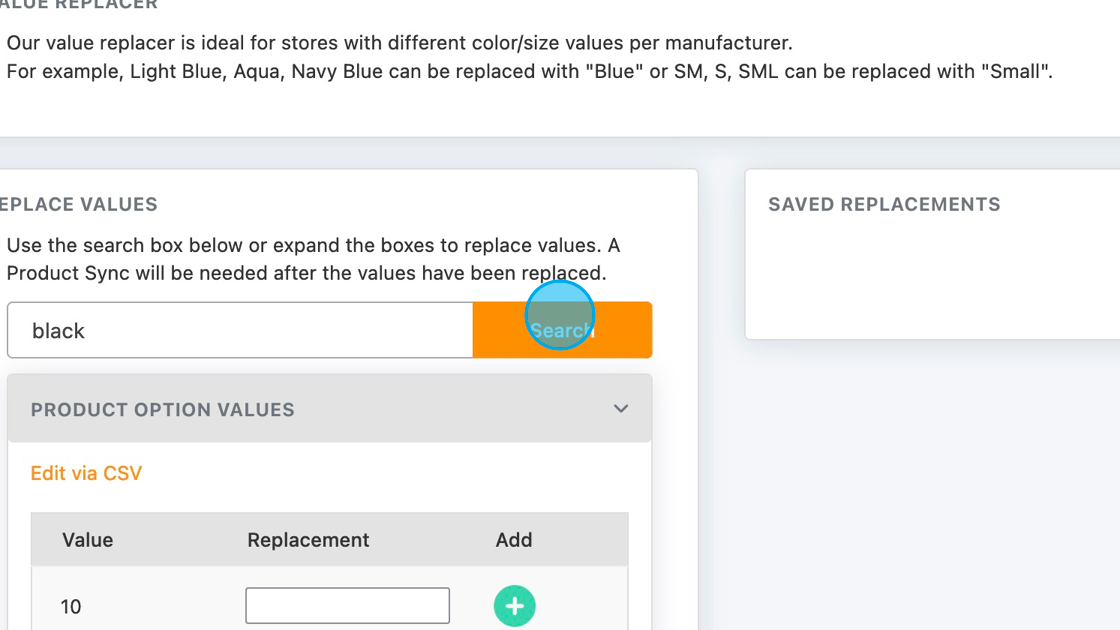
4. Click the replacement text field.
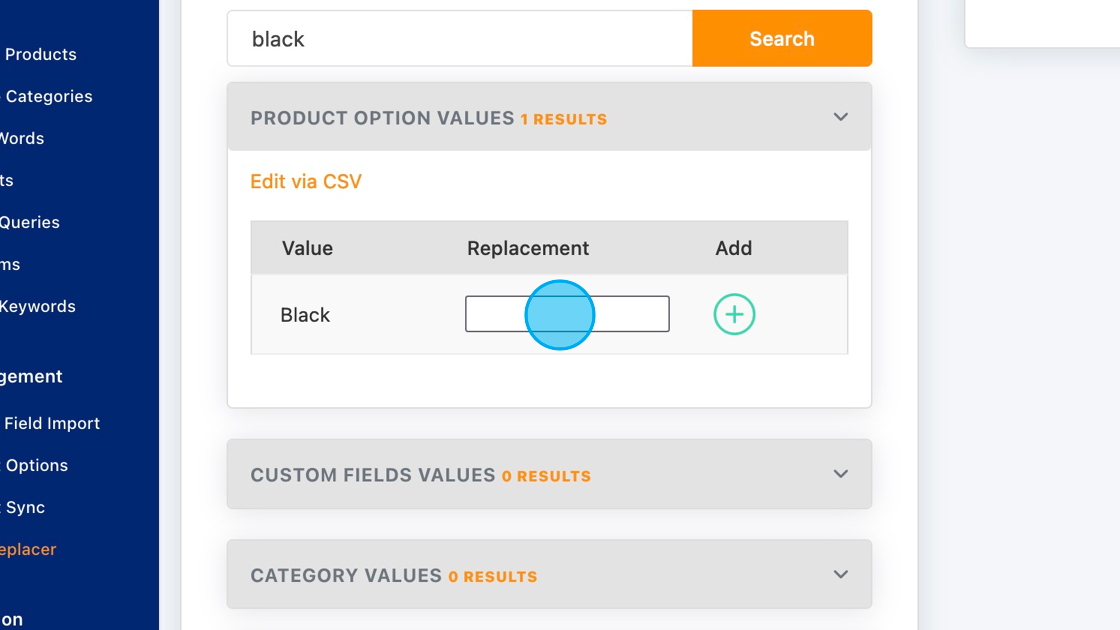
5. Enter the value you want to replace it with.
6. Click the plus button.
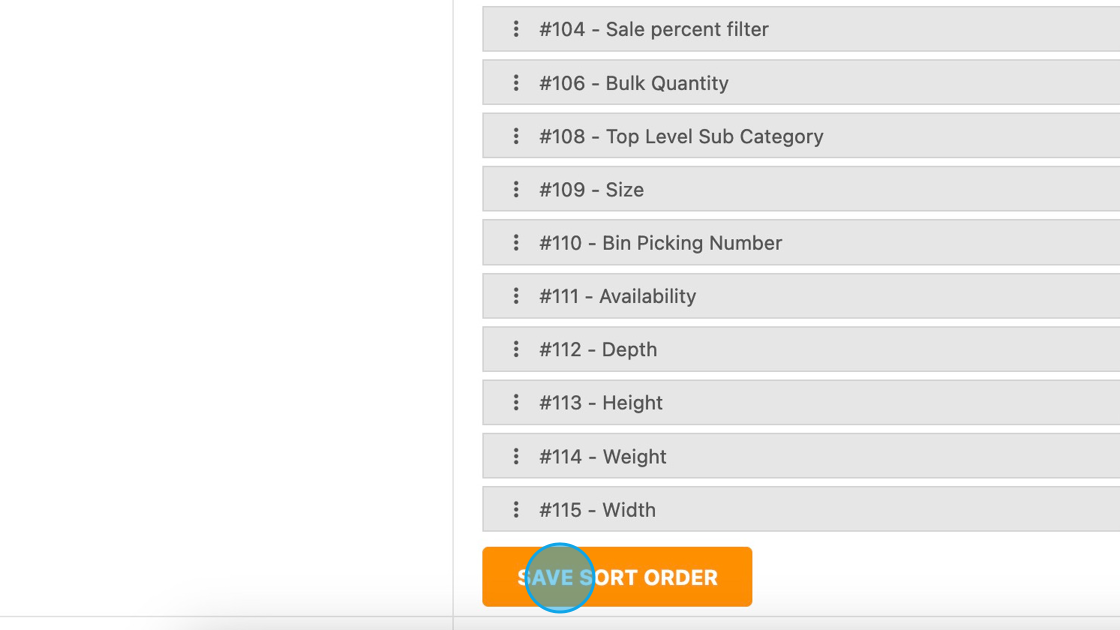
Filter Display Order lets you change the order of filters on different categories.
1. Click Manage Filters next to the category you want to edit.
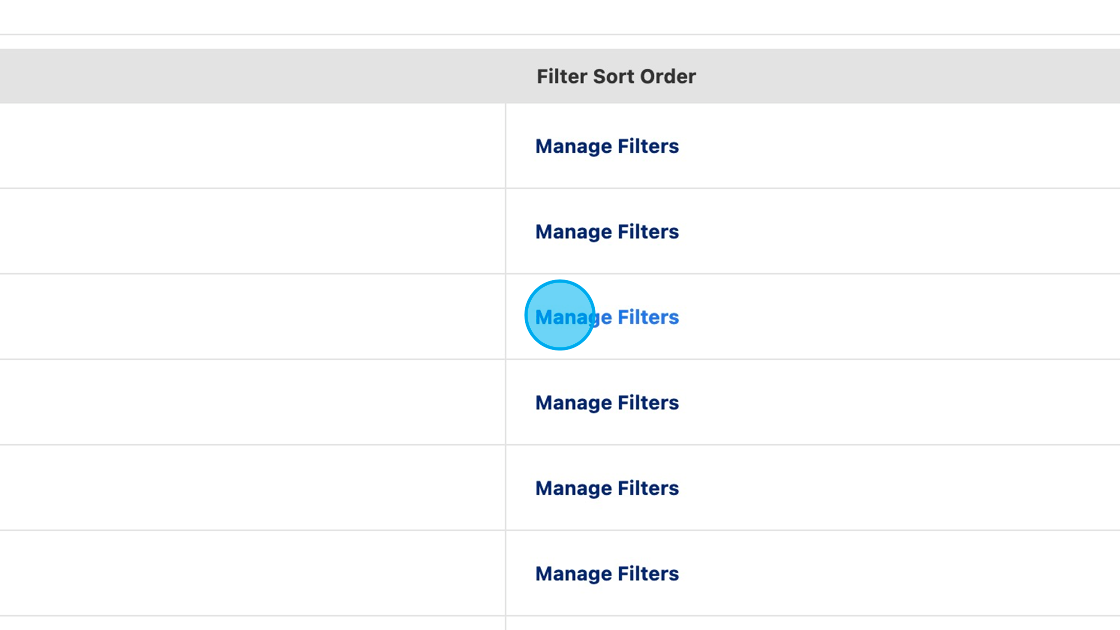
2. Drag the filters into the order you want.

3. Click SAVE SORT ORDER.
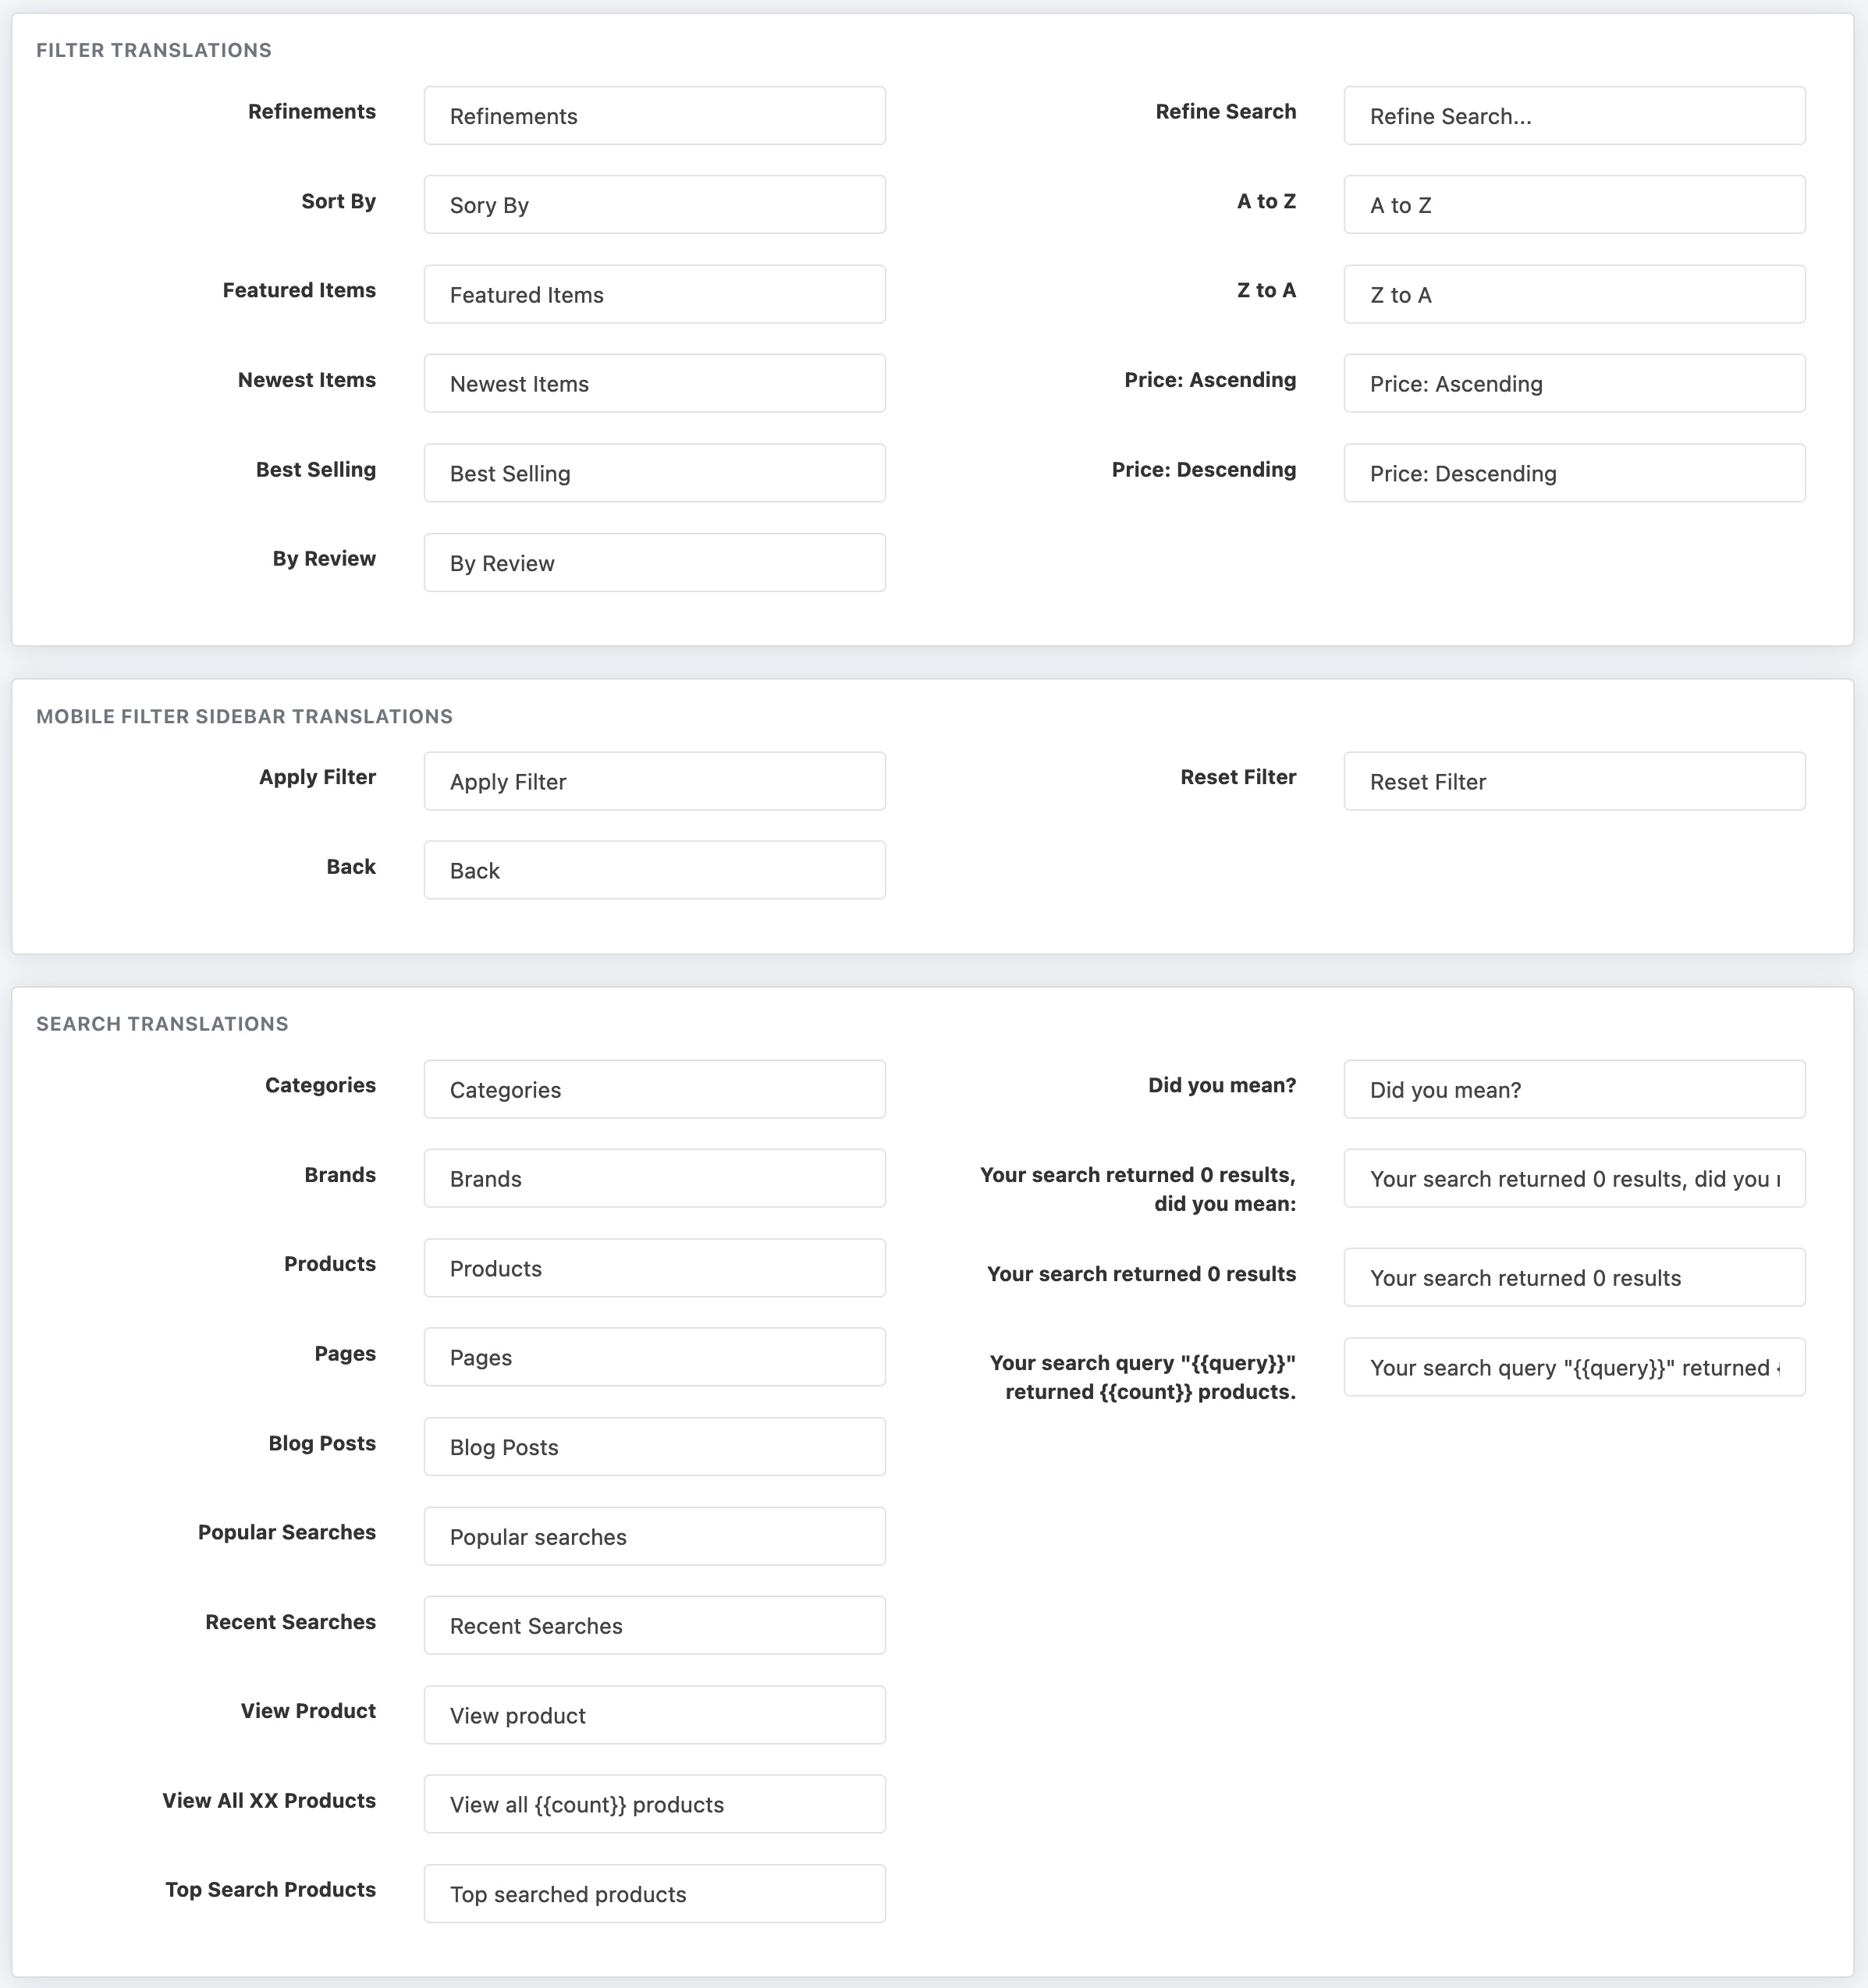
Our Language page lets you change interface text from English to any language you choose. Click the text you want to edit, remove the existing text, and enter your replacement. When you are done, click Save.
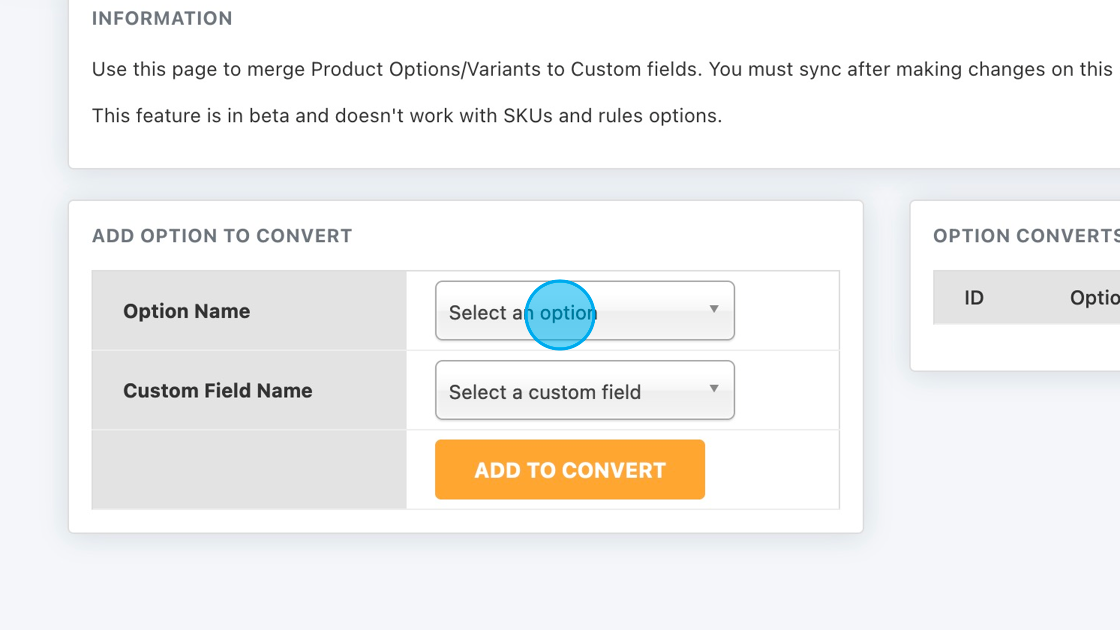
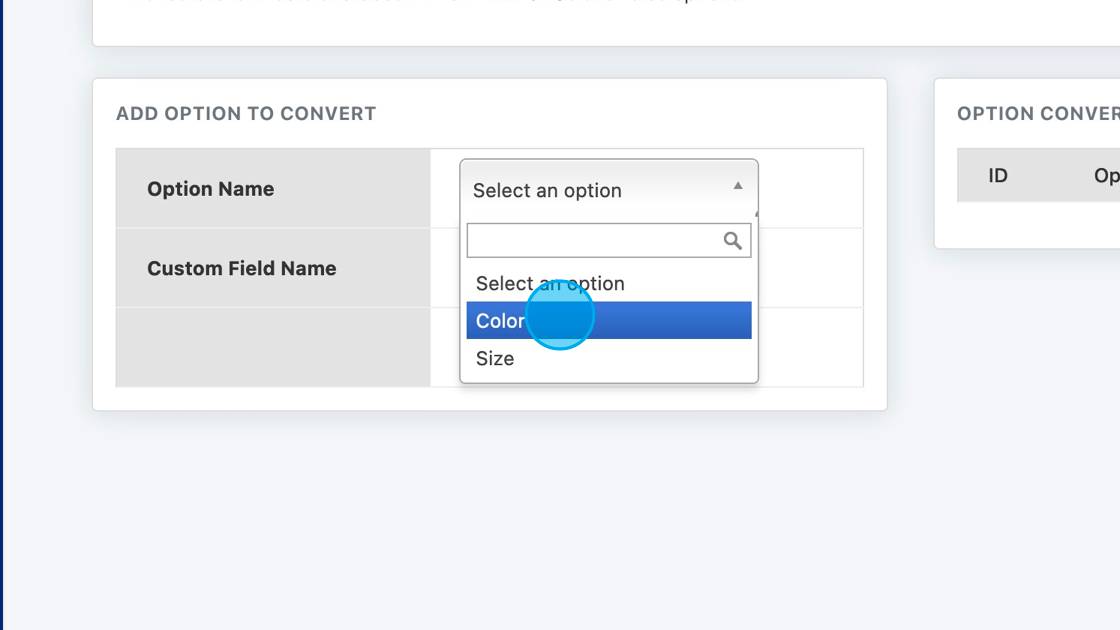
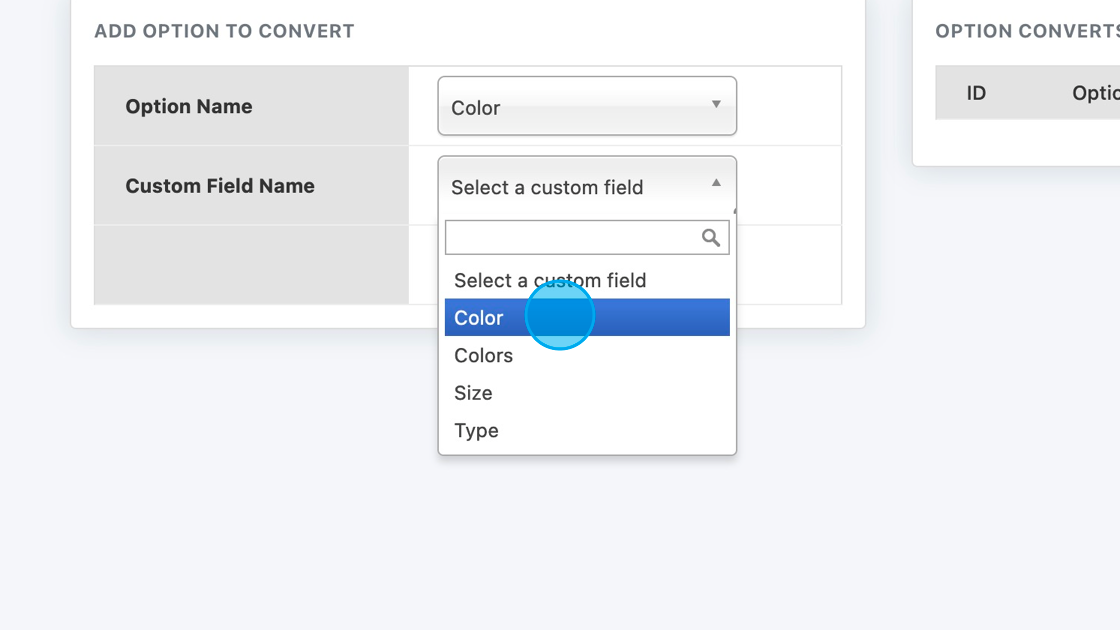
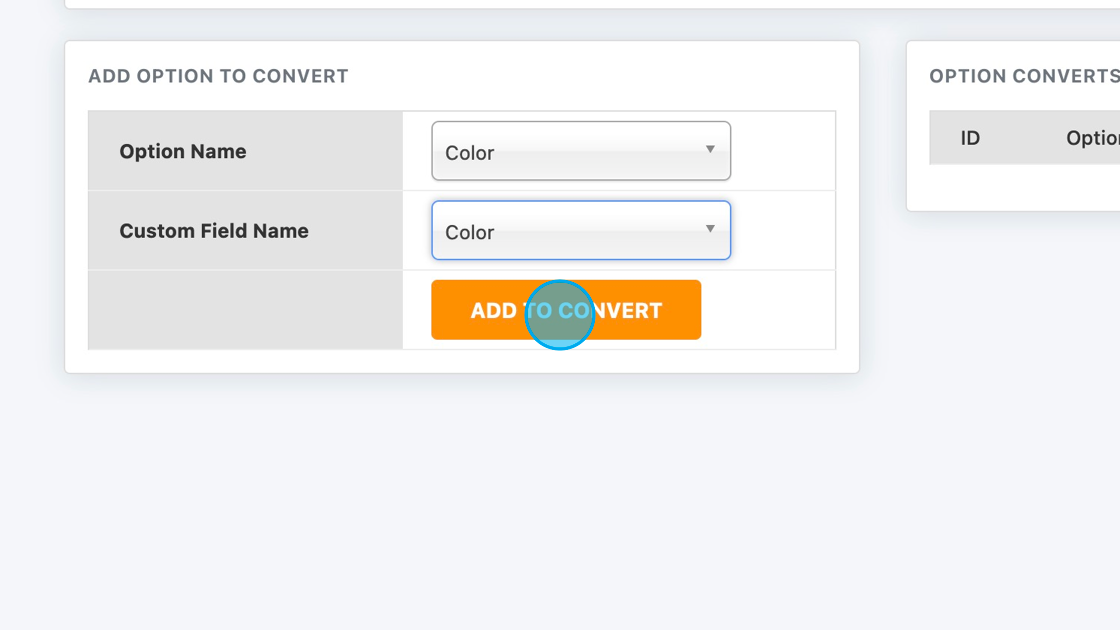
This tool lets you convert product options into custom fields so you can merge option data with existing custom field data.
1. Click Select an option.
2. Select the option you want to convert.
3. Click Select a custom field.
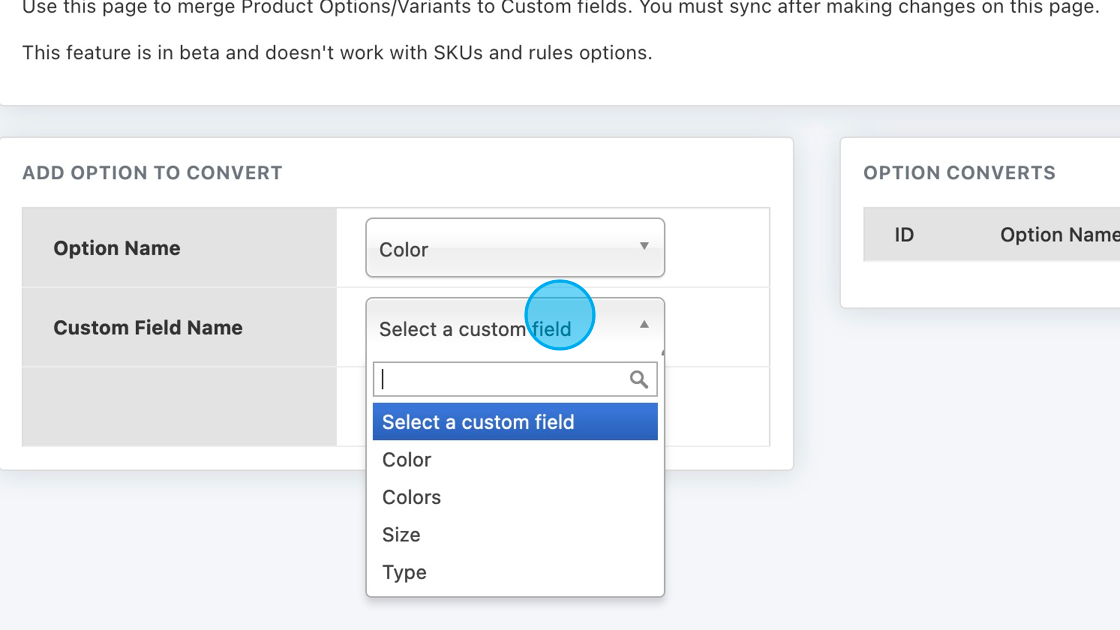
4. Select the custom field you want to merge it with.
5. Click ADD TO CONVERT.
1. Enable Custom Field Import by switching it On.
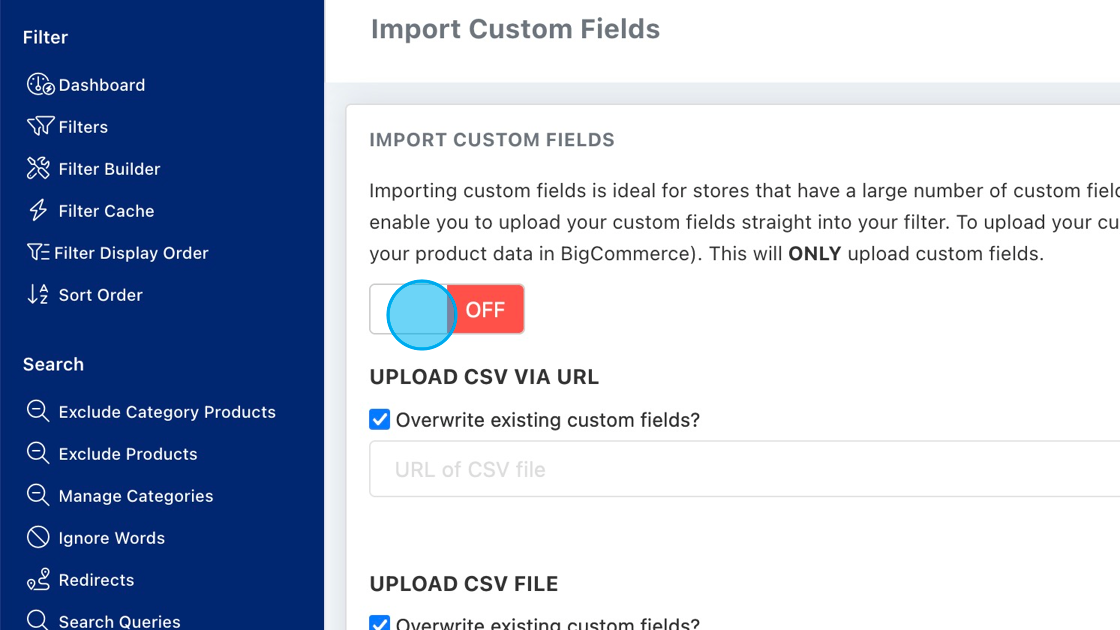
2. Scroll to Upload CSV Filter, click Browse, choose the BigCommerce export file you want to upload, and click Import.
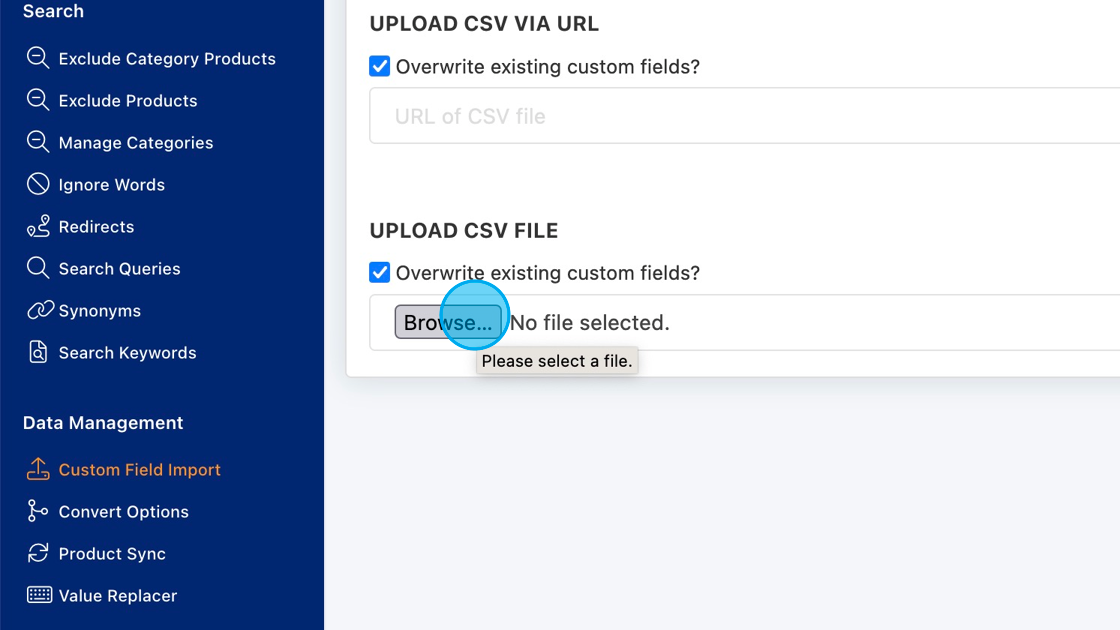
Your custom fields from the BigCommerce export will then be imported into the app.
Product Sync pulls your data from BigCommerce into our app. Depending on the size of your store, this can take anywhere from 1 minute to around 1 hour.
The initial sync runs during installation, then every 24 hours automatically. If you update data inside BigCommerce, you should run a manual sync from the Product Sync page using Sync All. If you only changed custom fields, use Sync Custom Fields for a quicker update.
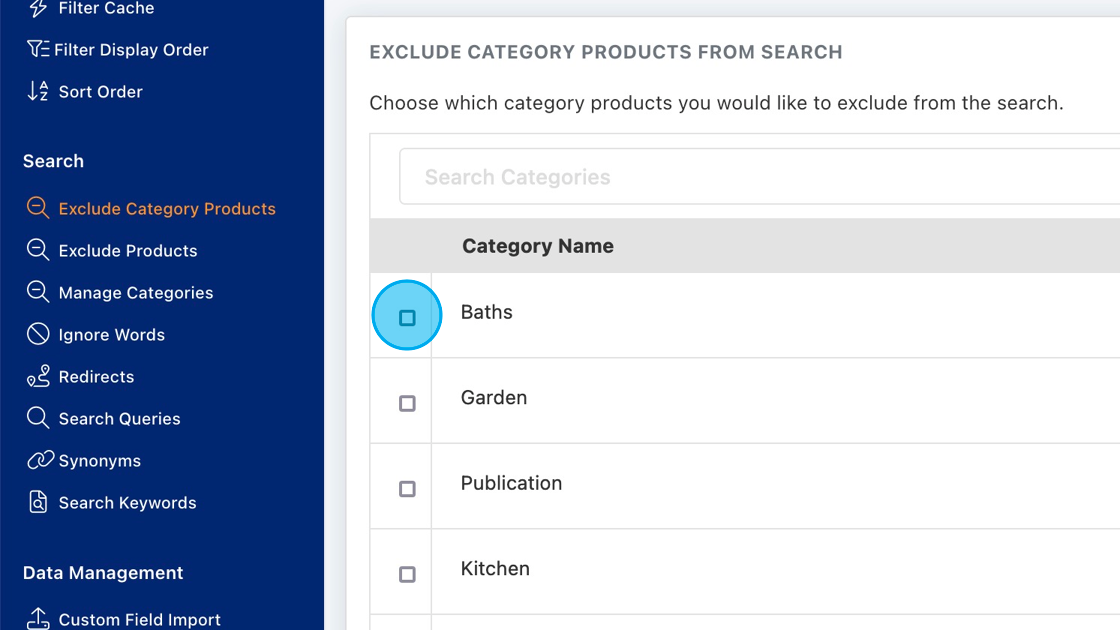
This feature lets you exclude certain categories from search results. It does not remove the products themselves from your store.
Simply select the categories you want to exclude from search.
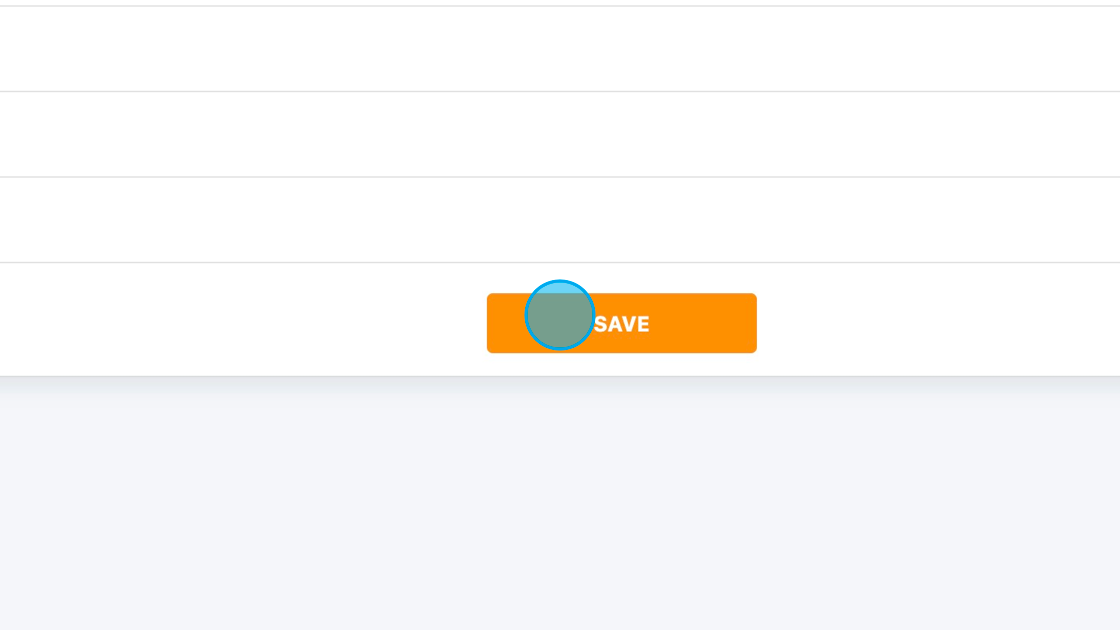
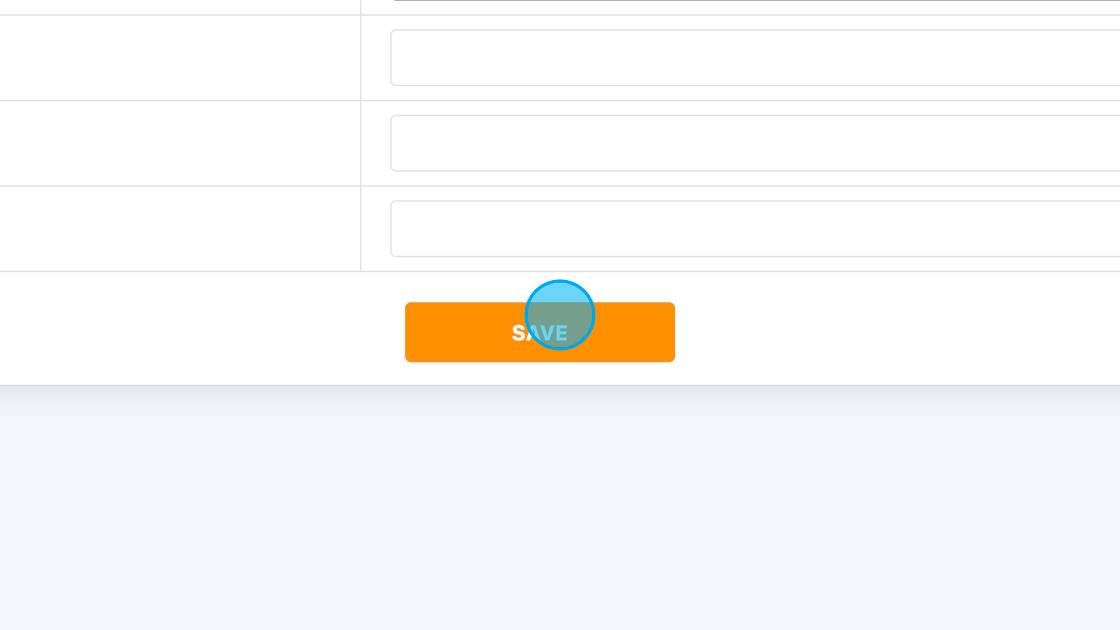
2. Click SAVE.
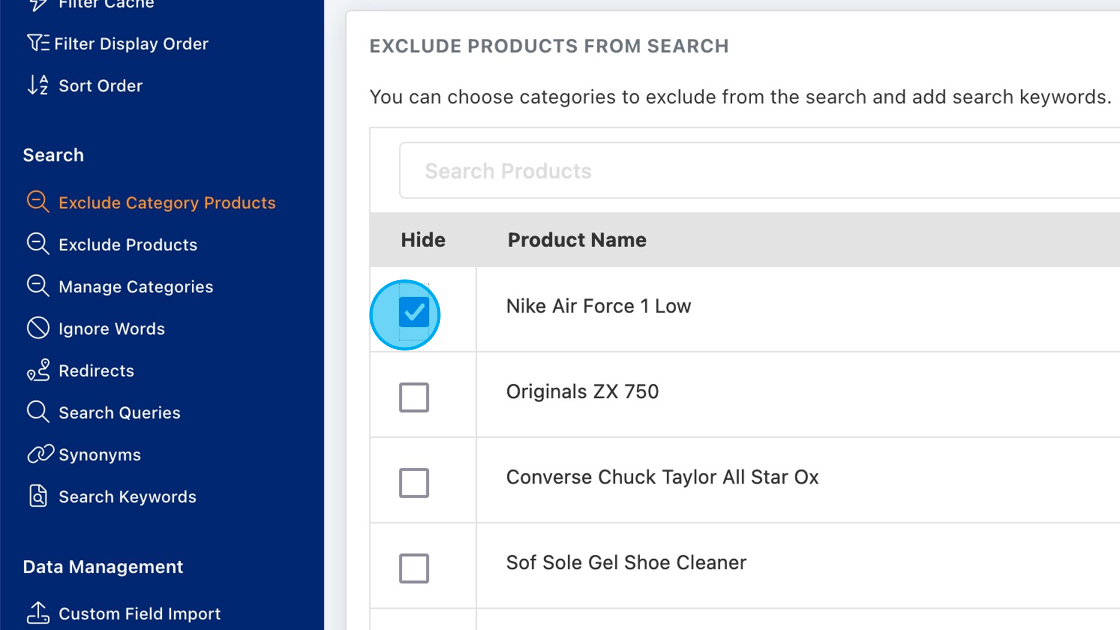
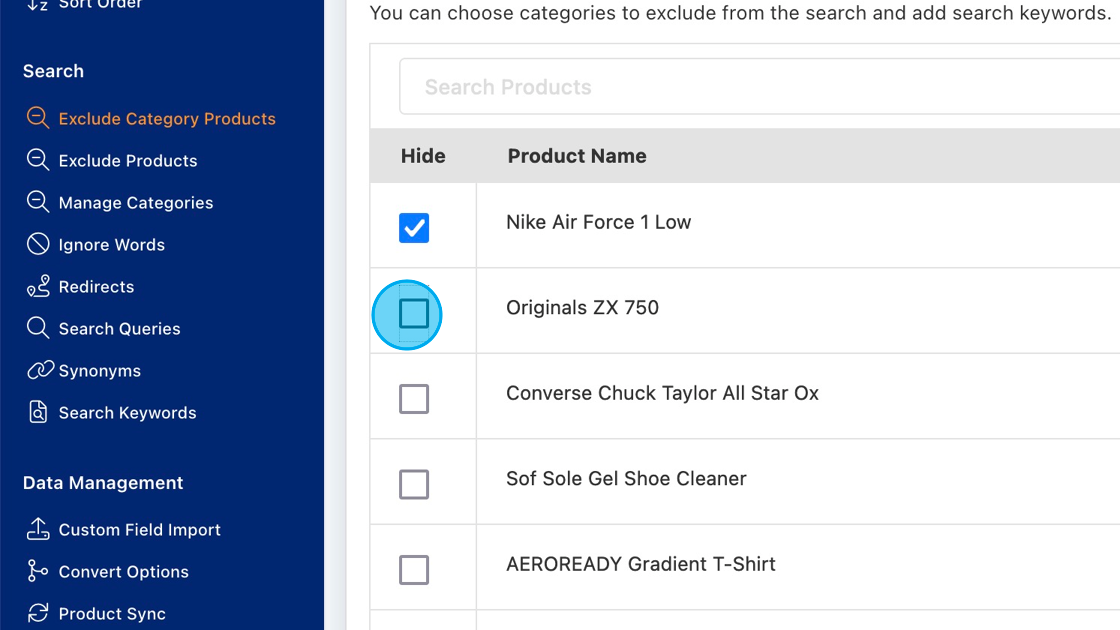
Excluding products lets you choose specific items that should not appear in search results.
1. Select the products you want to exclude from search.
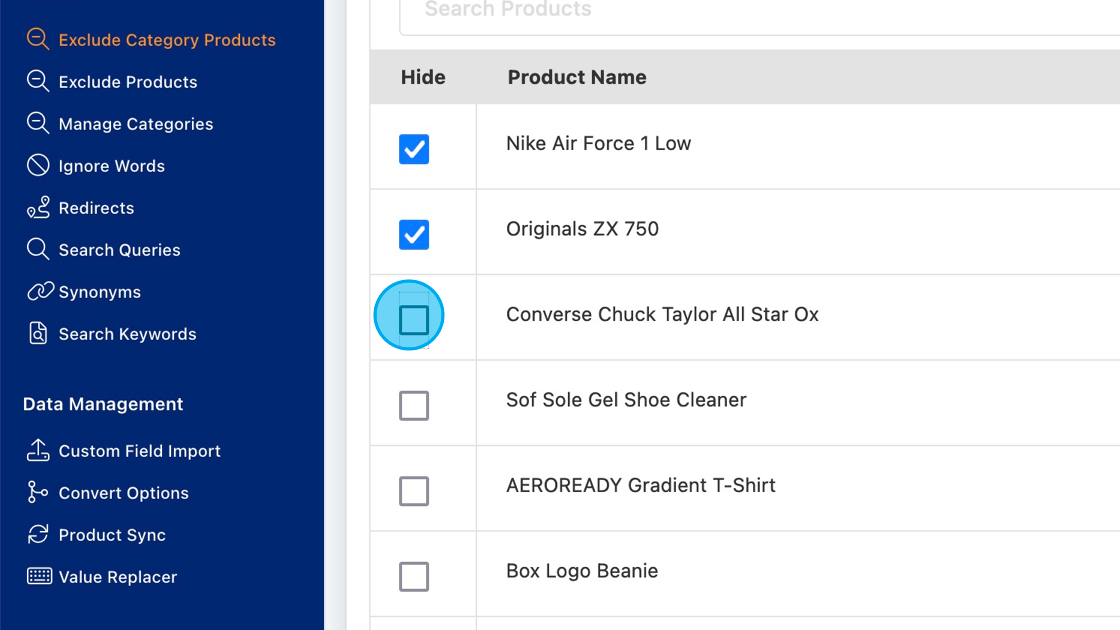
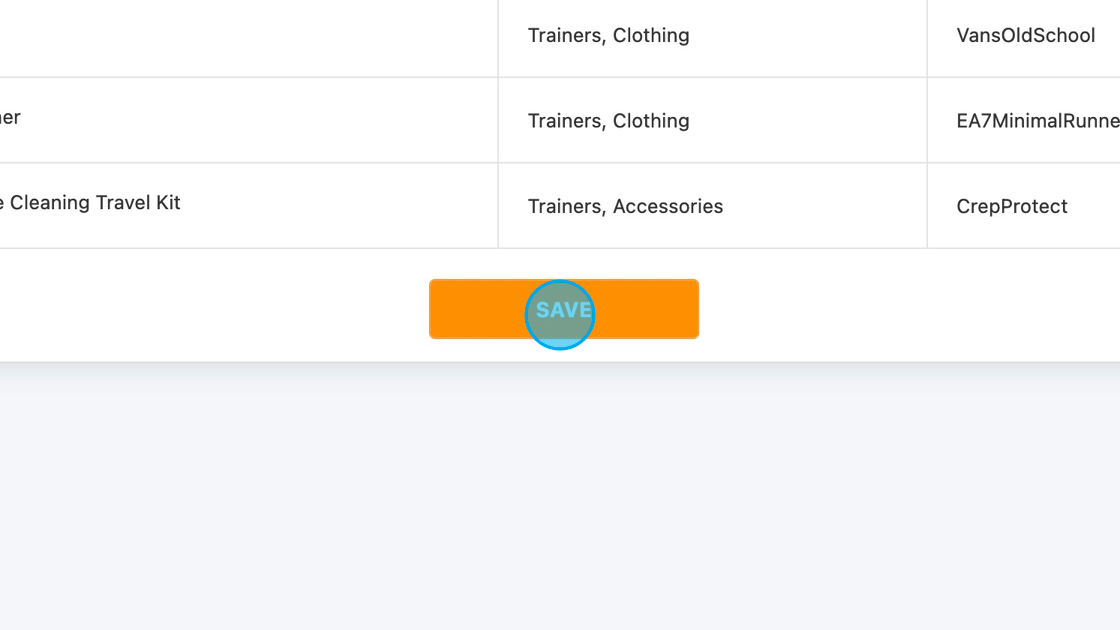
4. Click SAVE.
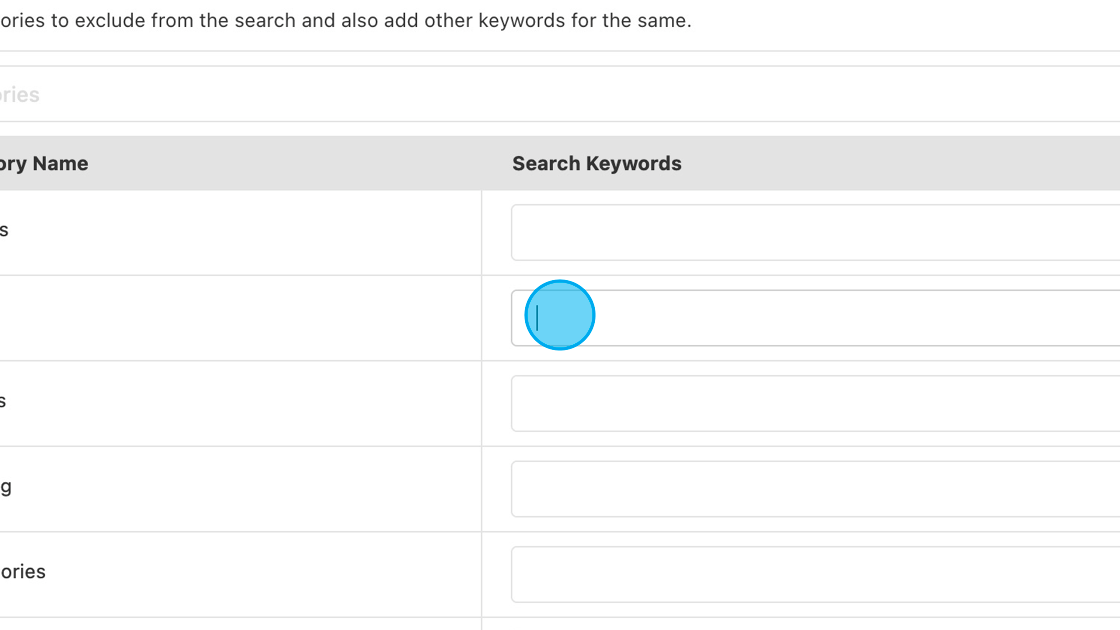
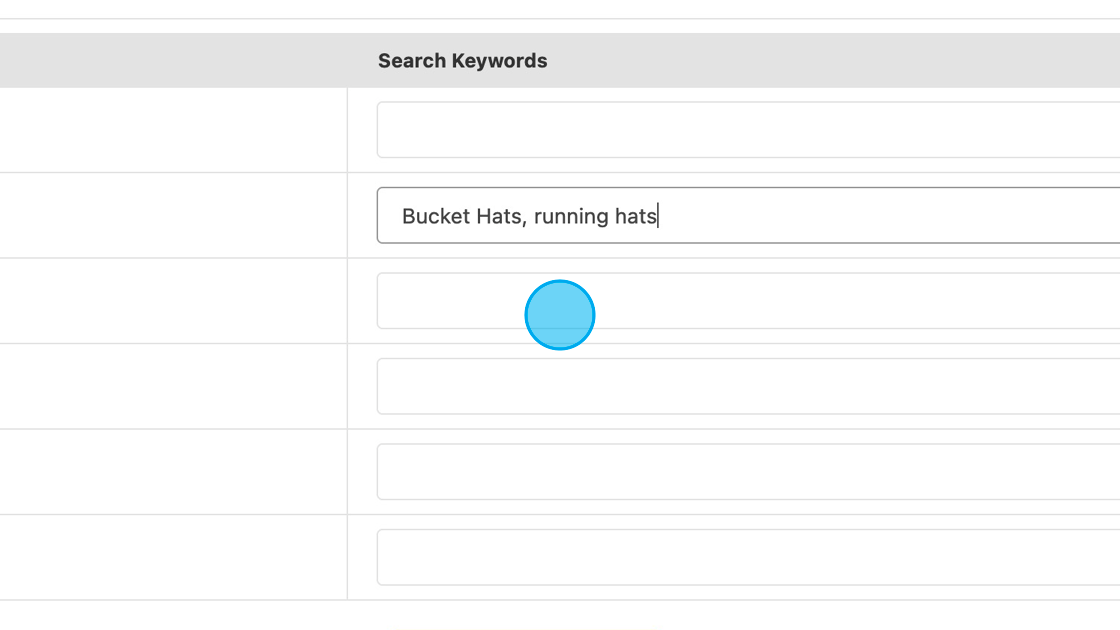
Manage Categories lets you hide categories from search results or add search keywords to categories.
1. To exclude categories from search, tick the checkbox in the Hide column.

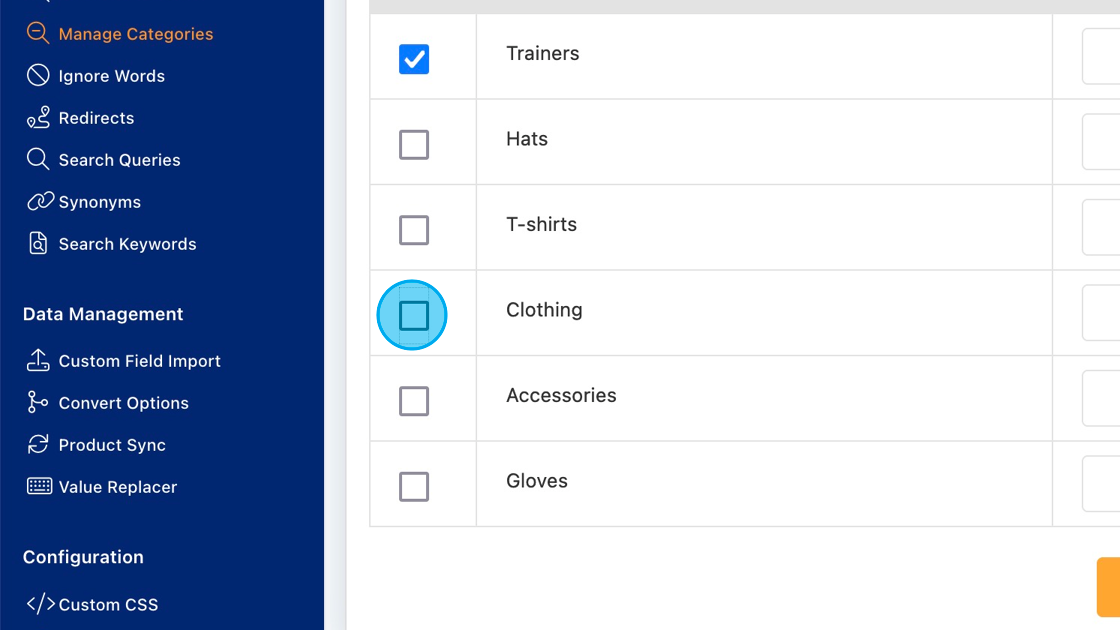
3. To add search keywords to a category, click the Search Keywords column and enter your terms.
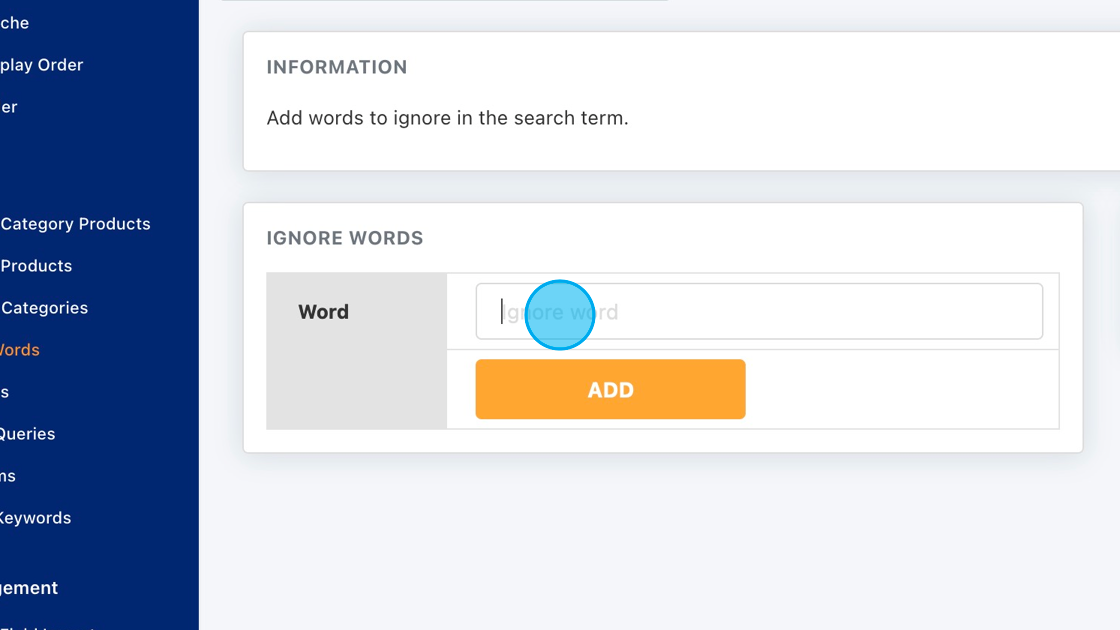
Add words you want the search engine to ignore. This can help prevent conflicting or unwanted results.
To add ignored words, open the Ignore Words page.
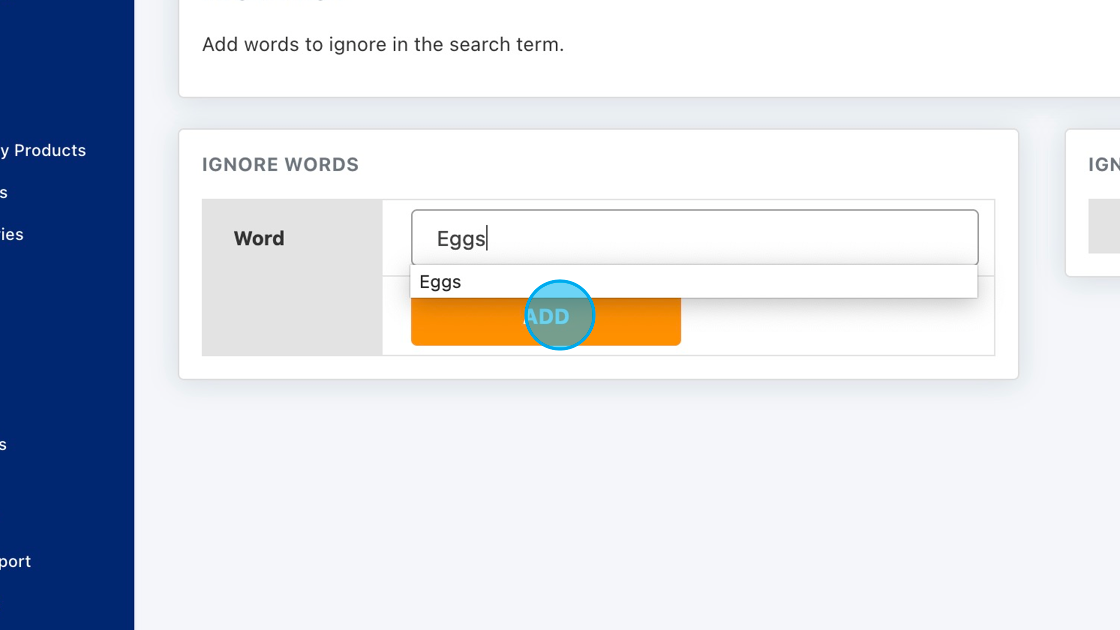
1. Click the Ignore Word text field.
2. Type the word you want to ignore. In this example, we’re using Eggs.
3. Click ADD.
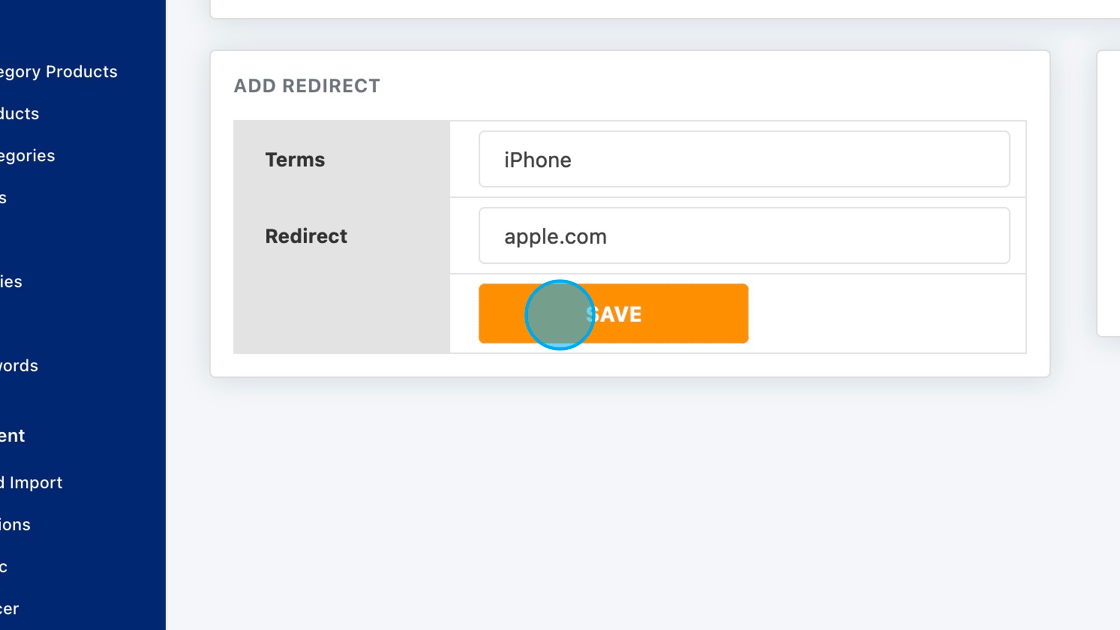
Redirects let you send customers to a specific page when they search for a certain term. For example, if a user types Apple, you could redirect them to your Apple brand page.
1. Click the Terms box and enter the search terms you want to redirect.

2. In the redirect box, enter the URL you want those terms to go to. This is useful for category pages, brand pages, or product pages.
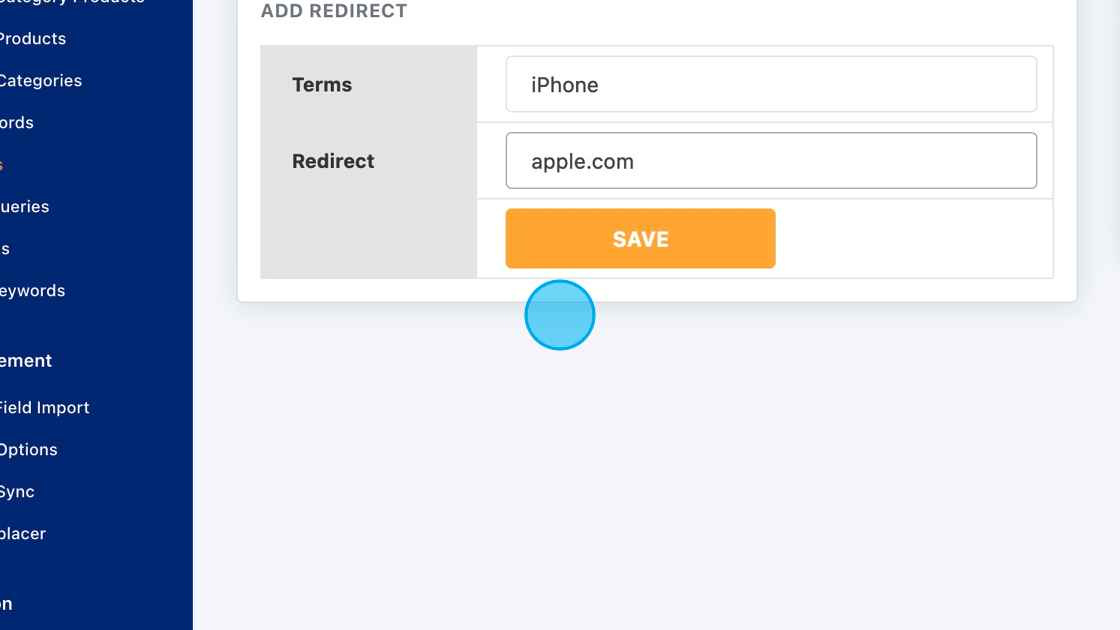
3. Click SAVE.
On the Search Queries page, we show every search term customers have used on your store. You can also filter the results by date to narrow the data down.
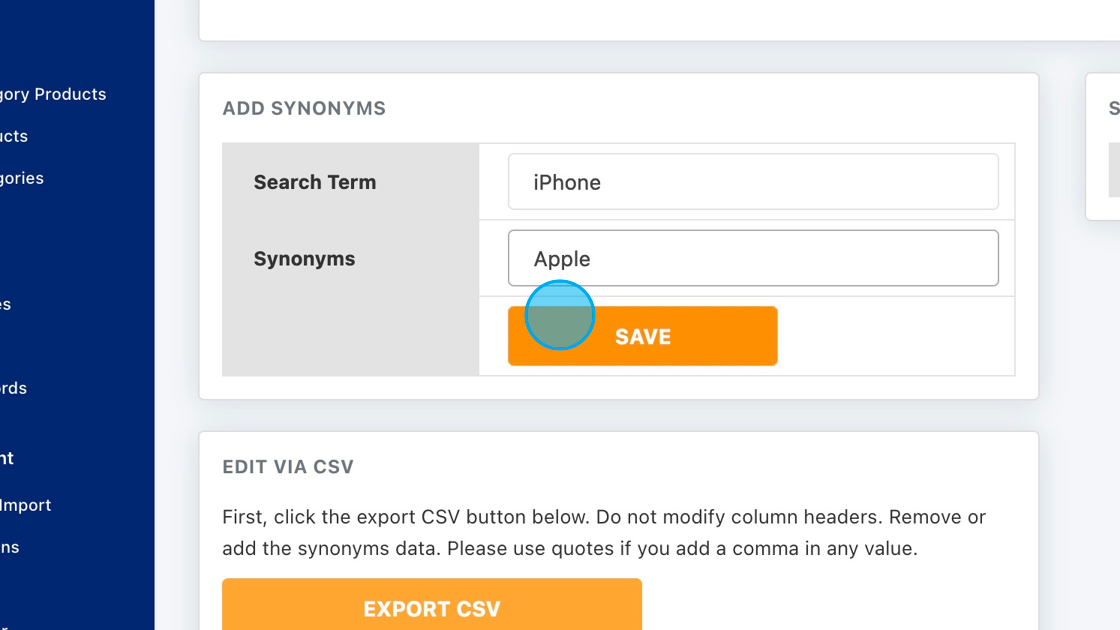
1. For this example, we will create a synonym so that when a customer searches iPhone, it also shows results for Apple. Click the Search Term field.
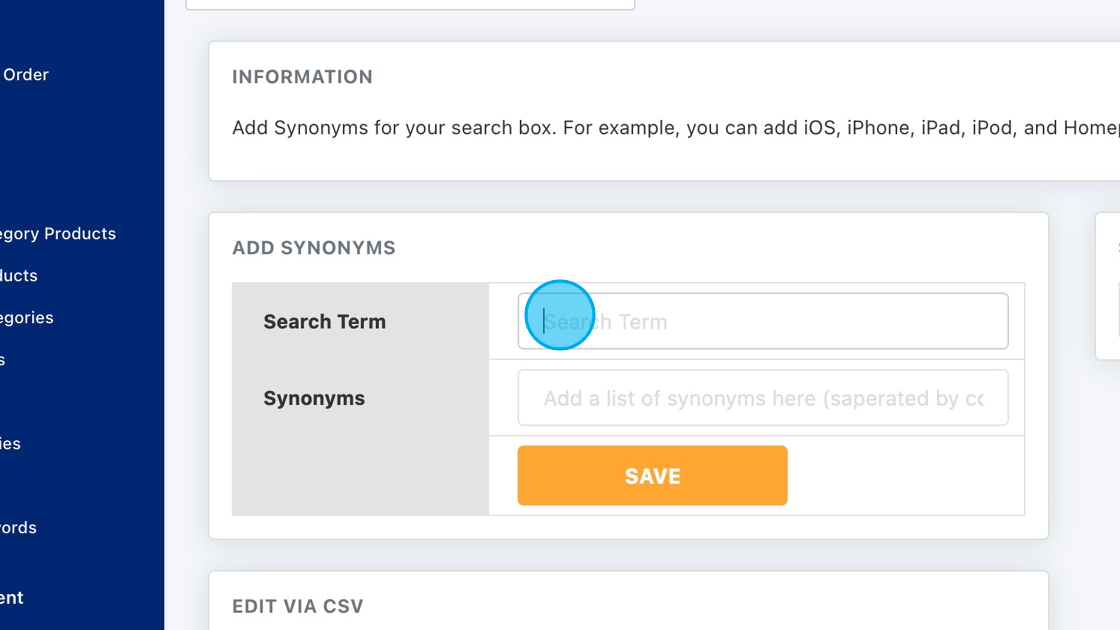
2. Type iPhone.
3. Click the synonyms field and add a list of synonyms separated by commas.
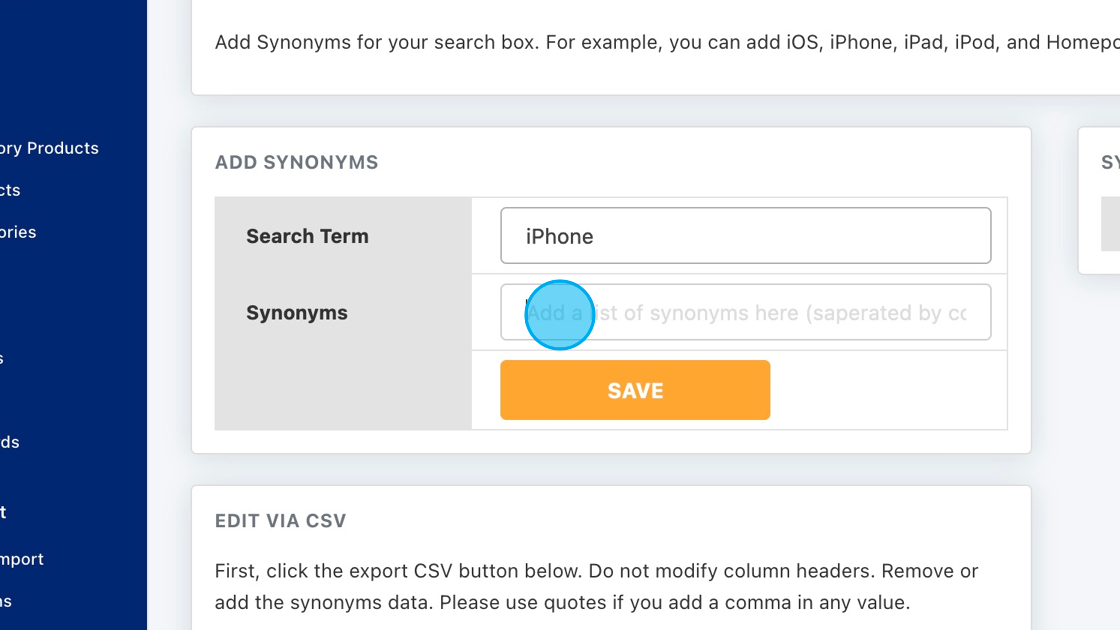
4. Type Apple.
5. Click SAVE.
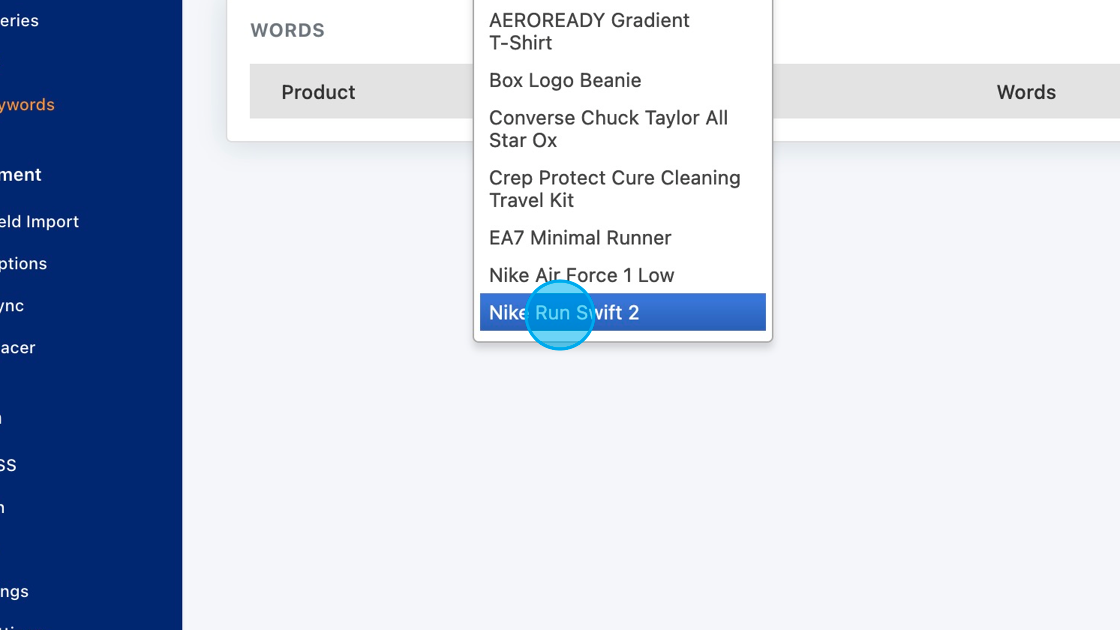
1. Select the product you want to add search keywords to.

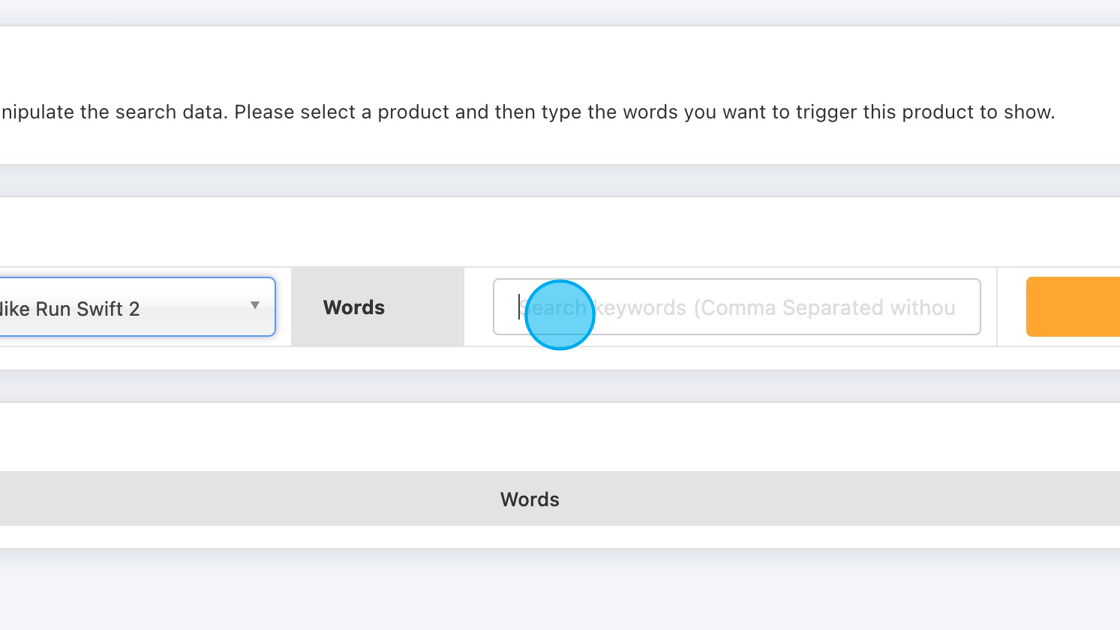
2. Click Nike Run Swift 2.
3. Click the Search Keywords text field.
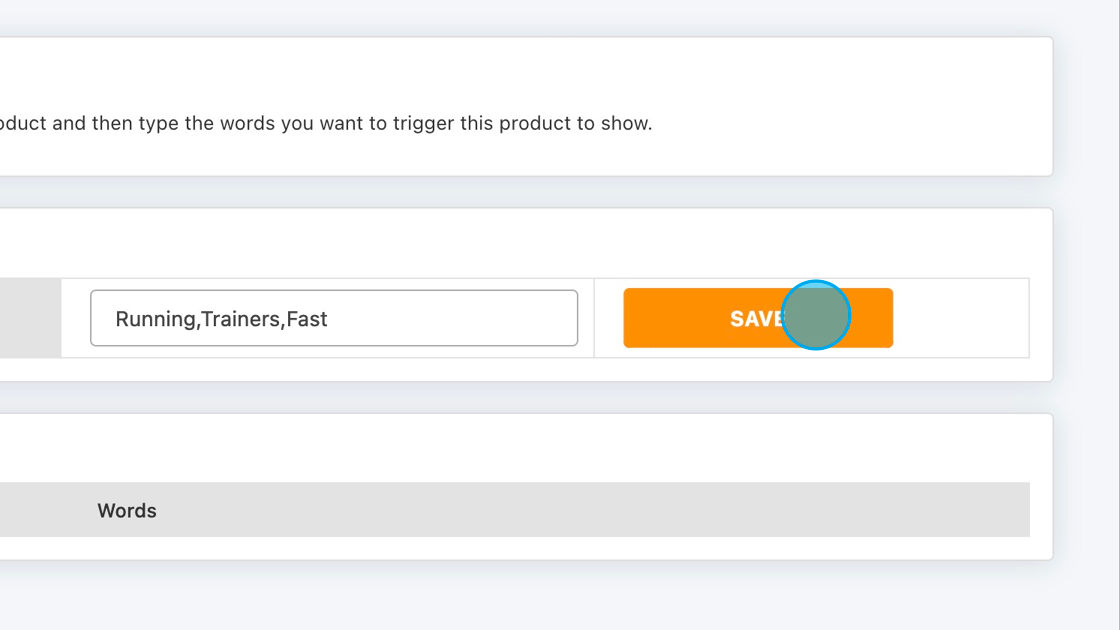
4. For this example, use the keywords Running, Trainers, Fast.
5. Click SAVE.
Our packages are based on the number of products in your store, and the correct package is assigned automatically. You can subscribe to the package shown in your app. Our pricing is also available here.
| Package | Product Range | Price per Month |
|---|---|---|
| Package 1 | 0 - 599 | £14.99 |
| Package 2 | 600 - 999 | £29.99 |
| Package 3 | 1,000 - 1,999 | £44.99 |
| Package 4 | 2,000 - 4,999 | £59.99 |
| Package 5 | 5,000 - 19,999 | £74.99 |
| Bronze | 20,000 - 49,999 | £89.99 |
| Silver | 50,000 - 89,999 | £104.99 |
| Gold | 90,000 - 149,999 | £119.99 |
| Platinum | 150,000 - 229,999 | £134.99 |
| Diamond | 230,000+ | £149.99 |
Your package is assigned automatically based on how many products your store contains. Once you subscribe, payment is taken immediately, and future payments are charged monthly on the same date.
If your product count changes, your package will update automatically. You are only charged for the time spent on each package, and billing is calculated at the end of the month.
If a payment fails, the app will stop displaying on your store. You will receive an email asking you to pay the failed invoice.
To cancel your subscription, simply uninstall the app. This triggers an email asking you to confirm the cancellation. If you do not receive the email, please contact support and we will help you.
If you are cancelling because of an issue with the app, please get in touch first. We will always try to help and work out a solution.